Table of Contents
SplashID Pro 9
This site is the user guide for version 9.3 of SplashID Pro 9.
Some of the features described here are not available in earlier versions of SplashID Pro 9.
We have included screenshots in certain sections throughout this guide to help you in understanding a feature. You can click or tap on the screenshots to view them in a magnified view.
SplashID Pro 9 and SplashID
SplashID Pro 9 will also be referred to as SplashID at places in this documentation for convenience. Any references to our other editions of SplashID will be with their full name e.g. SplashID Safe for the version 8 apps.
Quick start
- Install a SplashID Pro 9 app from App Store, Microsoft Store or Play Store.
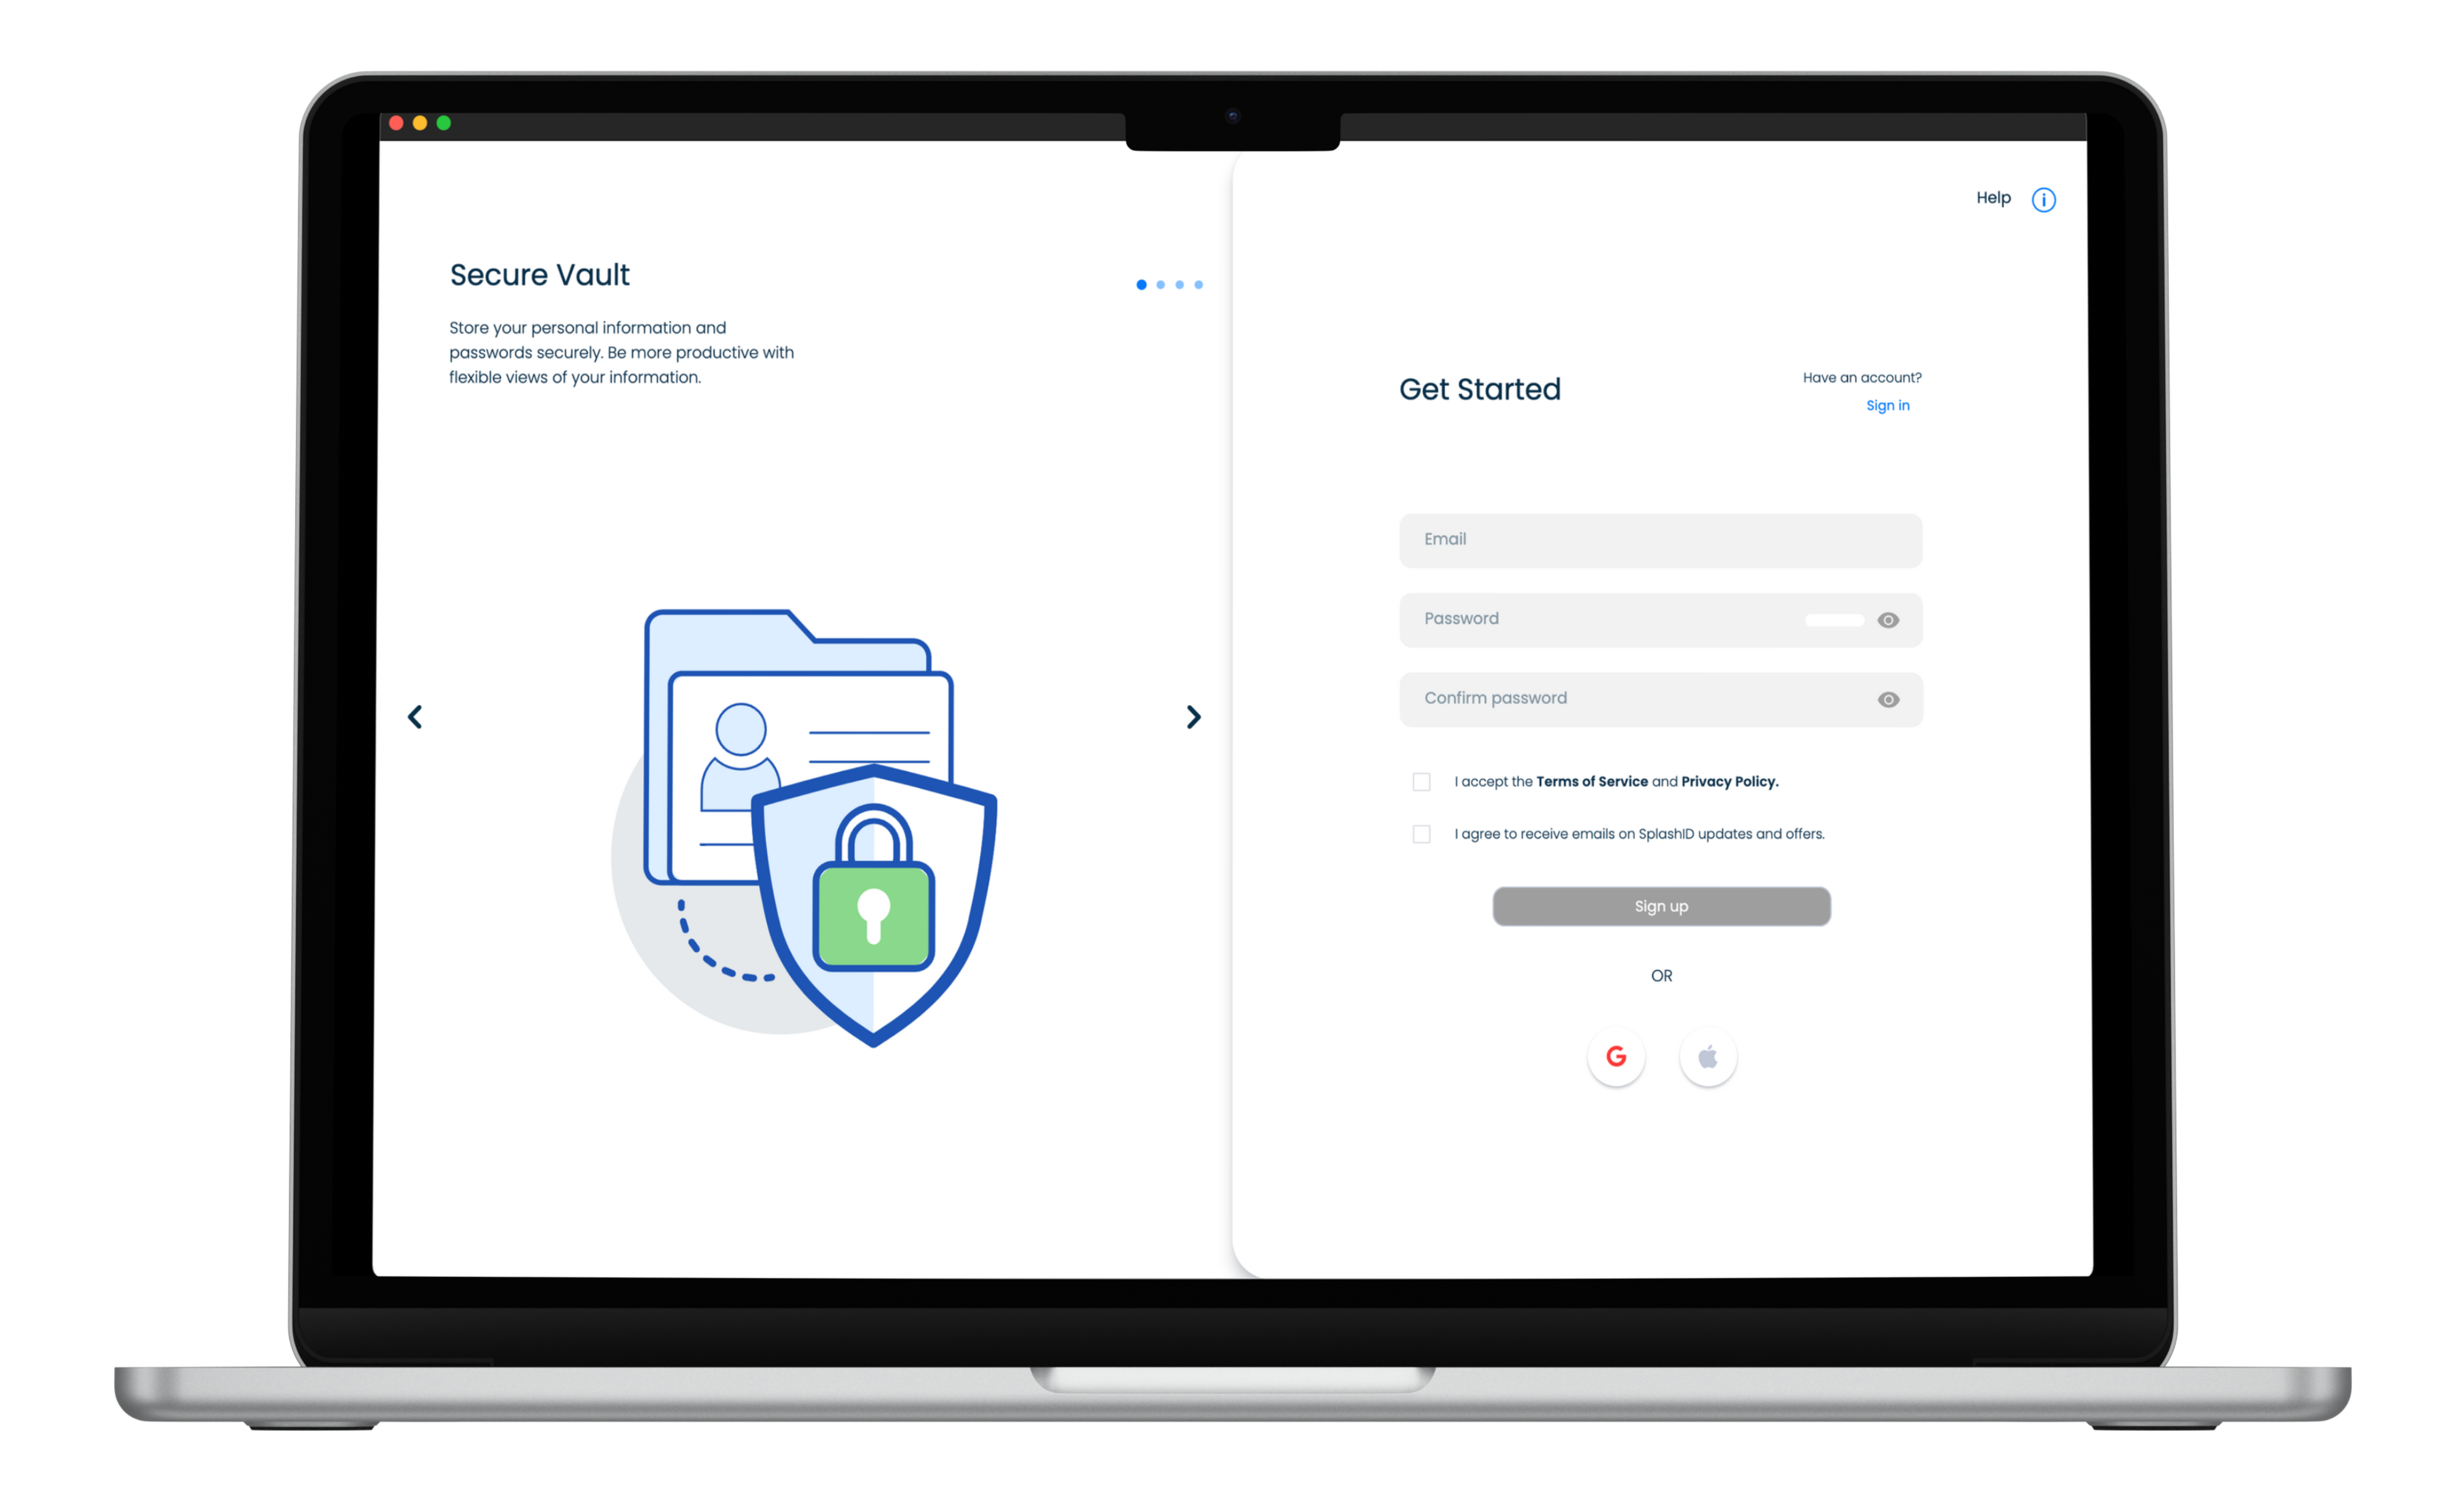
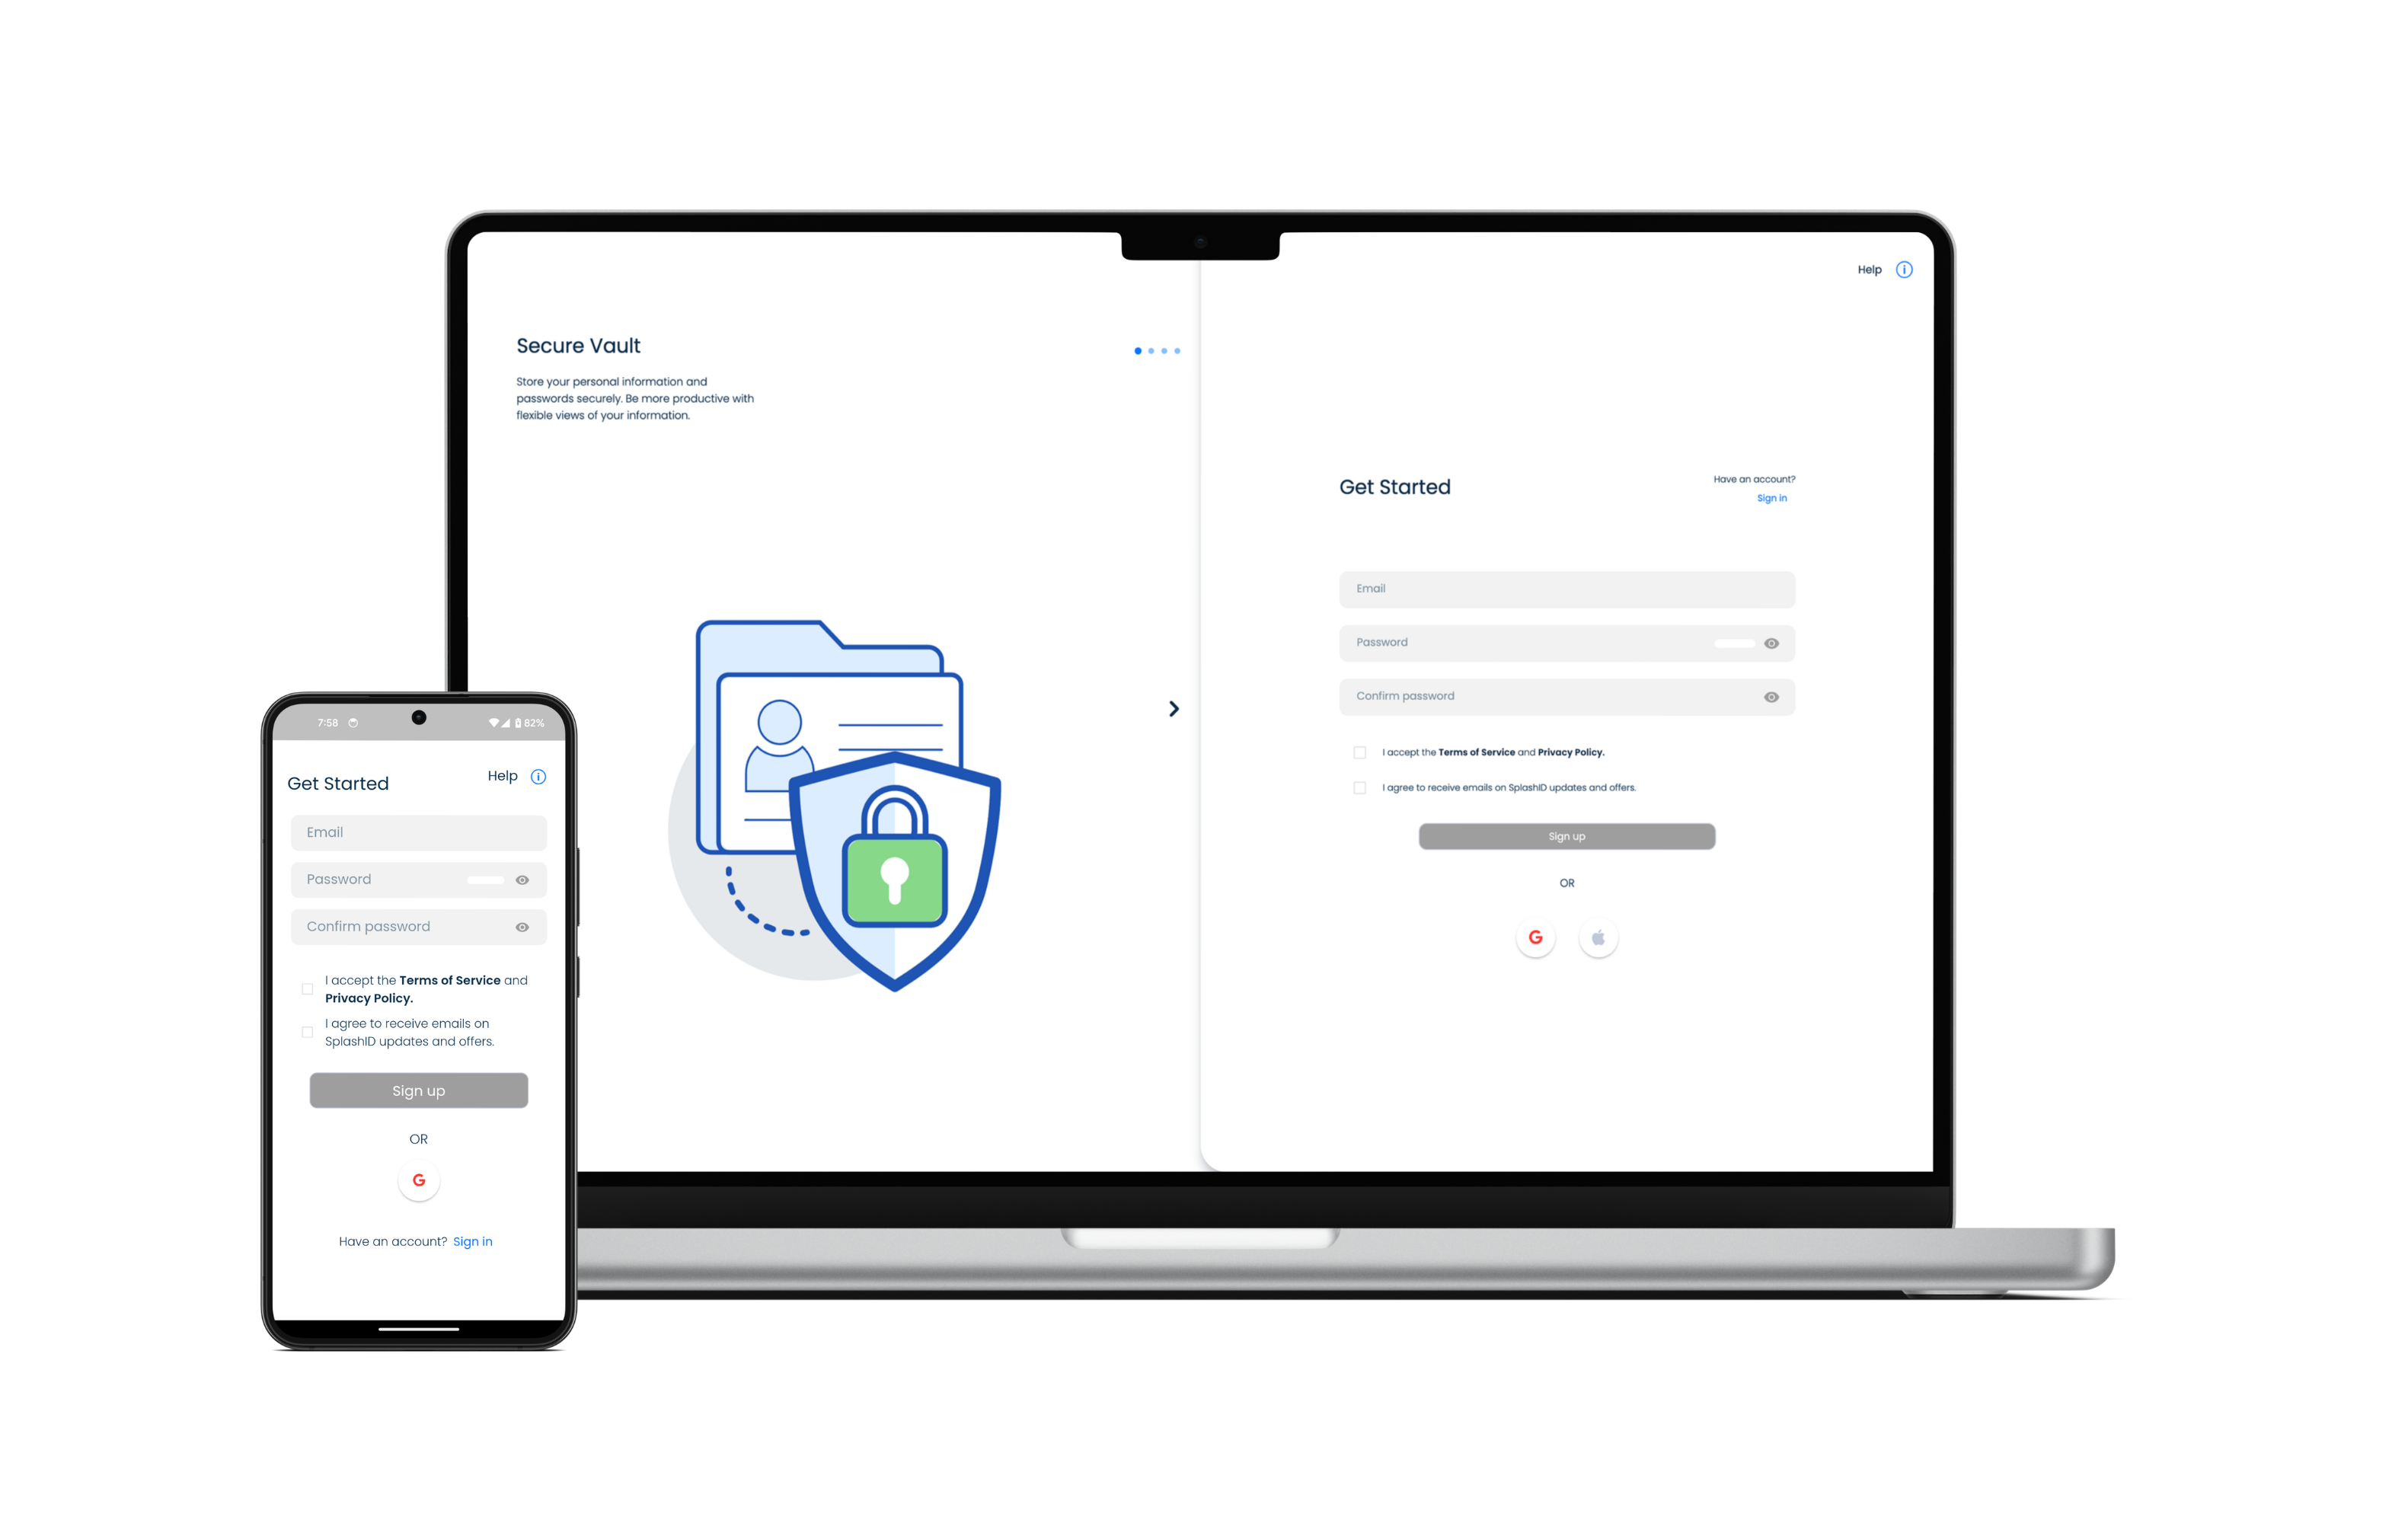
- Launch the installed app, and create a SplashID Pro 9 account on the account sign up screen.
- Verify your account email address.
- Complete the initial account setup.
- Optionally purchase a subscription or migrate your existing SplashID Safe license to unlock all Pro features.
- Start using SplashID Pro 9.
- Install SplashID Pro 9 on all your devices that you plan to use SplashID on.
Install apps
SplashID Pro 9 apps are distributed through the following application stores provided on your devices.
- App Store on iPhones and iPads
- Mac App Store on MacBooks
- Microsoft Store on Windows 10 and 11
- Play Store on Android phones and tablets
To begin, download and install SplashID Pro 9 on one of your laptops, desktops, tablets or mobiles. After the initial setup, you can then install them on any number of devices to access your stored information.
Please visit the downloads page on our website for more details on available applications.
Download on your device
To install SplashID Pro 9 on your mobile, tablet, laptop or desktop launch the application store provided on your device. Then search for SplashID Pro 9 and proceed to install the application on your device.
If SplashID Pro 9 is not listed on your device, then it is quite likely that you have an older version of the operating system on your device that is not supported by SplashID. You will need to upgrade your device to a later version for being able to use SplashID Pro 9.
Browser app
Cloud sync users can also use the web application in a browser of their choice to access their records. We support the latest versions of the following browsers.
- Chrome
- Edge
- Firefox
- Safari
Account registration in native apps only
Signing up for a new account is possible only in an app installed through one of the stores listed above.
Once an account has been created, verified and setup for cloud sync, you can use the web application to access your data.
Whats new in SplashID Pro 9?
SplashID Pro 9 retains most of the features of SplashID Safe. It brings to you a set of new features that will help you better in managing your information. The new features are listed below.
- In built one-way sharing of records with trusted users and groups of your trusted users.
- Unlimited notes in records with a separate view of only notes that have been created in all your records.
- Upto 5 attachments in a record.
- Store your authenticator one time codes in records, and access all of them in a single view.
- Archiving of records.
- Delete records and send them to recycle bin before you decide to permanently delete them.
- Setup sign in to your account using your Google or Apple account on supported devices.
- Setup 2FA for your SplashID account using a third party authenticator app like Google Authenticator, Microsoft Authenticator, Authy or similar third party authenticator apps.
- Creation of a recovery kit for regaining access to your account, if you forget your master password.
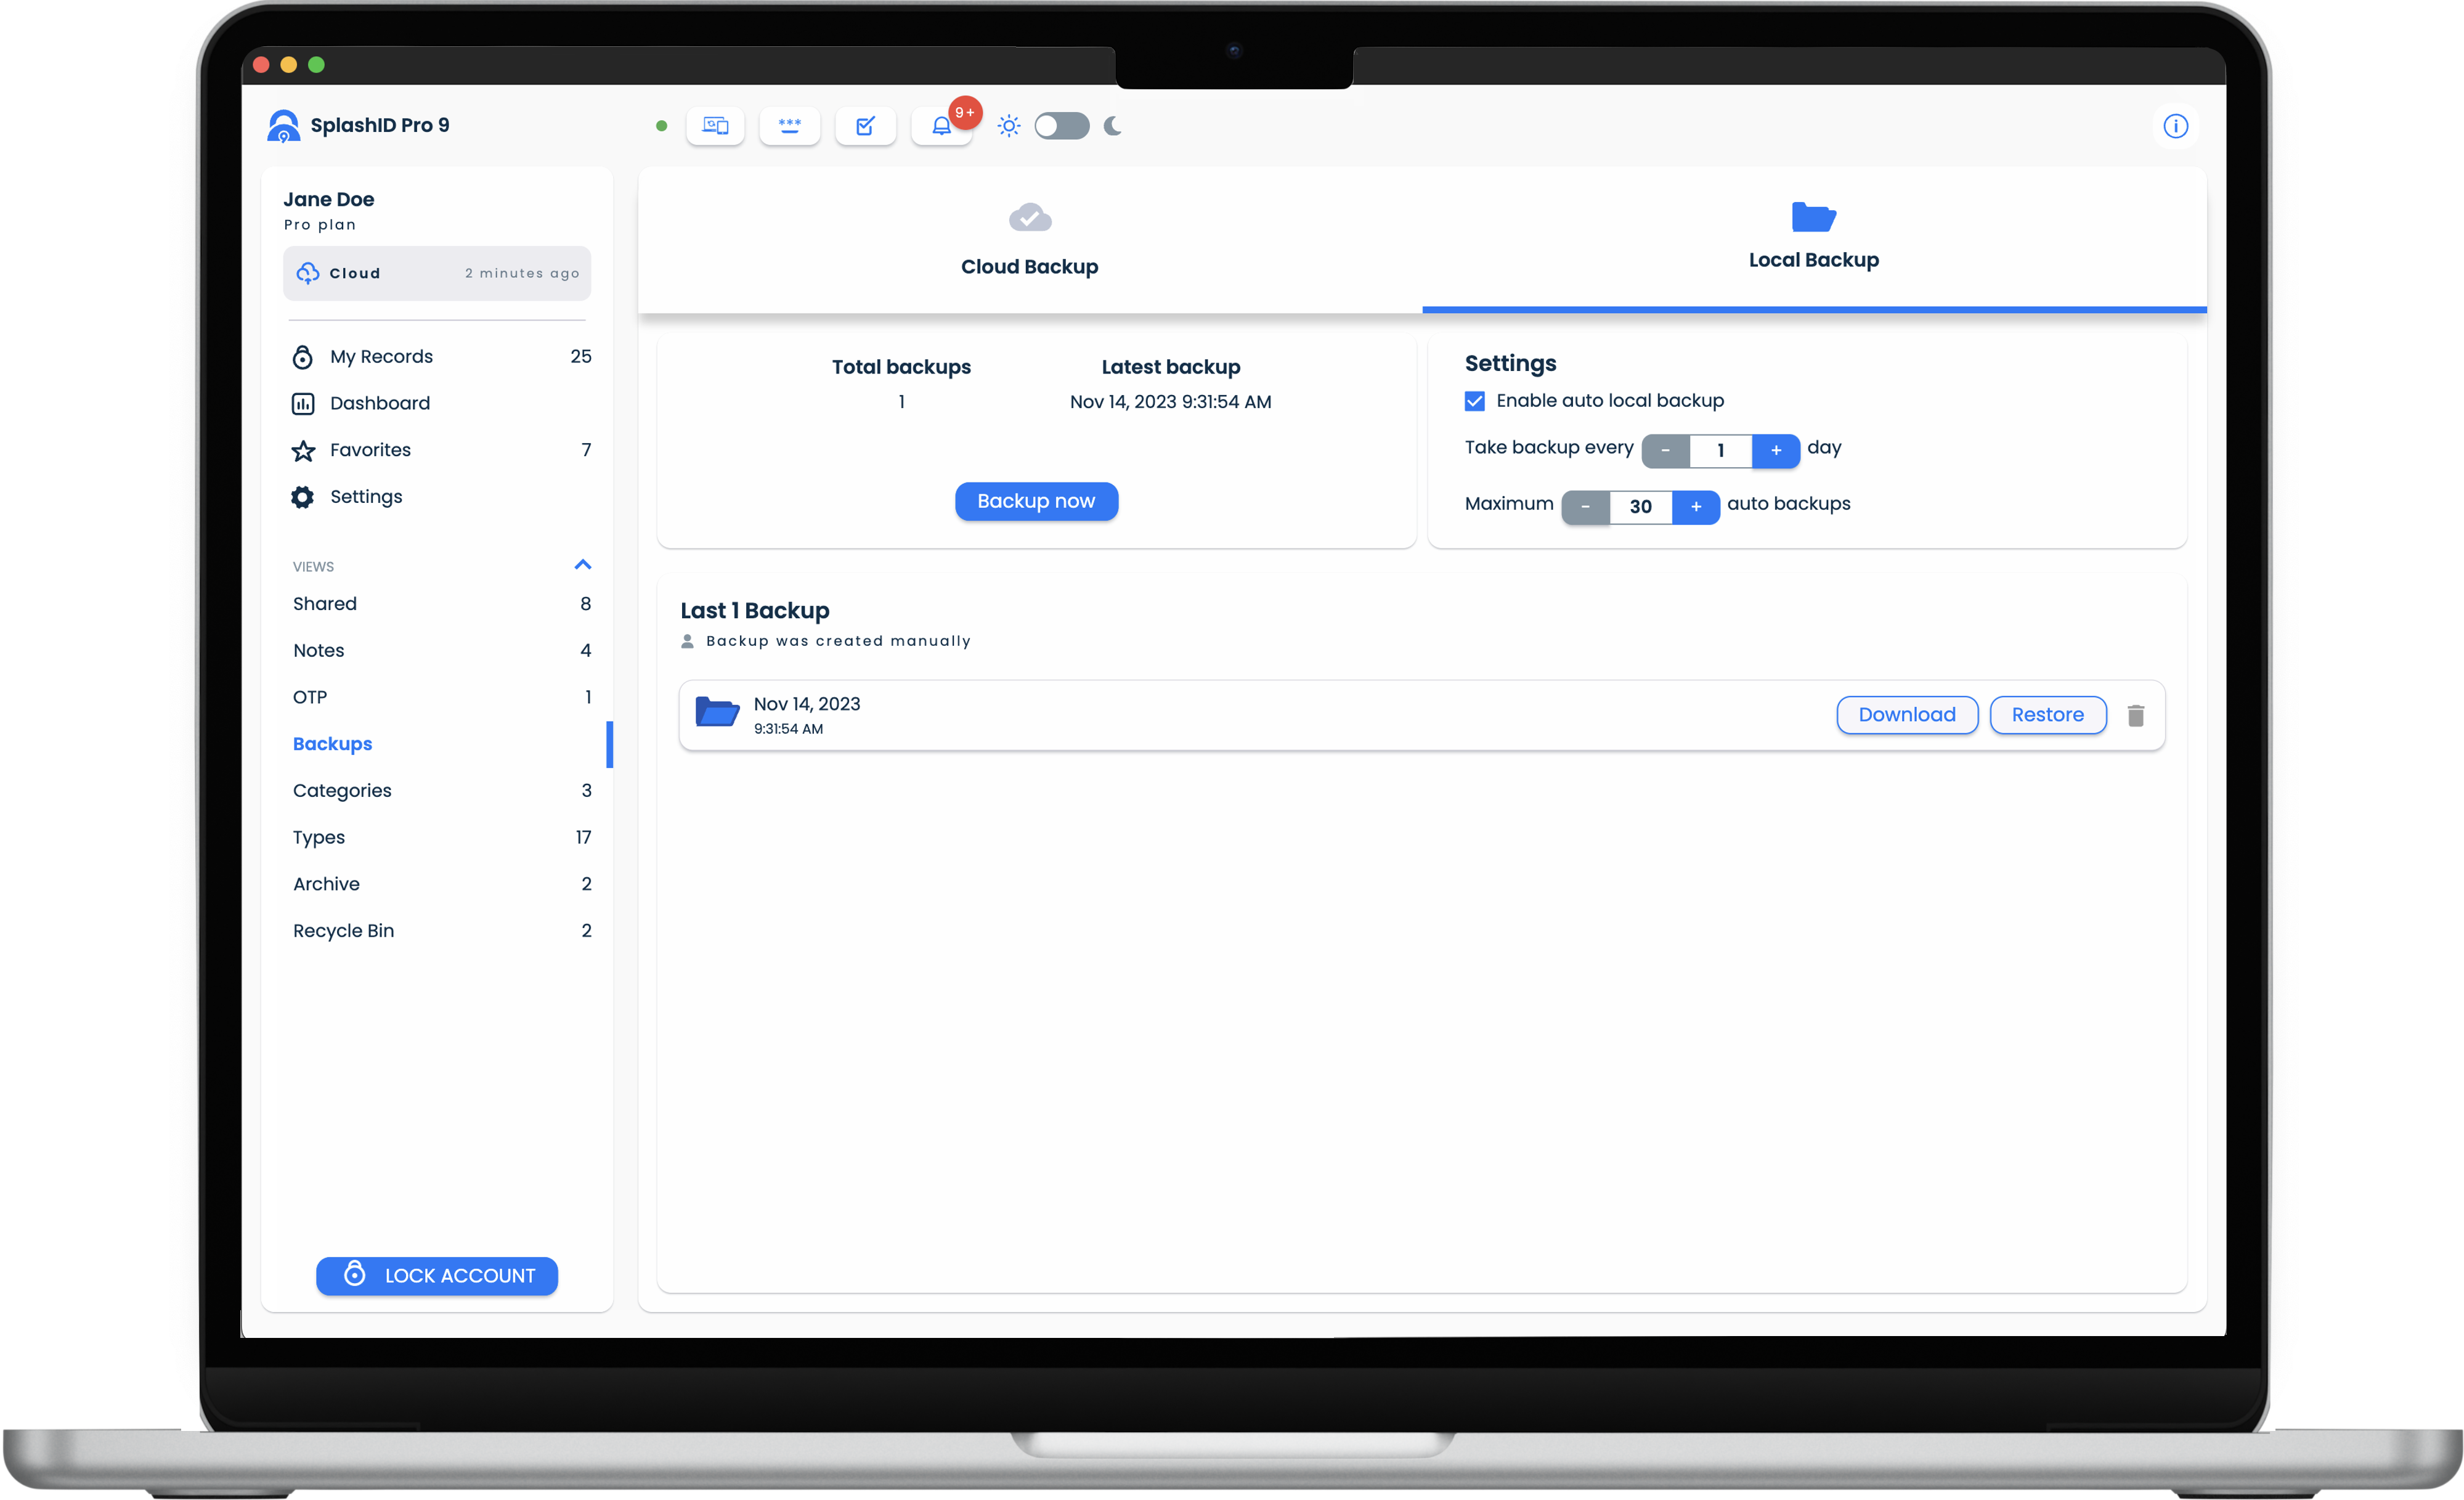
- View, create and access all your local backups in one view.
Migrate from SplashID Safe
If you are an existing SplashID Safe user, then you can migrate your account, data and license to SplashID Pro 9.
For more details on how to migrate, please refer to the migration page.
Next steps
- Learn how the user interface of the record screens looks like.
- Setup your account and sign in.
- Create personal records and view them in diferent ways.
How does the application look?
Screen layout
The user interface that you see after you log in to your account in a SplashID Pro 9 application depends on the device in which you are using it.
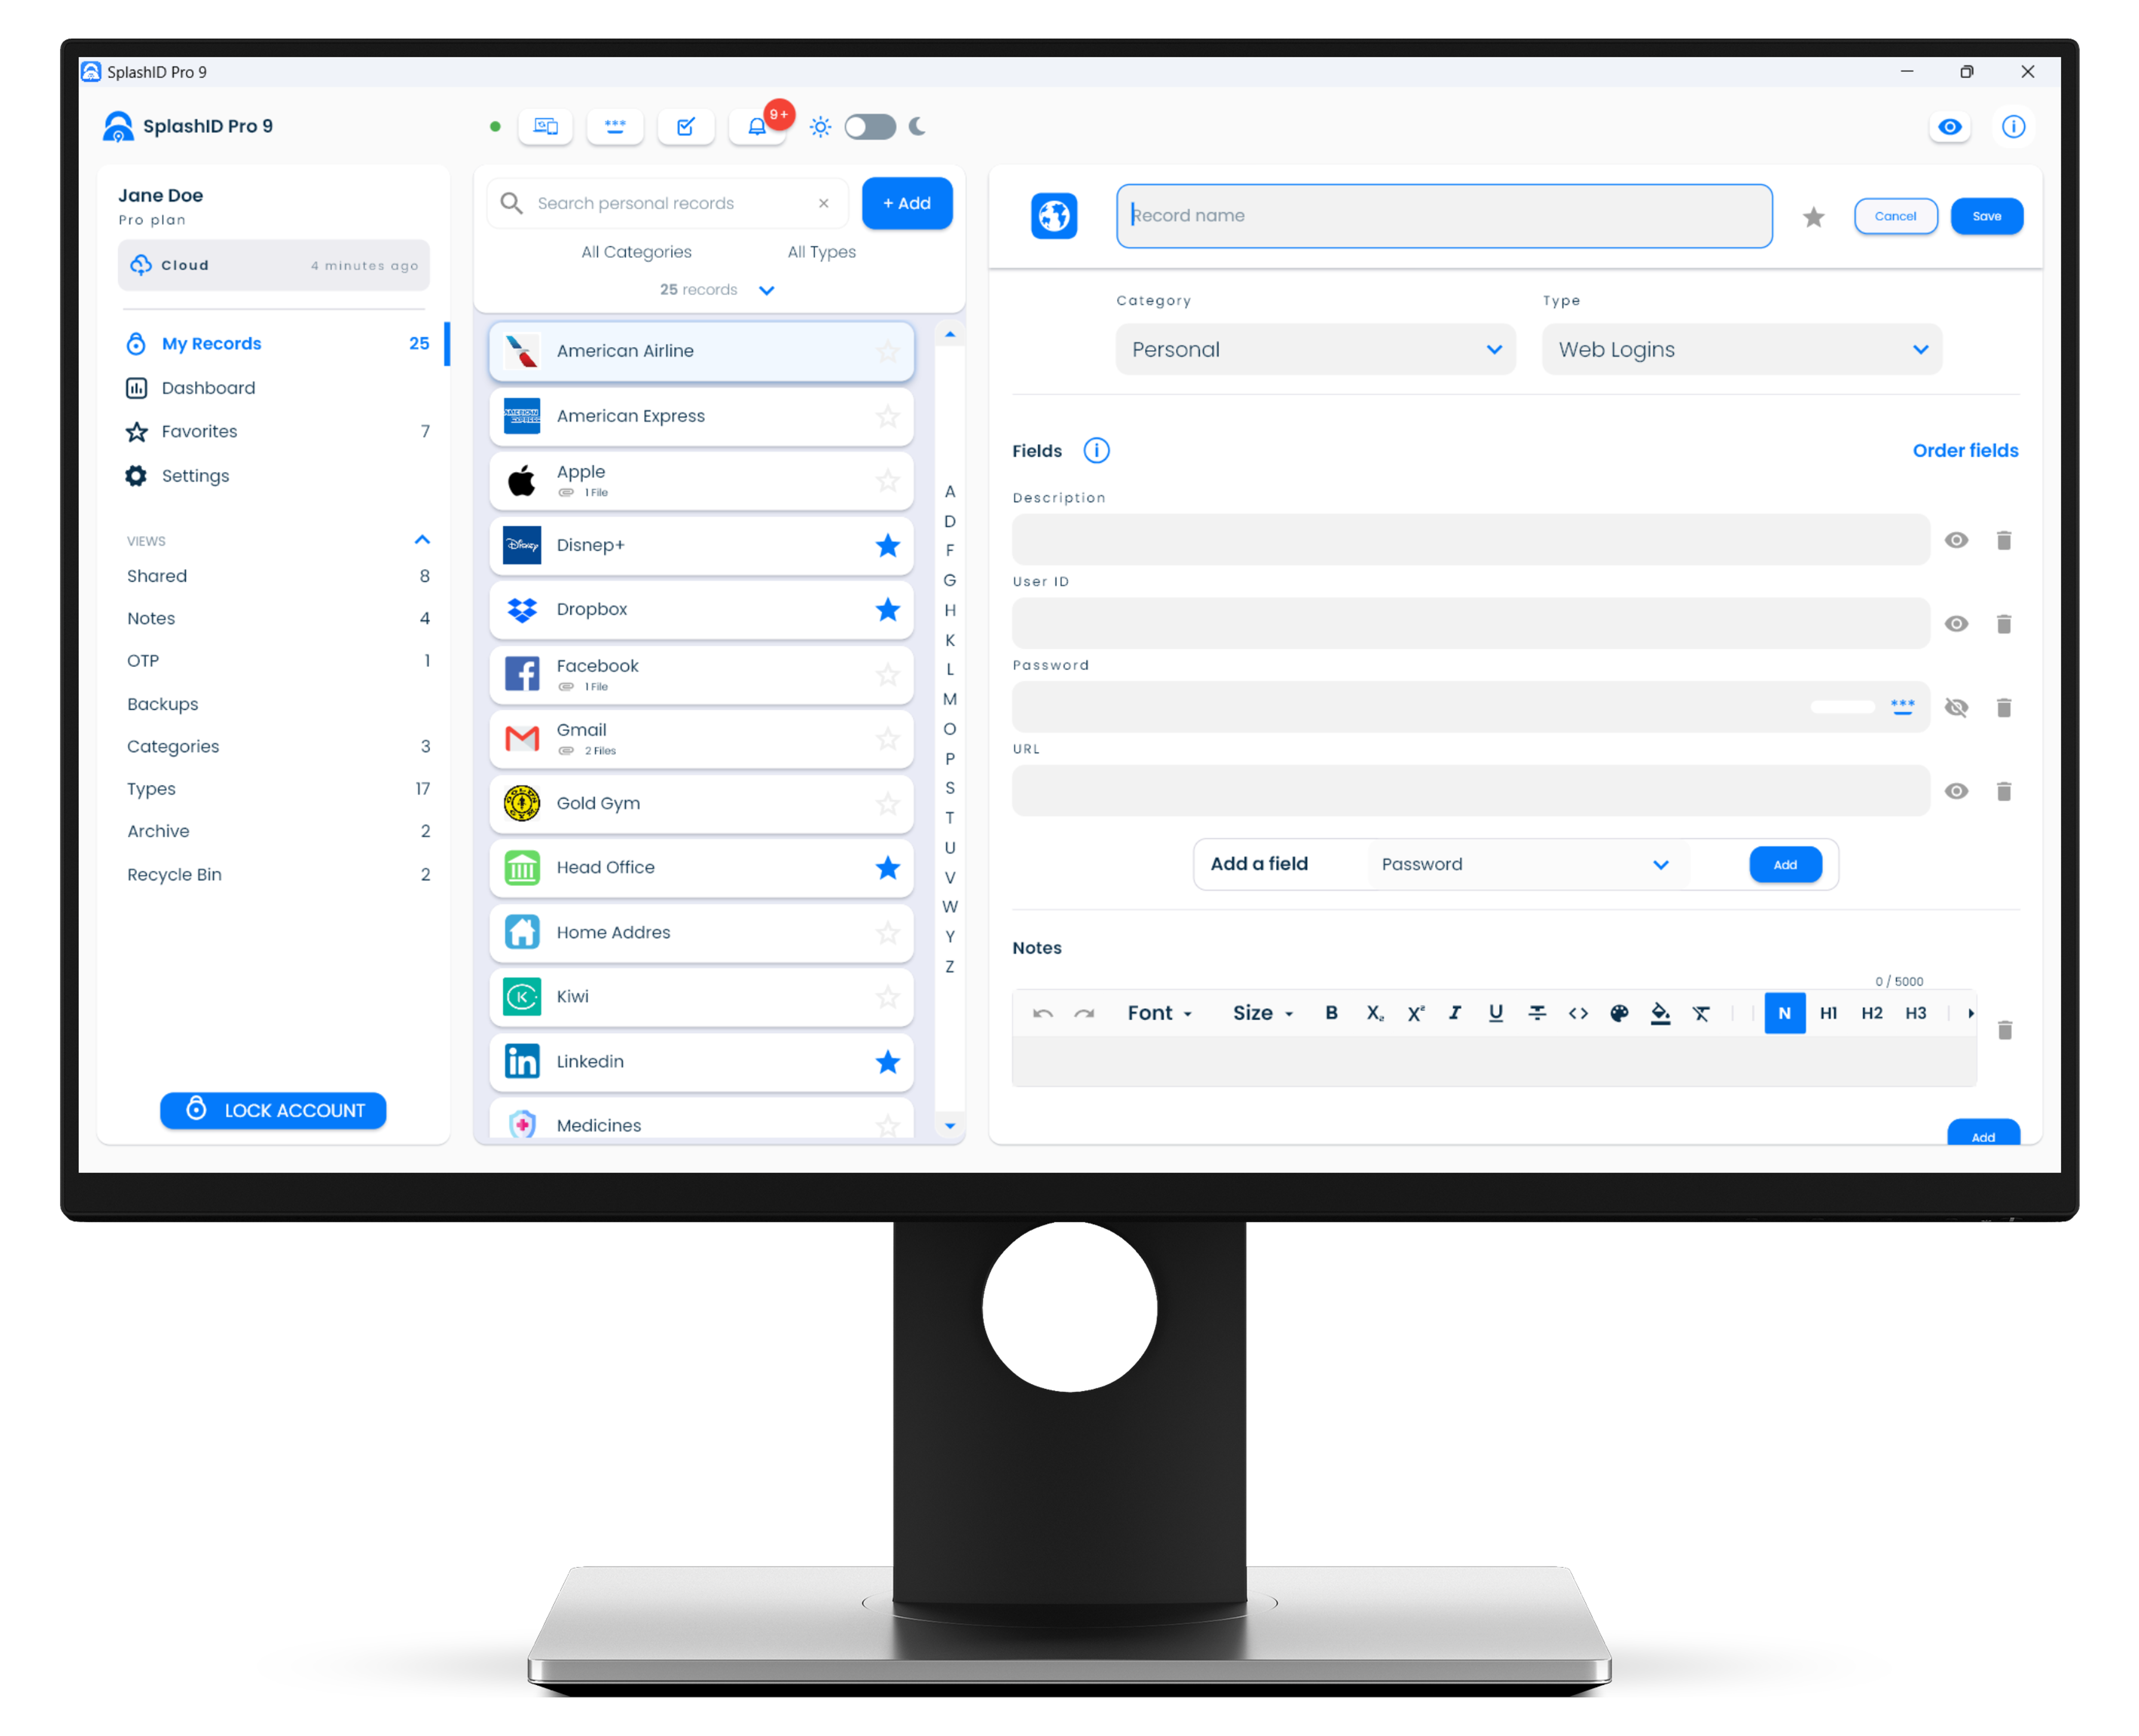
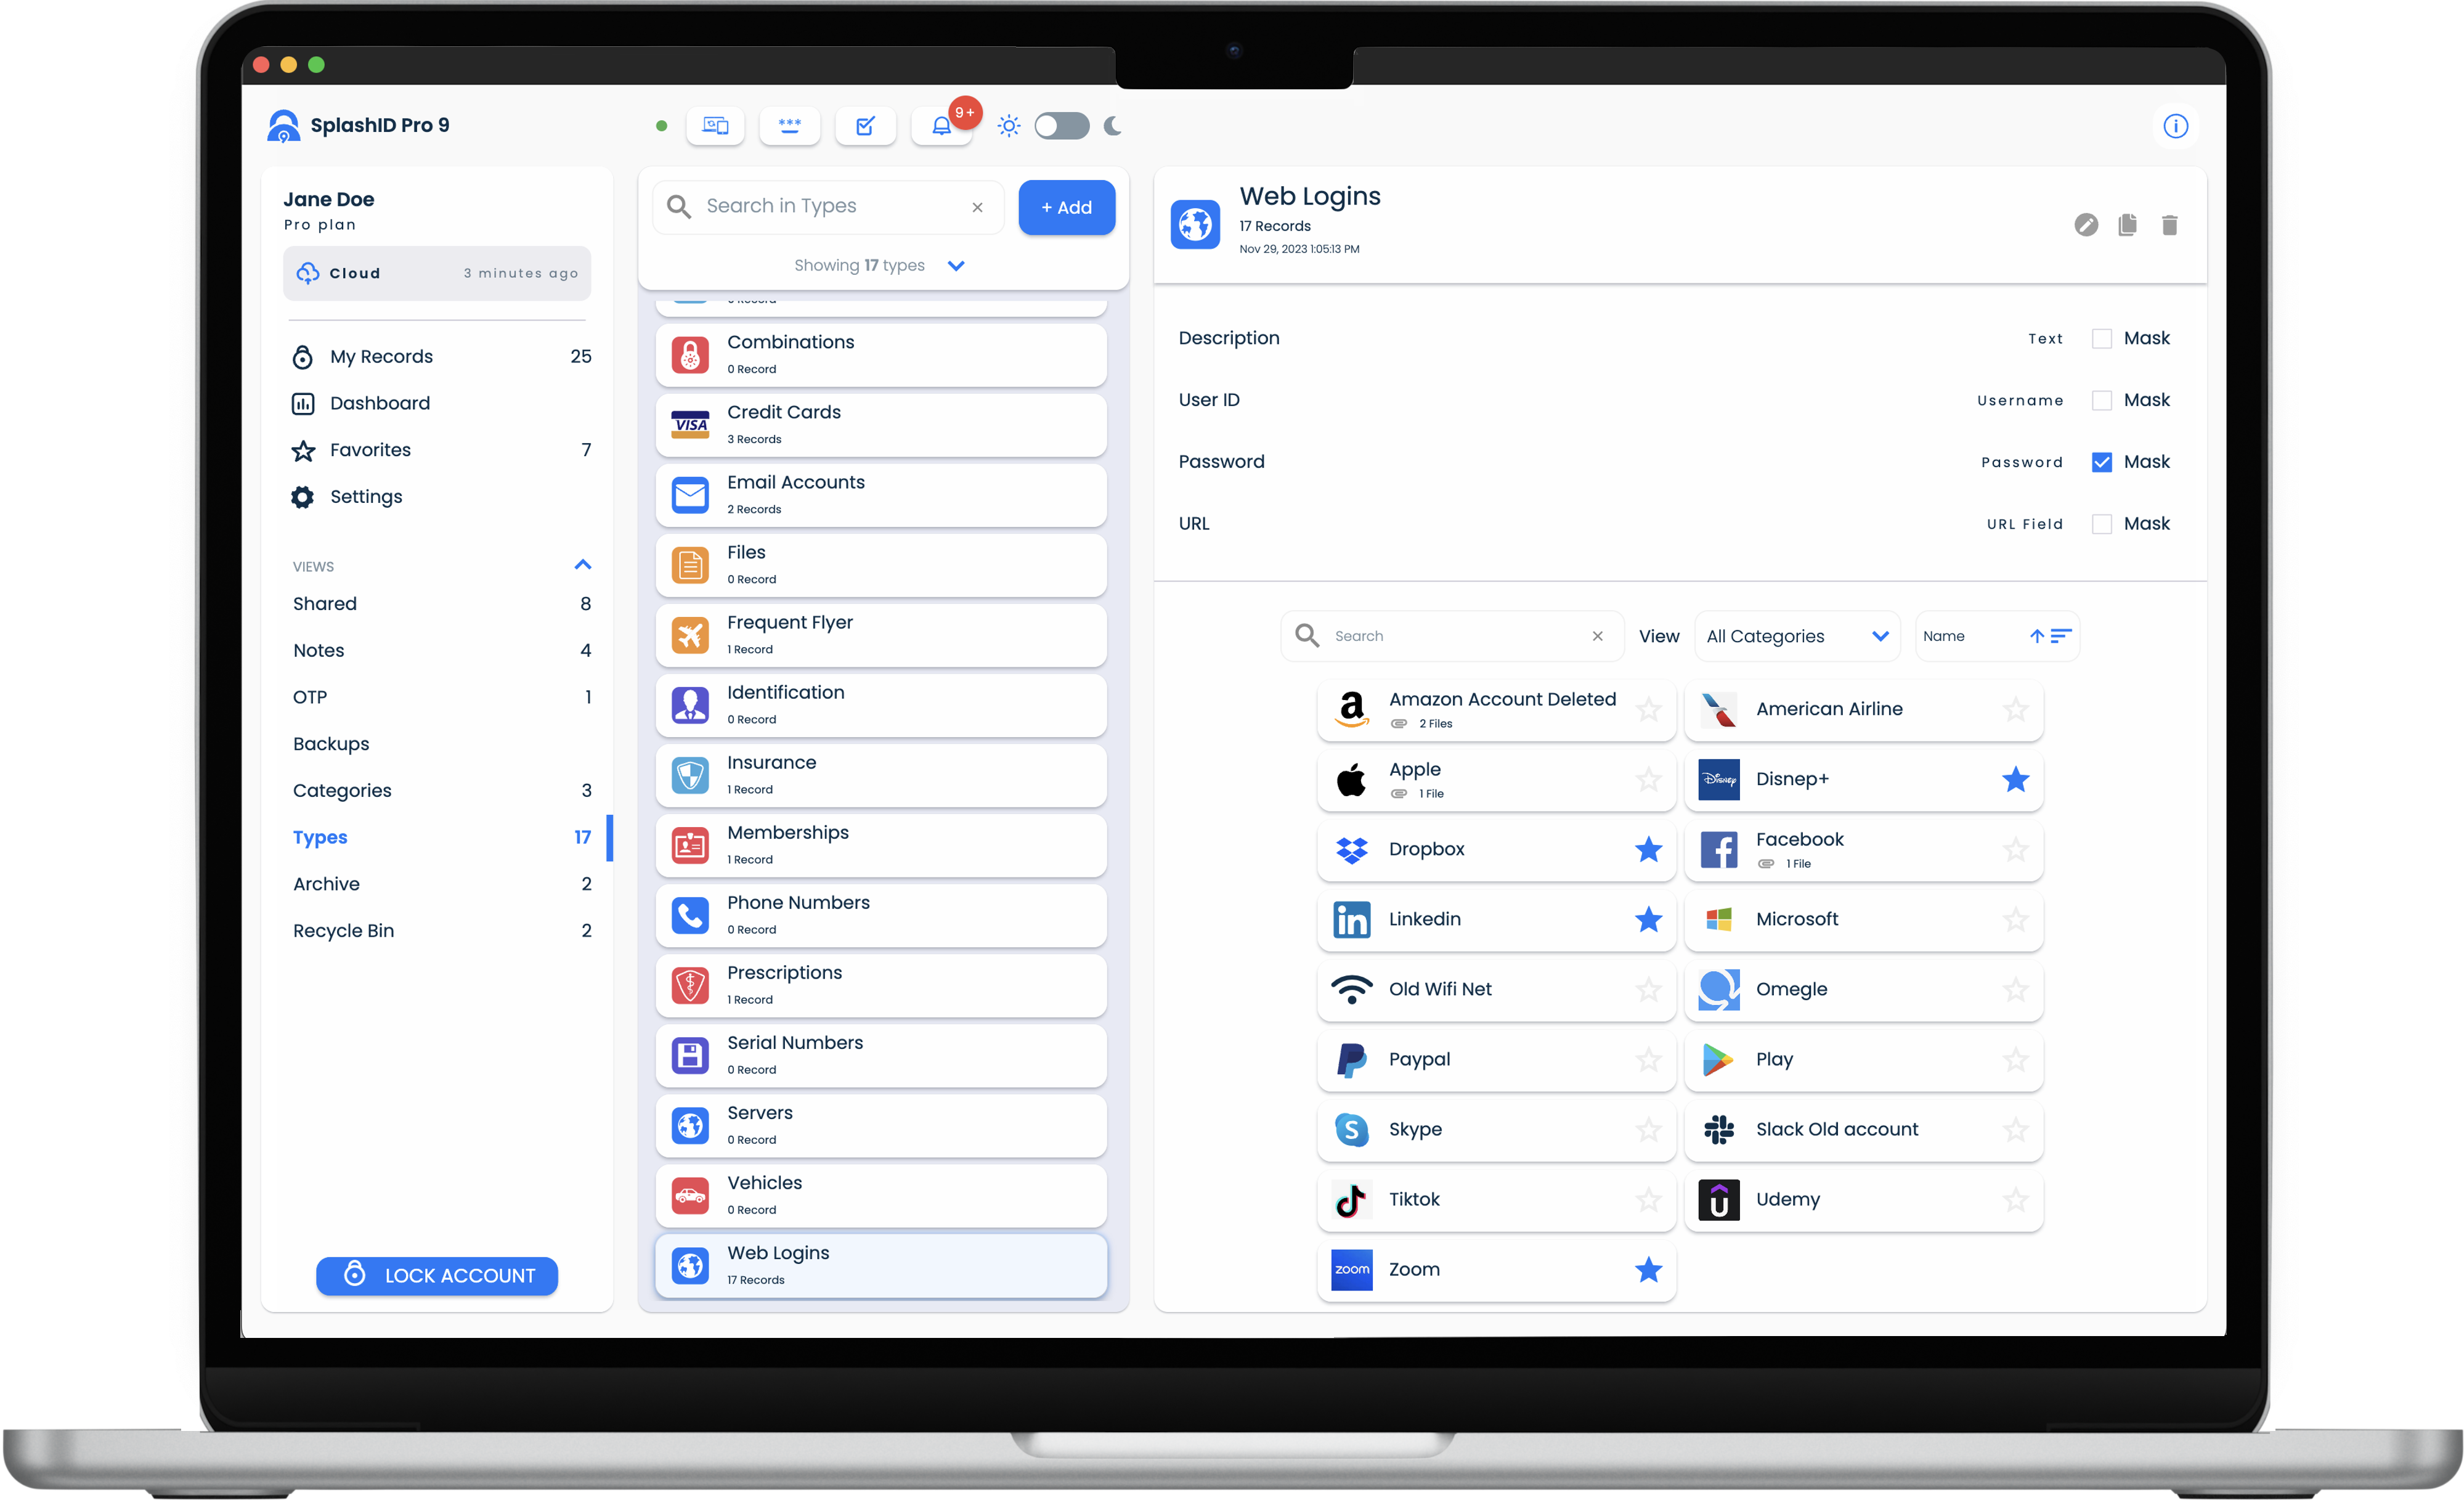
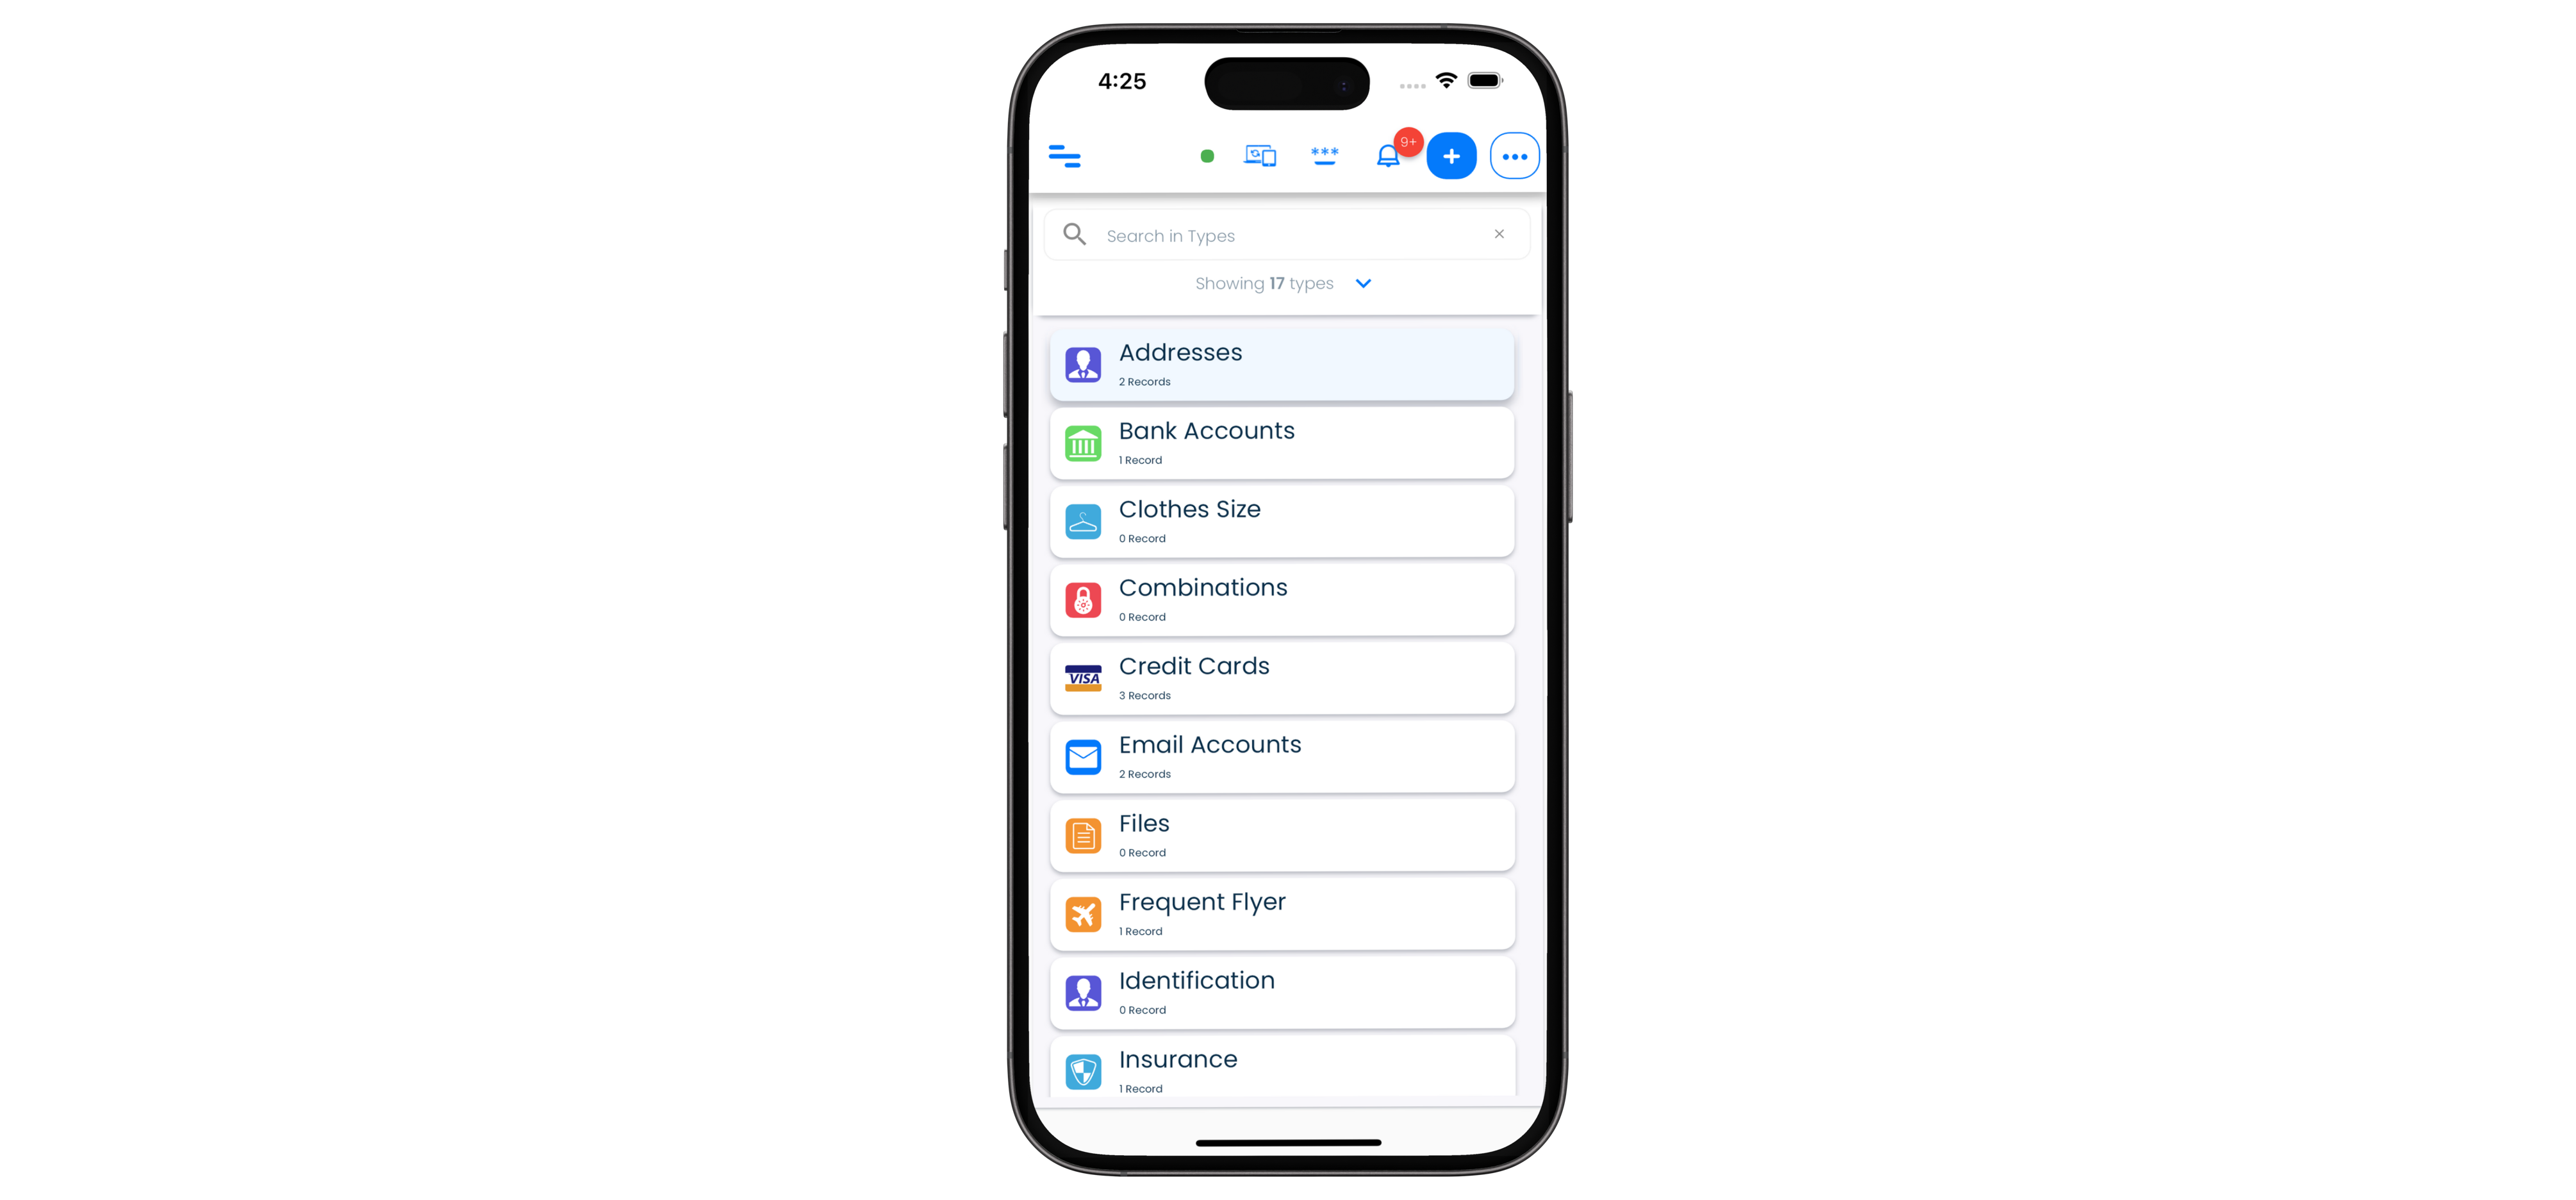
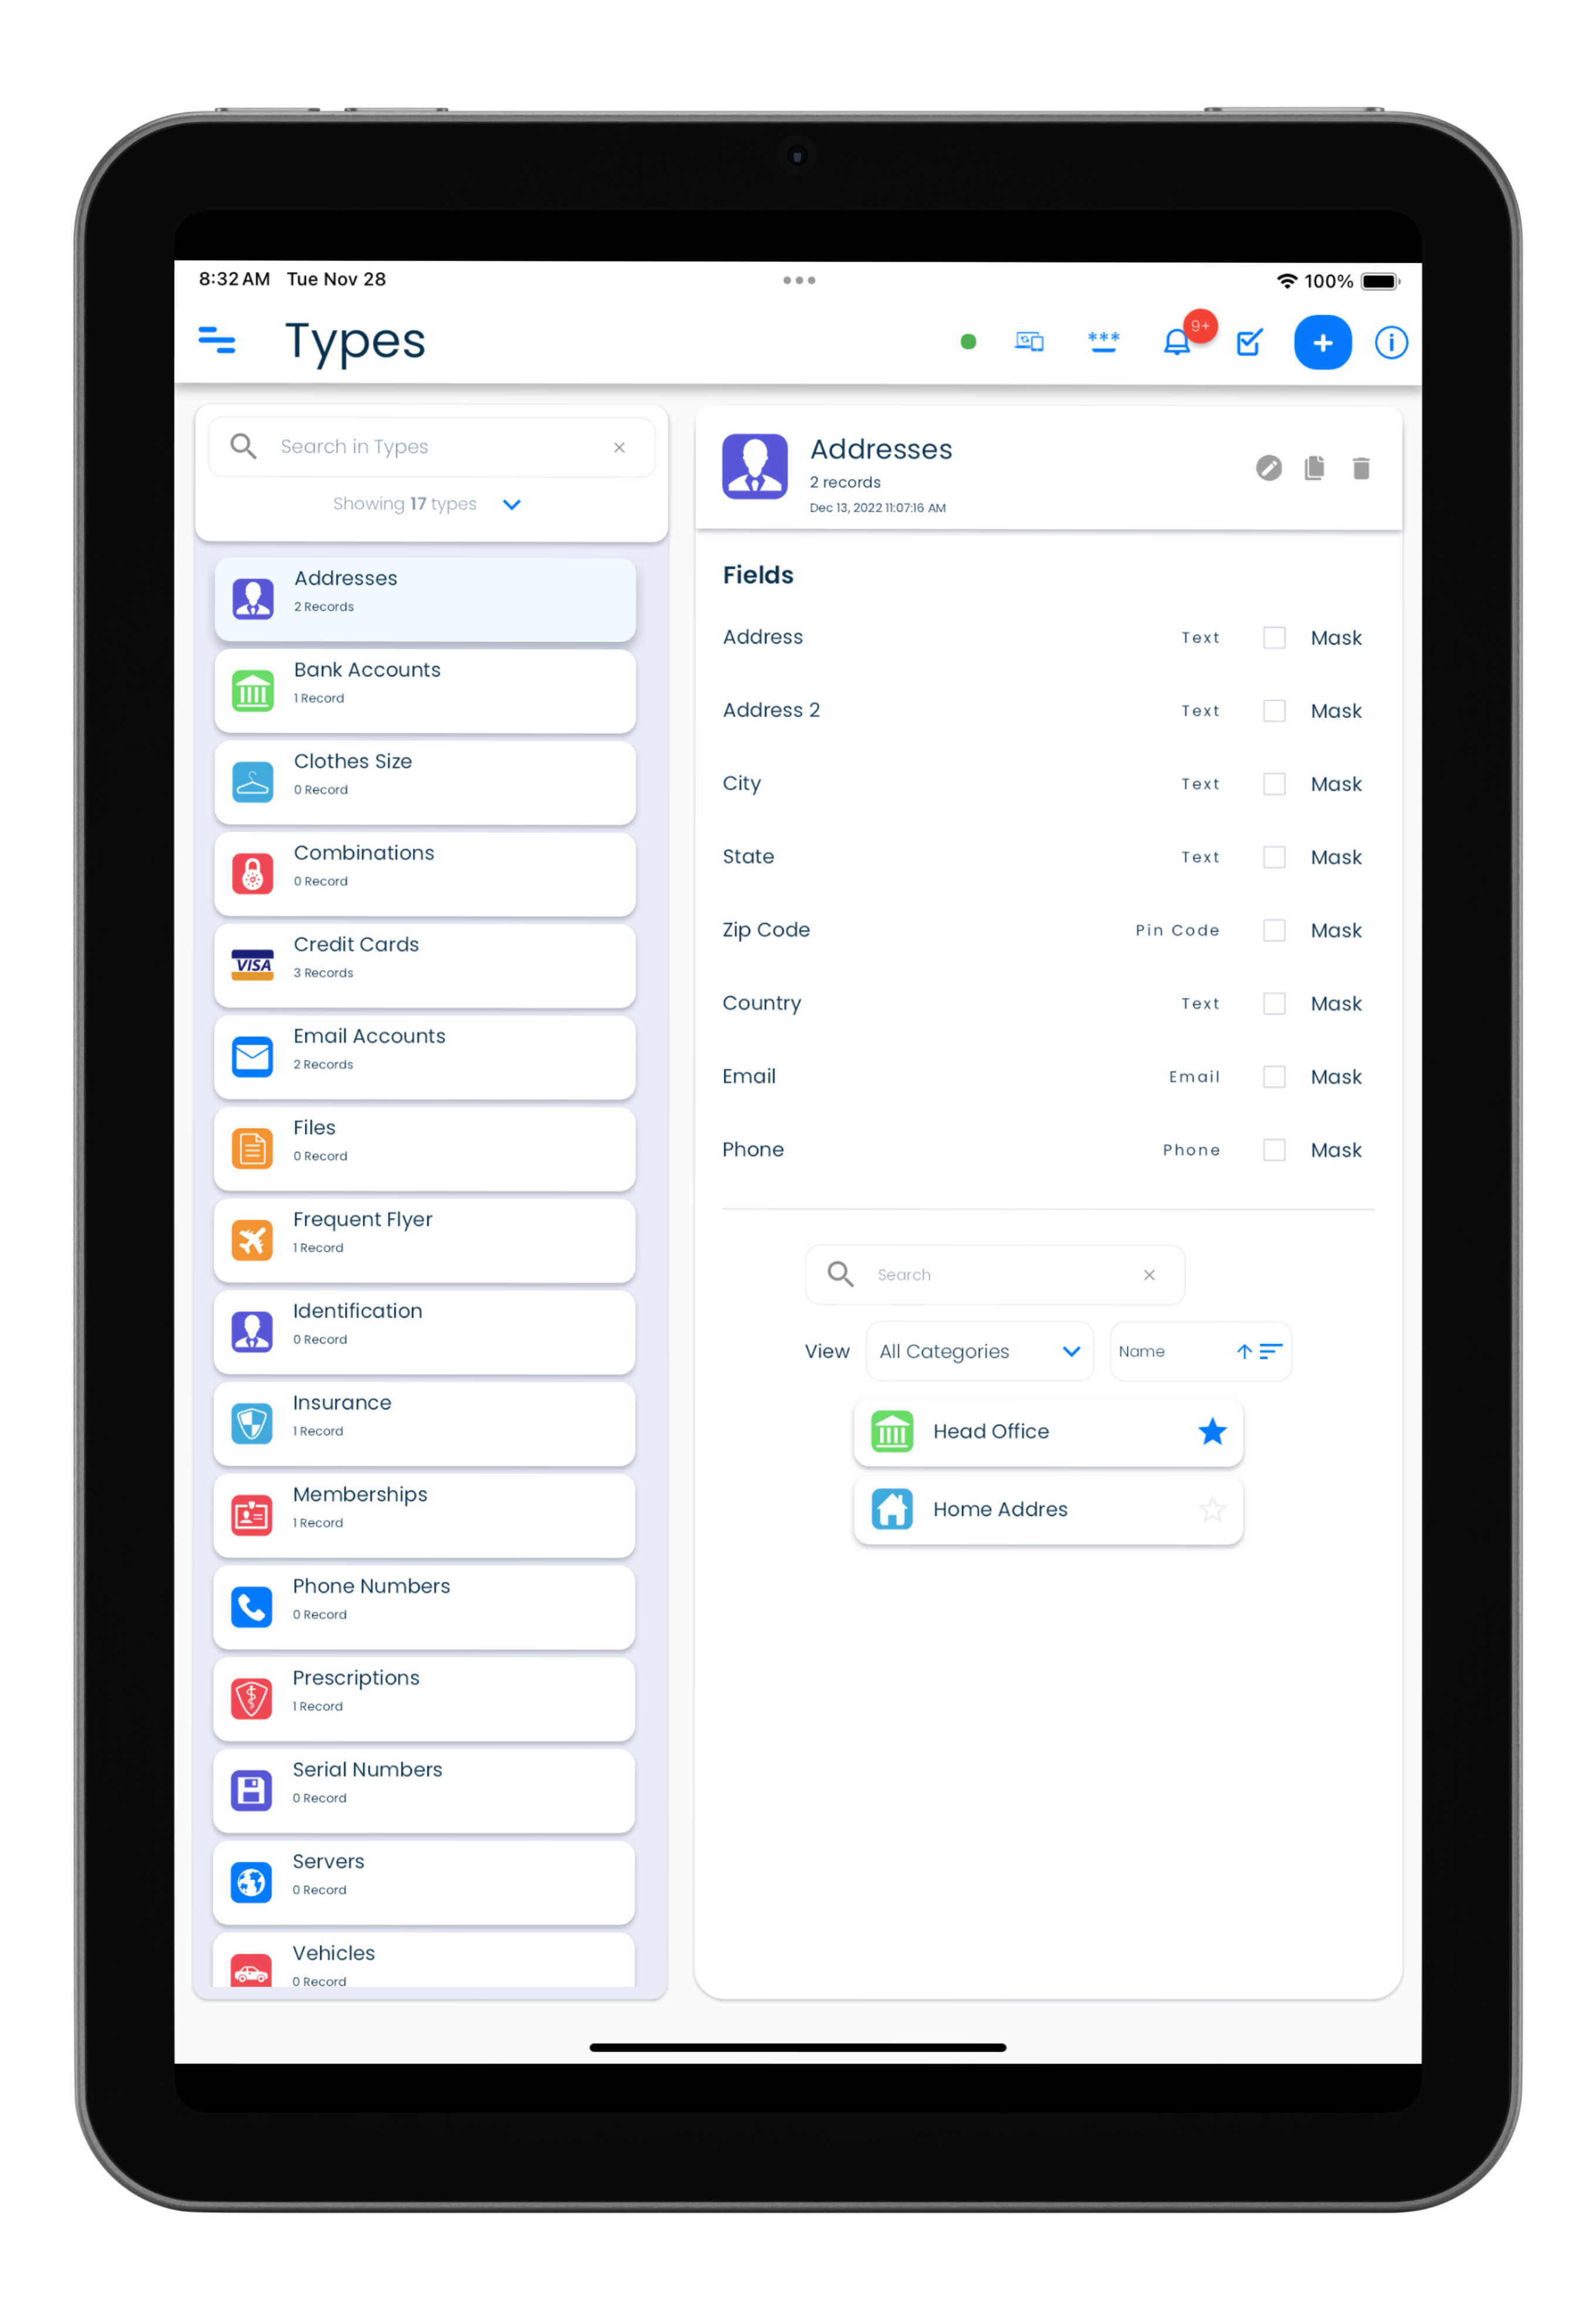
The screens that display your records and their content are composed of panels as listed in the table below. Other screens have a simpler layout.
| Device | Layout for records |
|---|---|
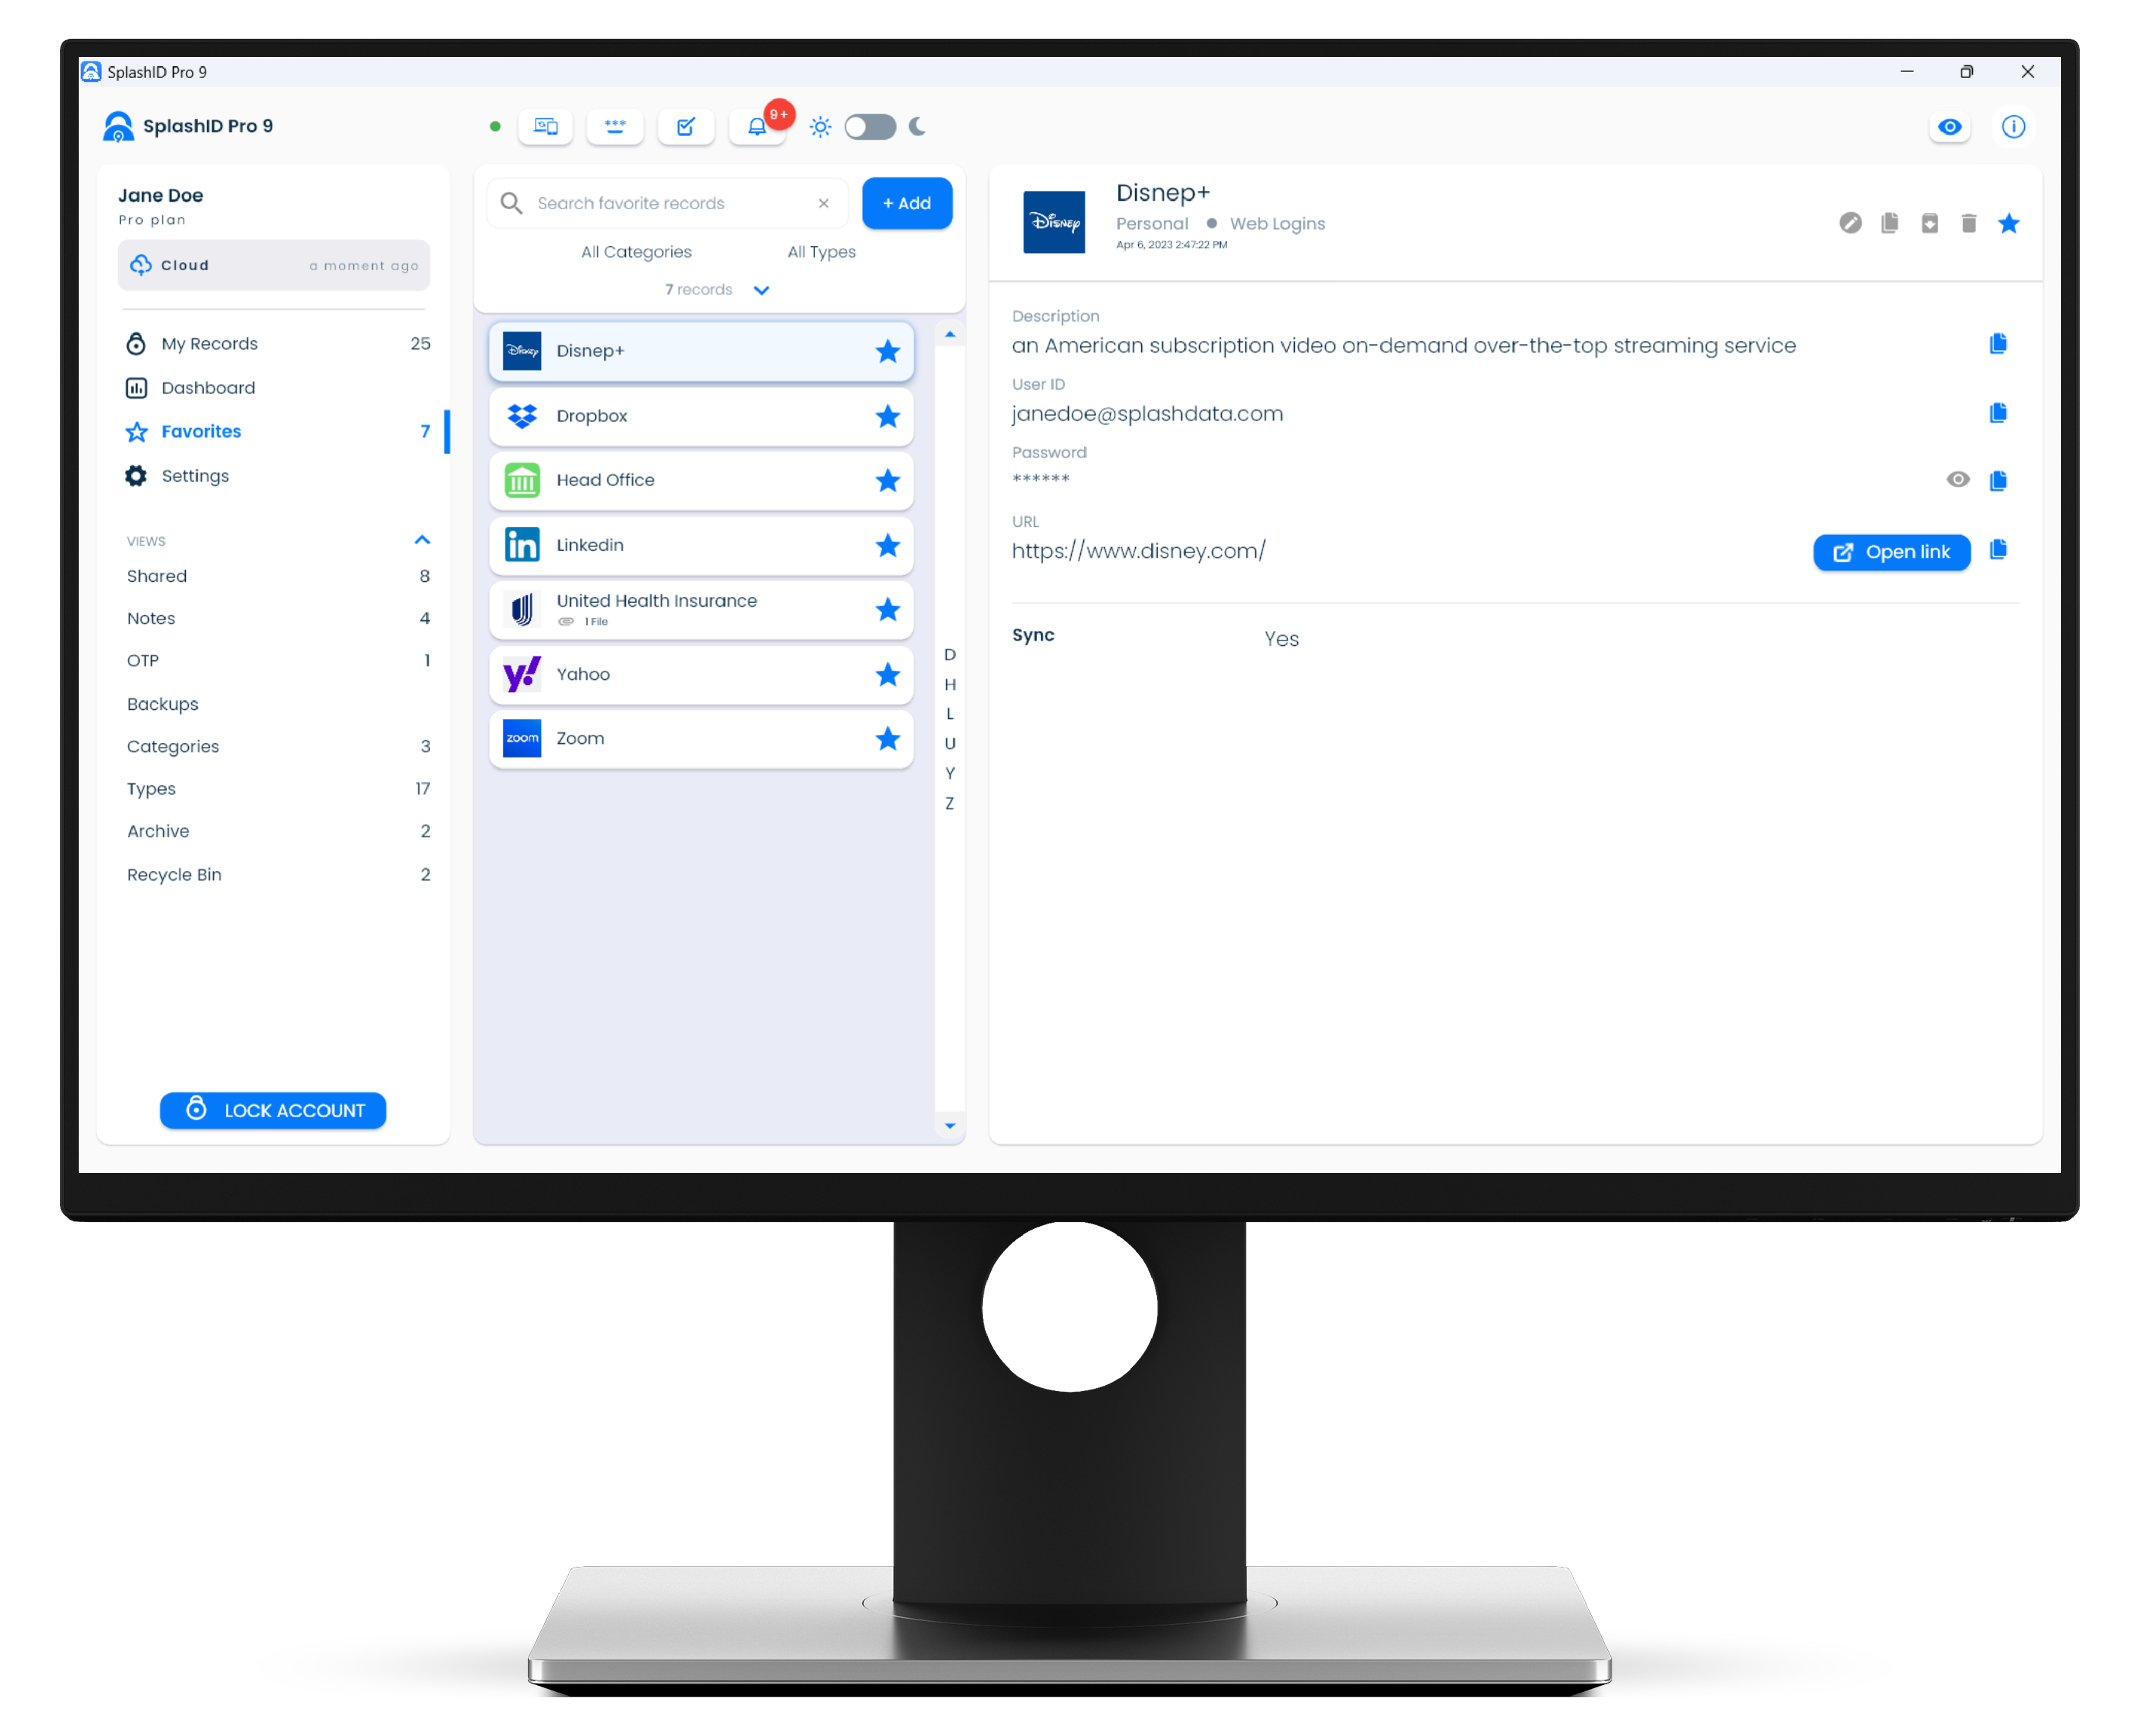
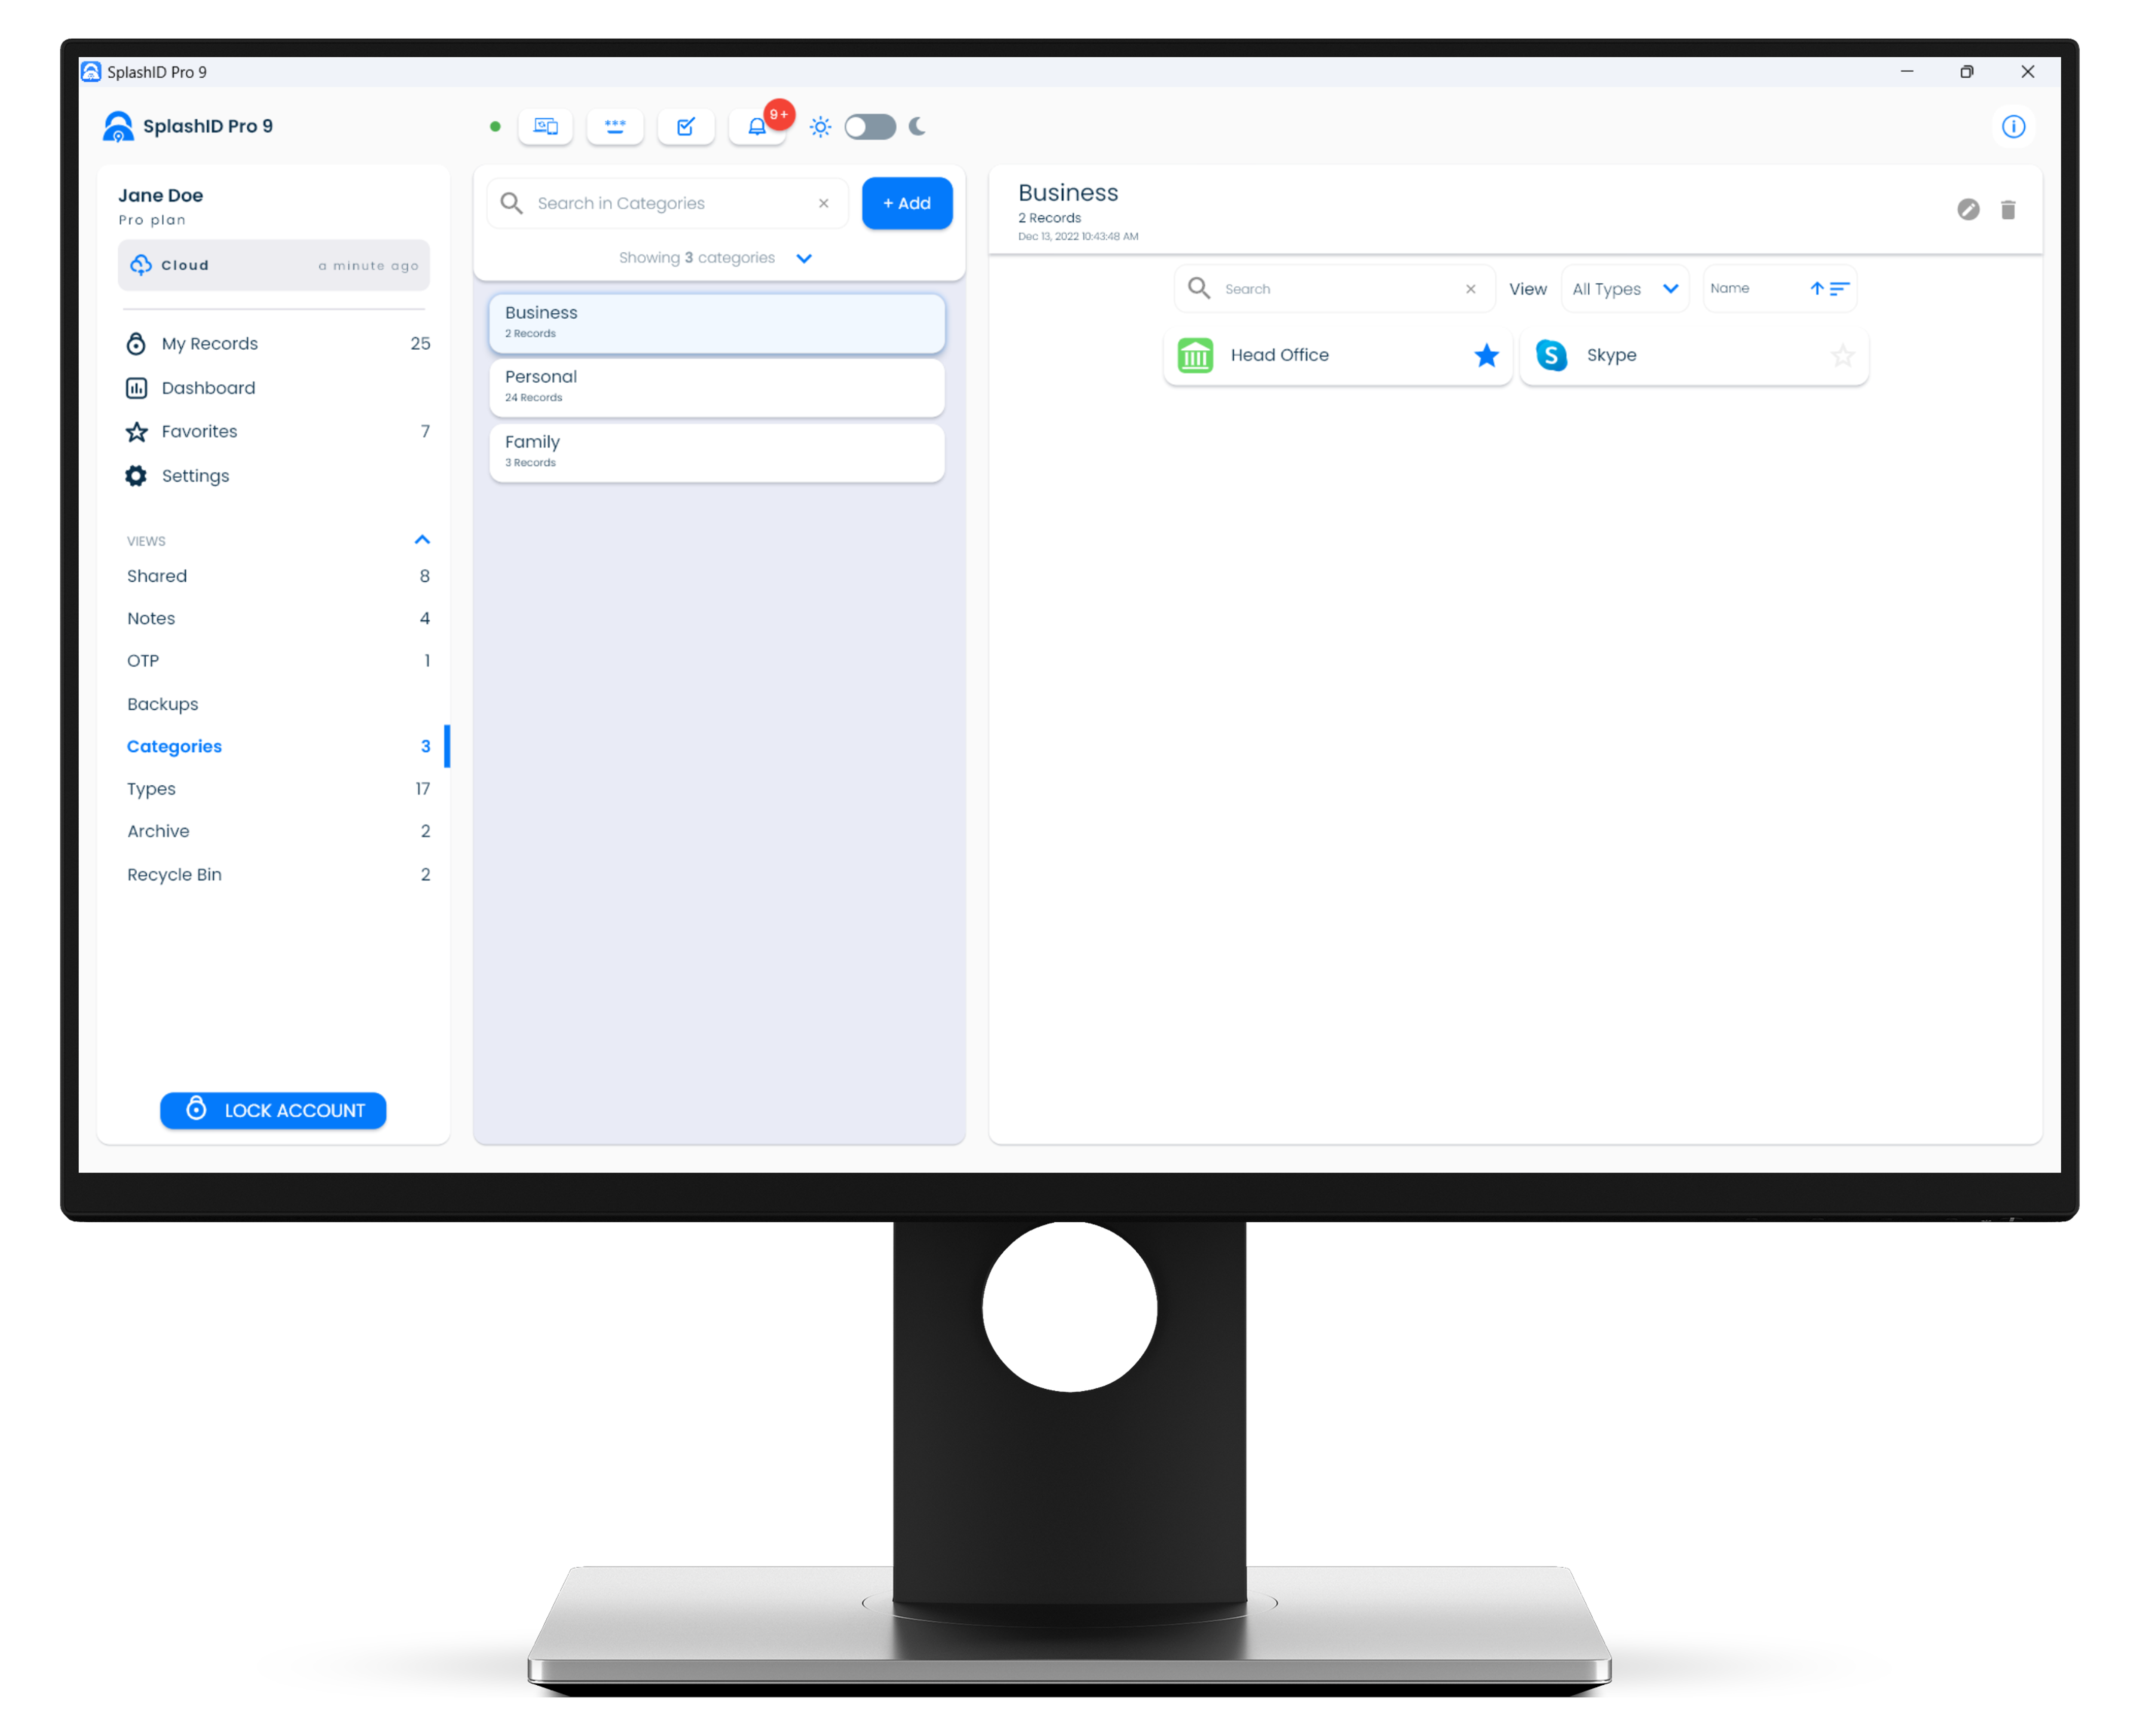
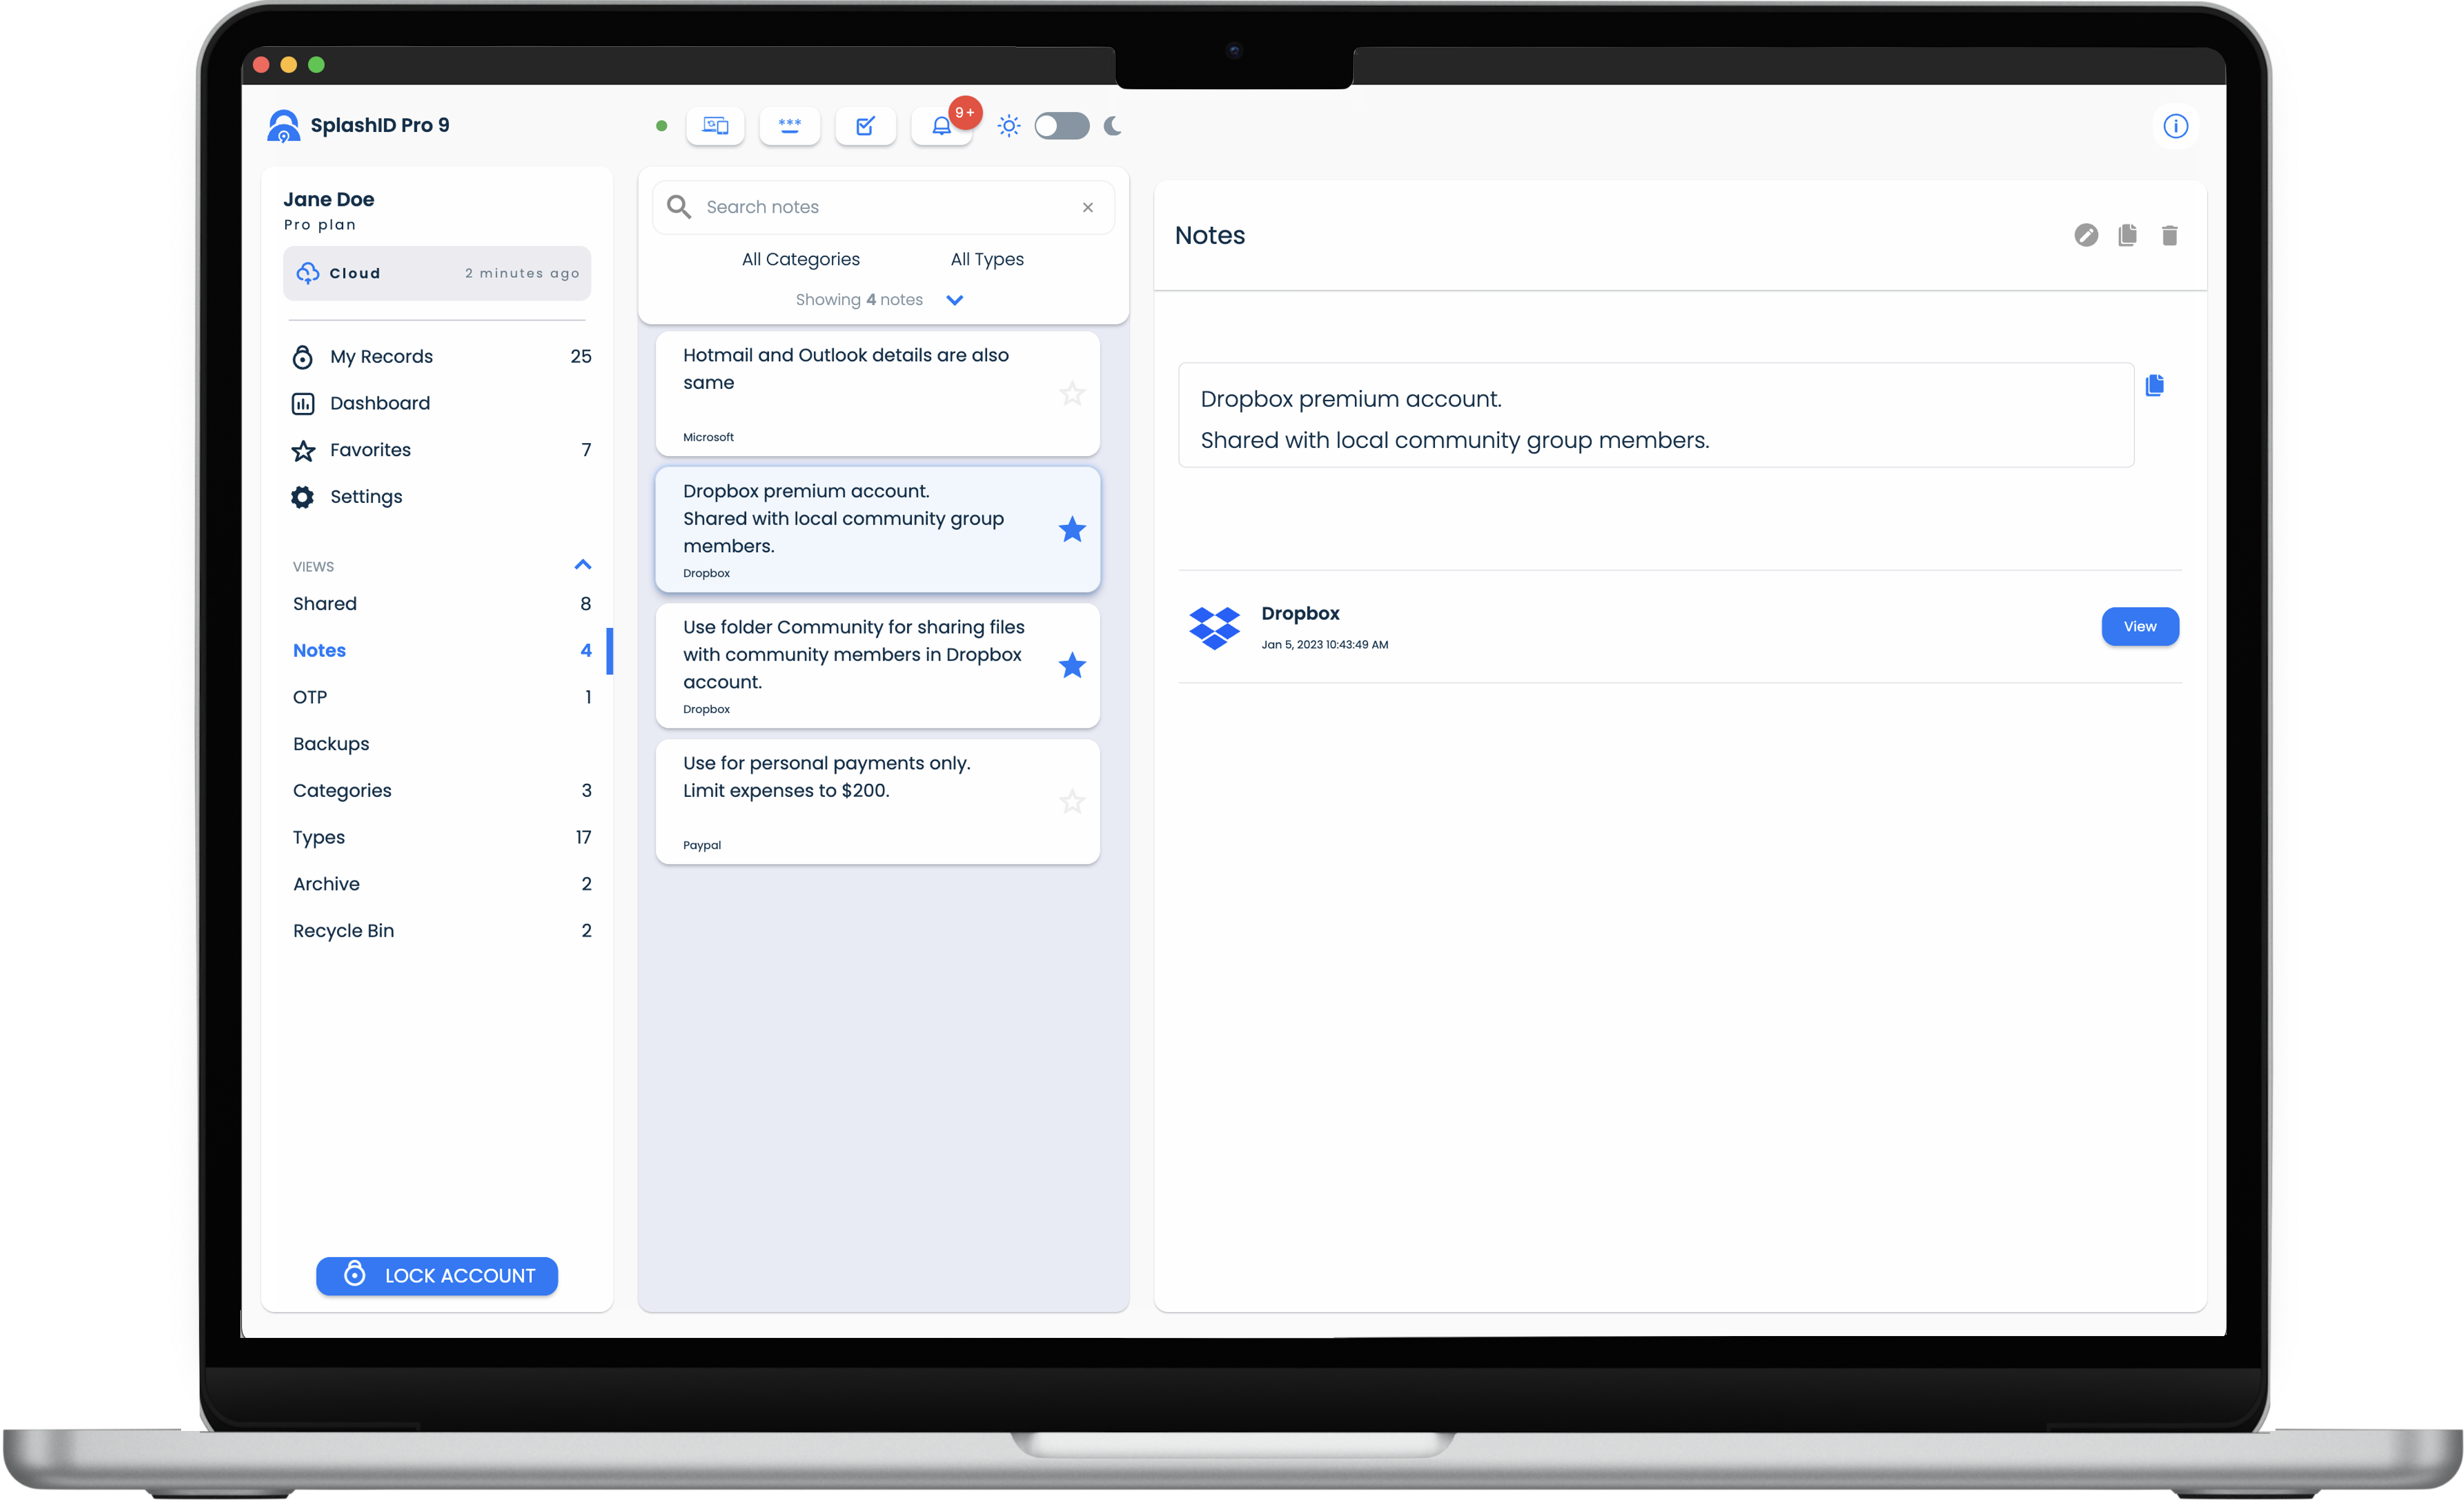
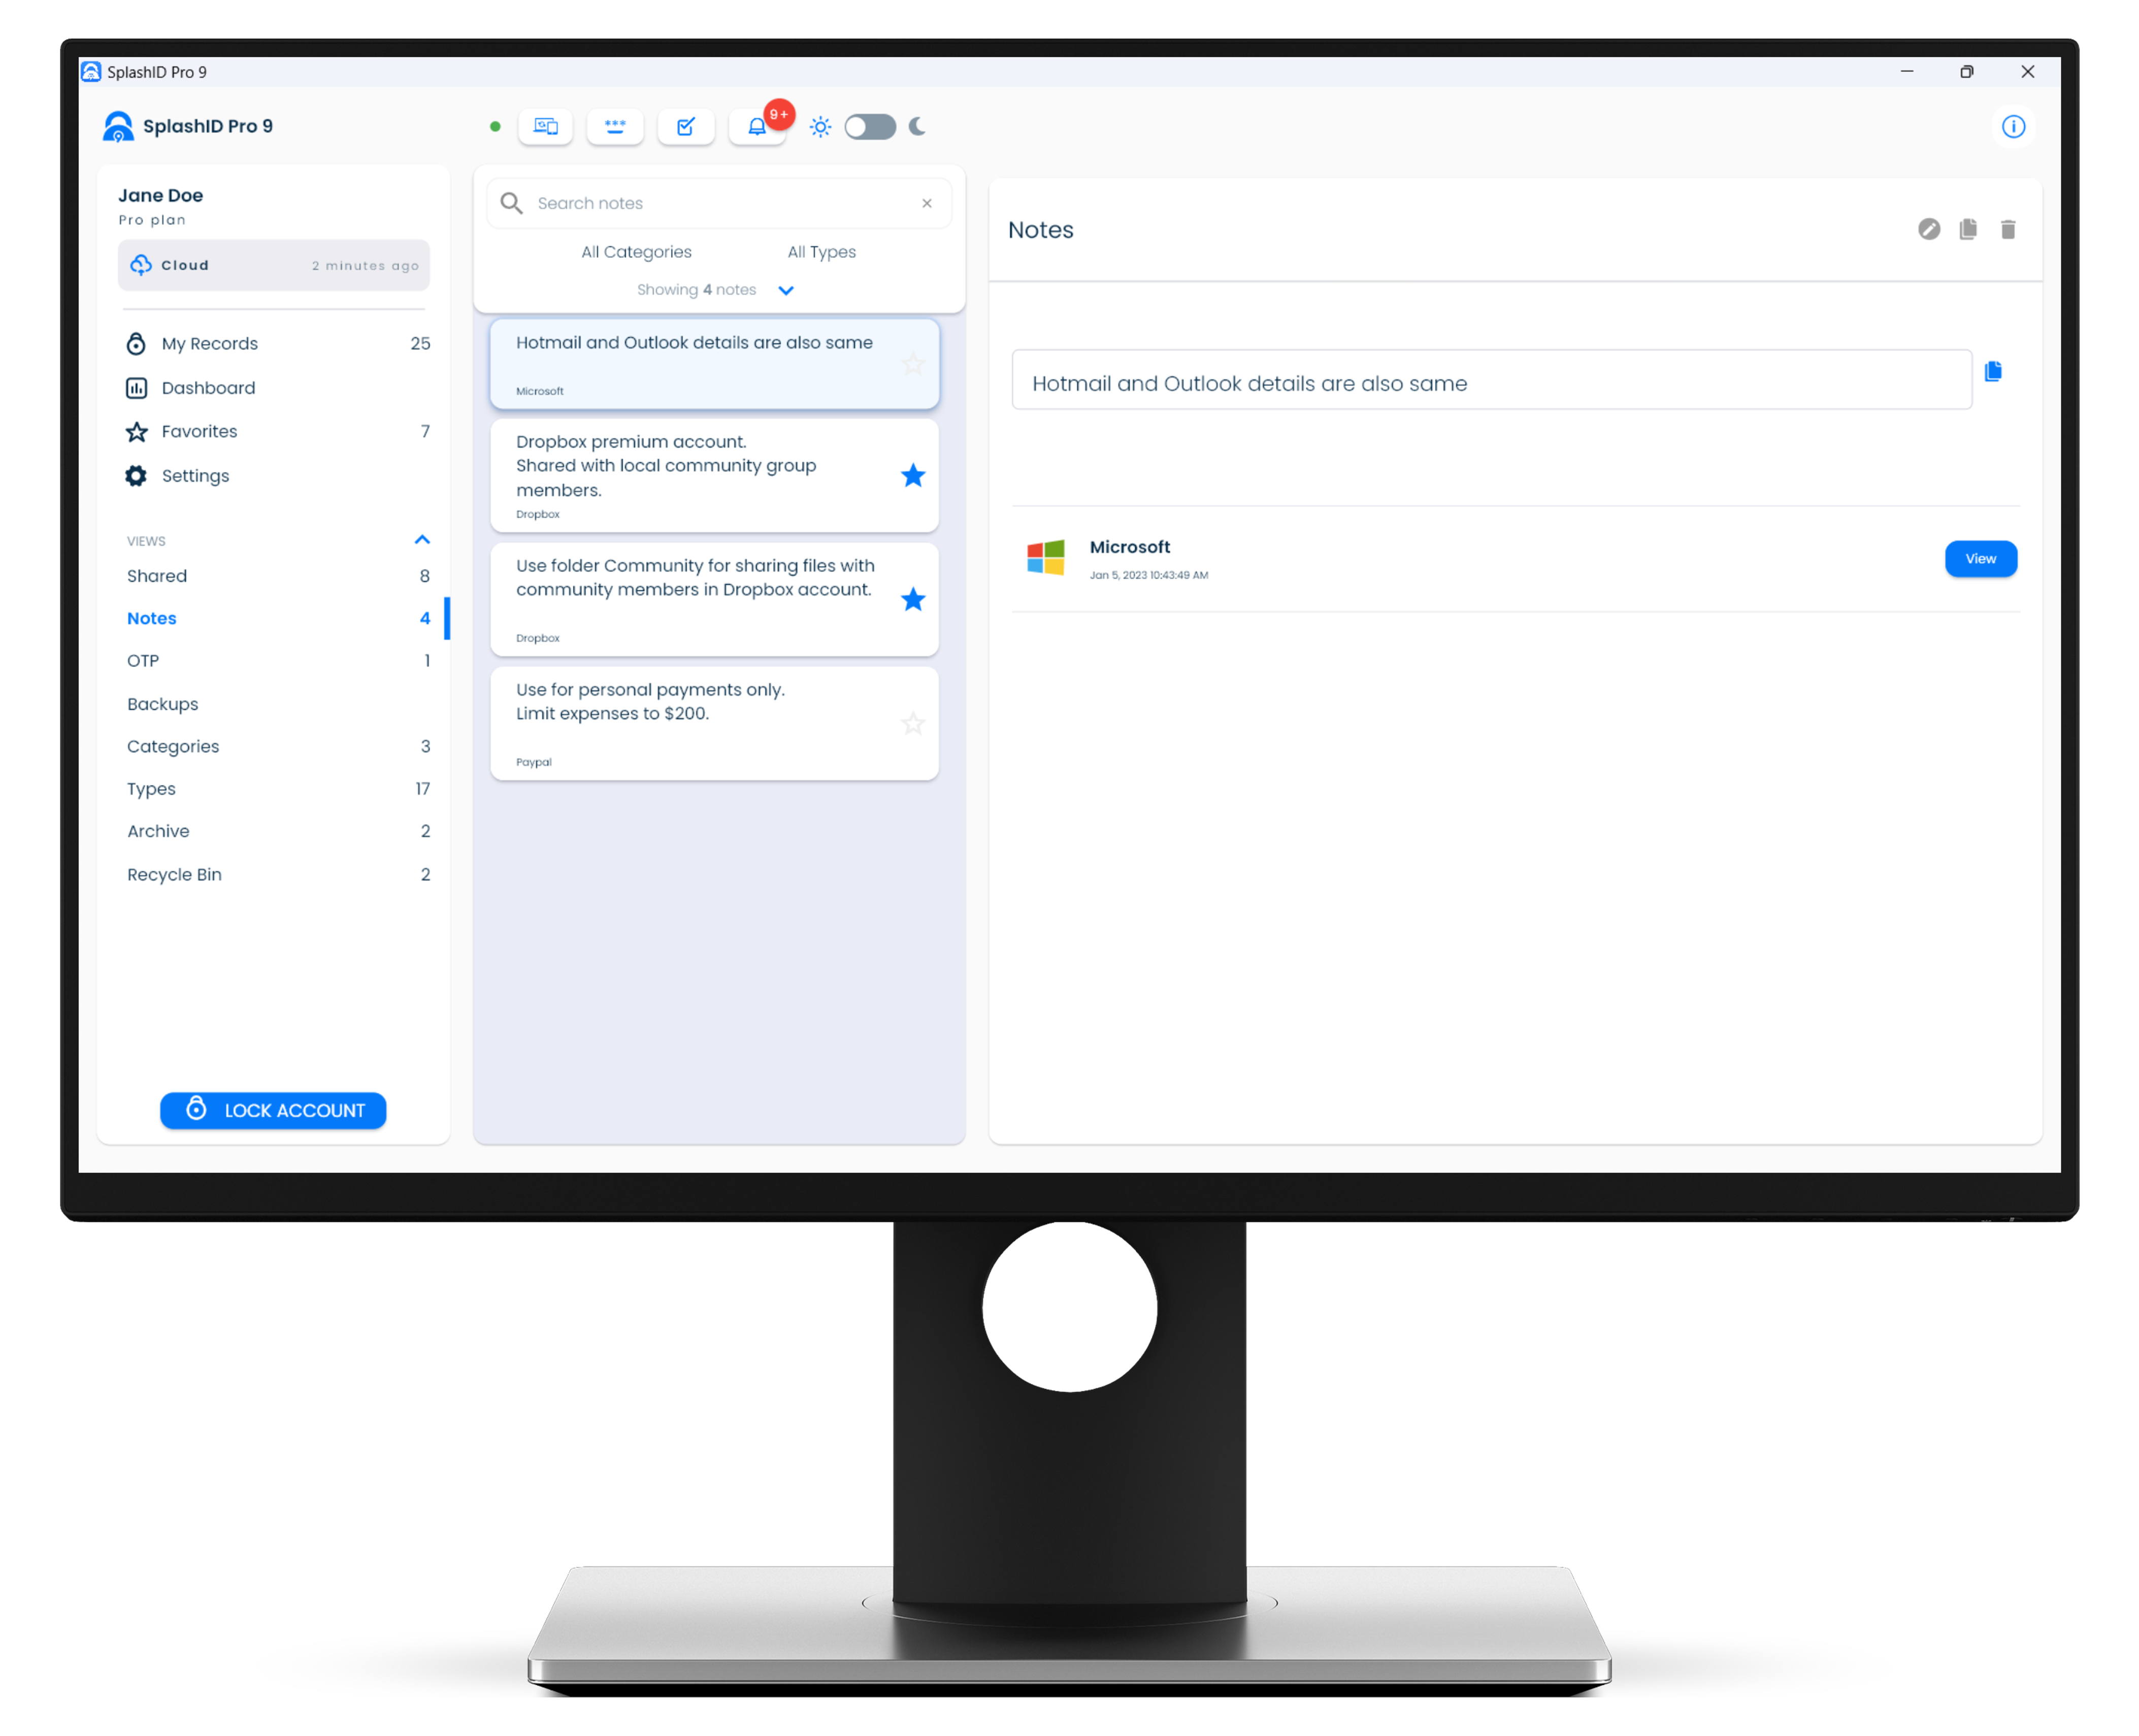
| Laptops and desktops | 3 panel layout |
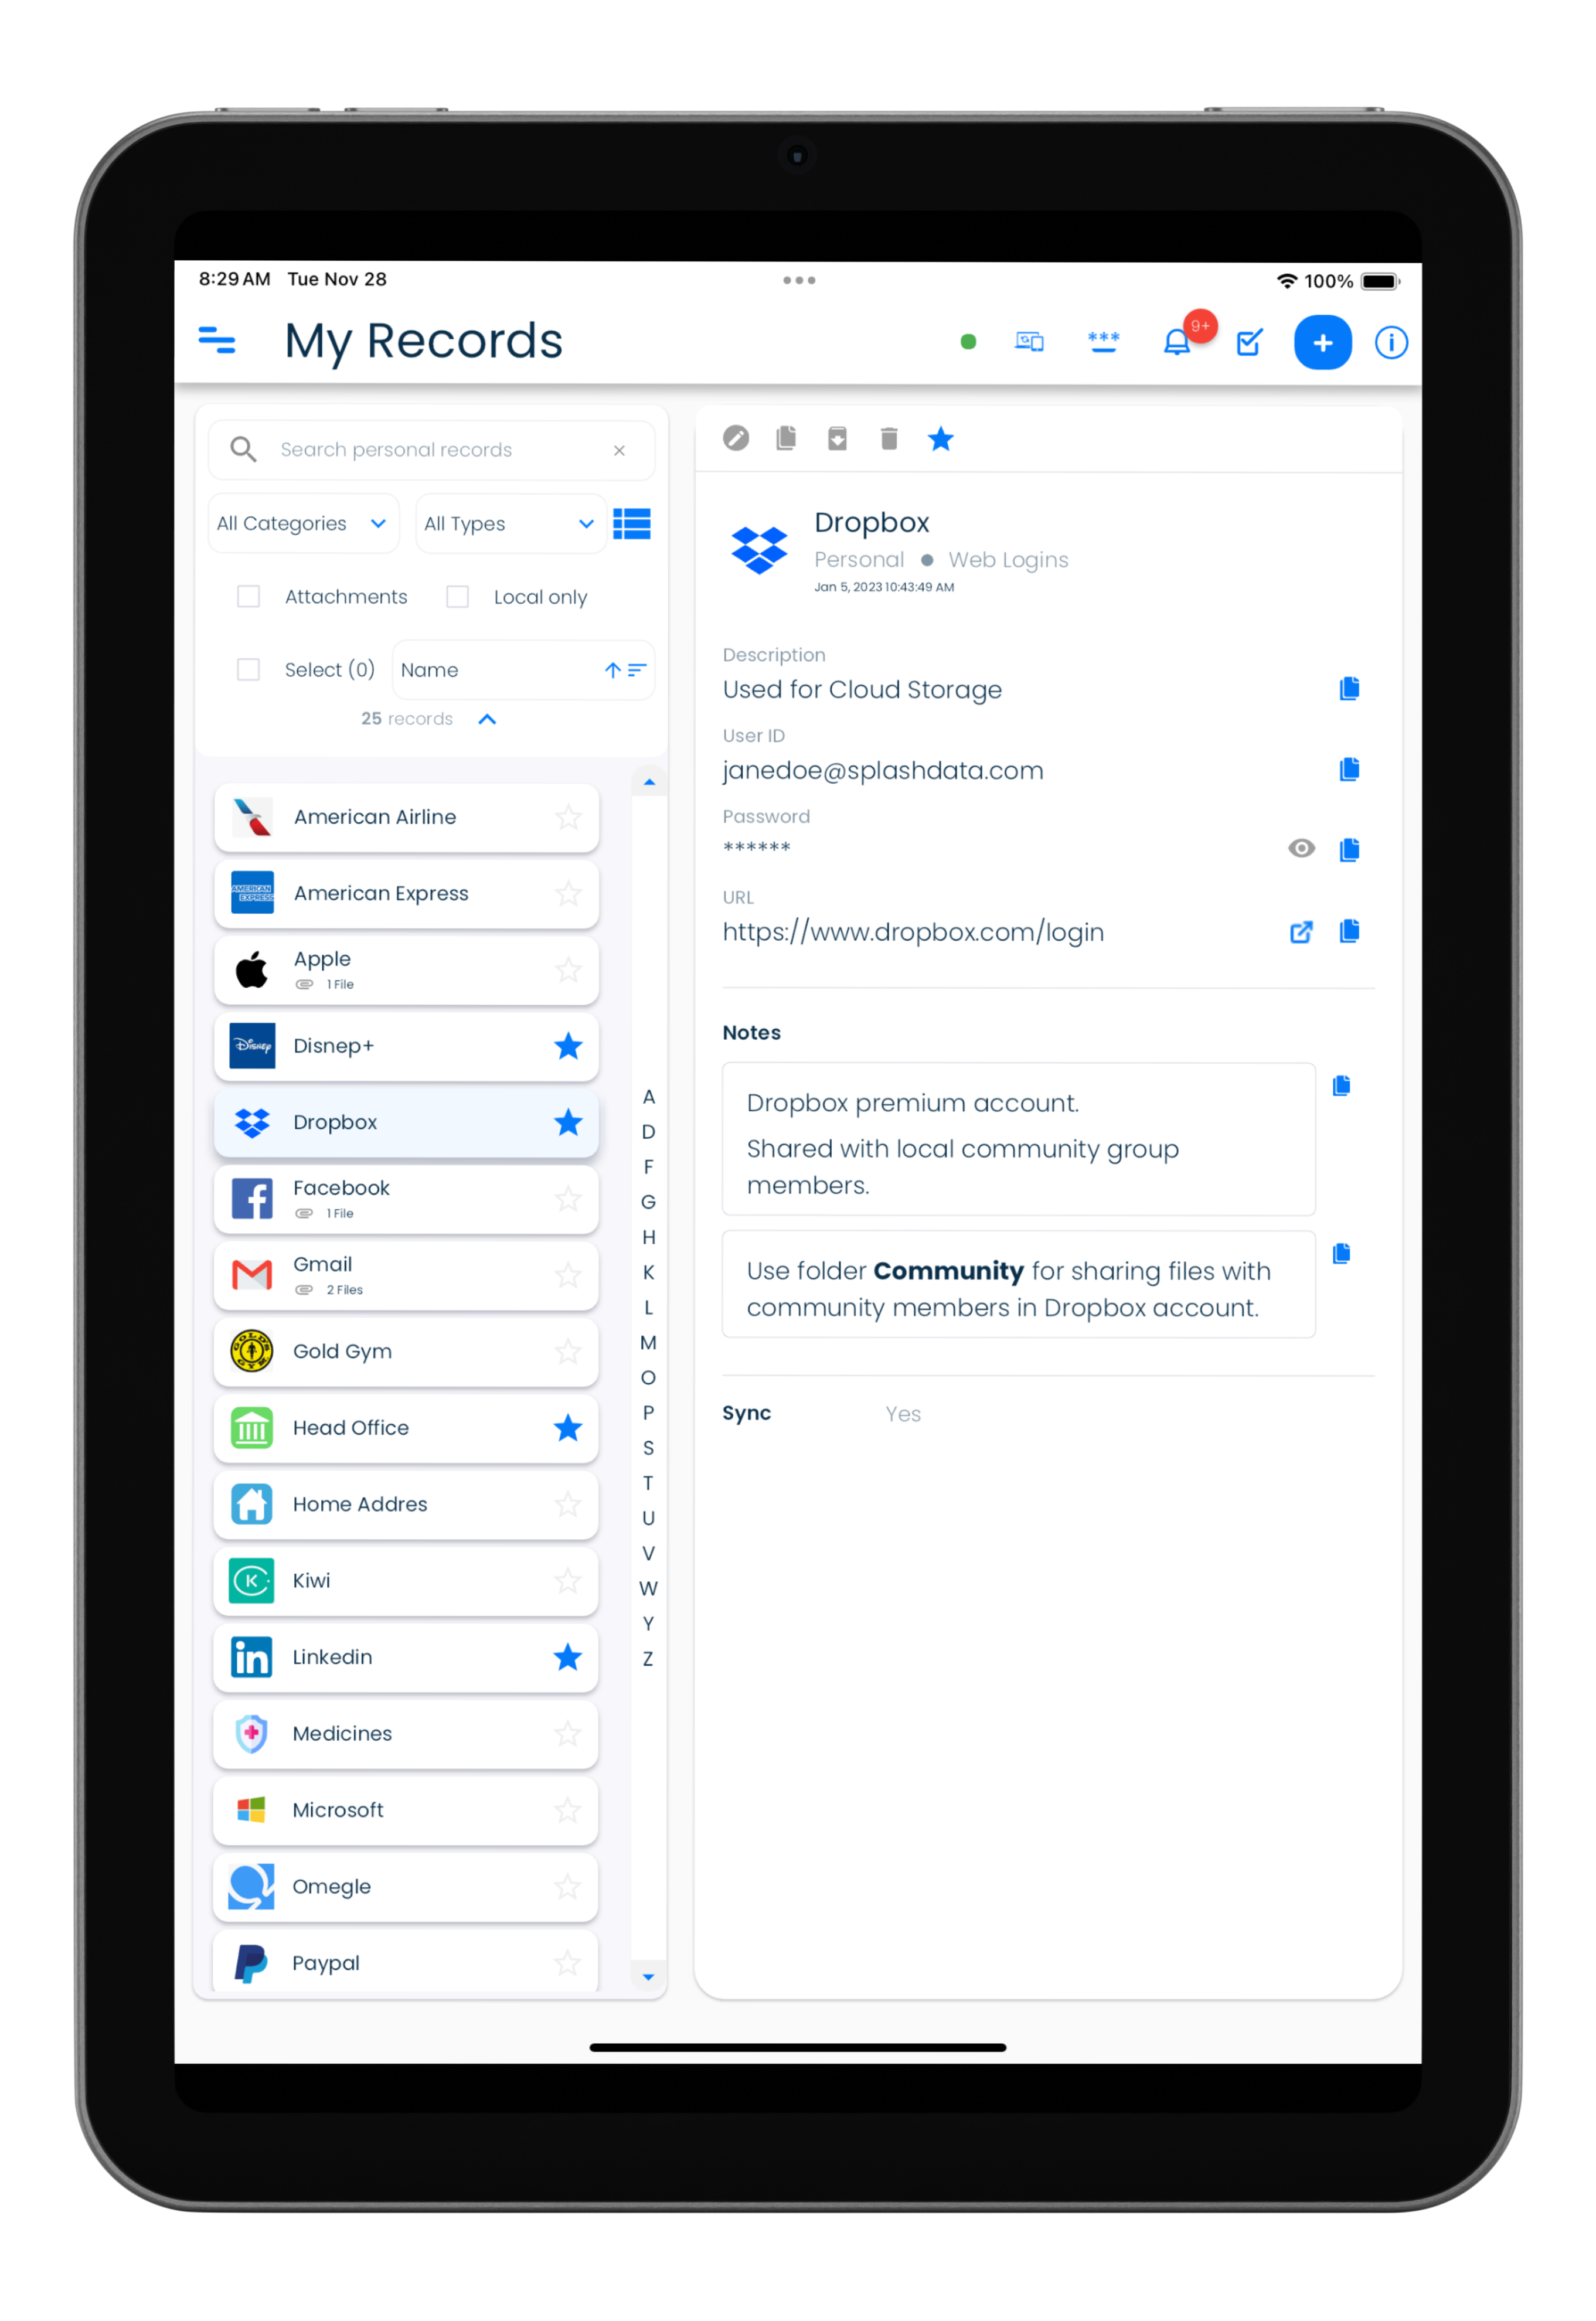
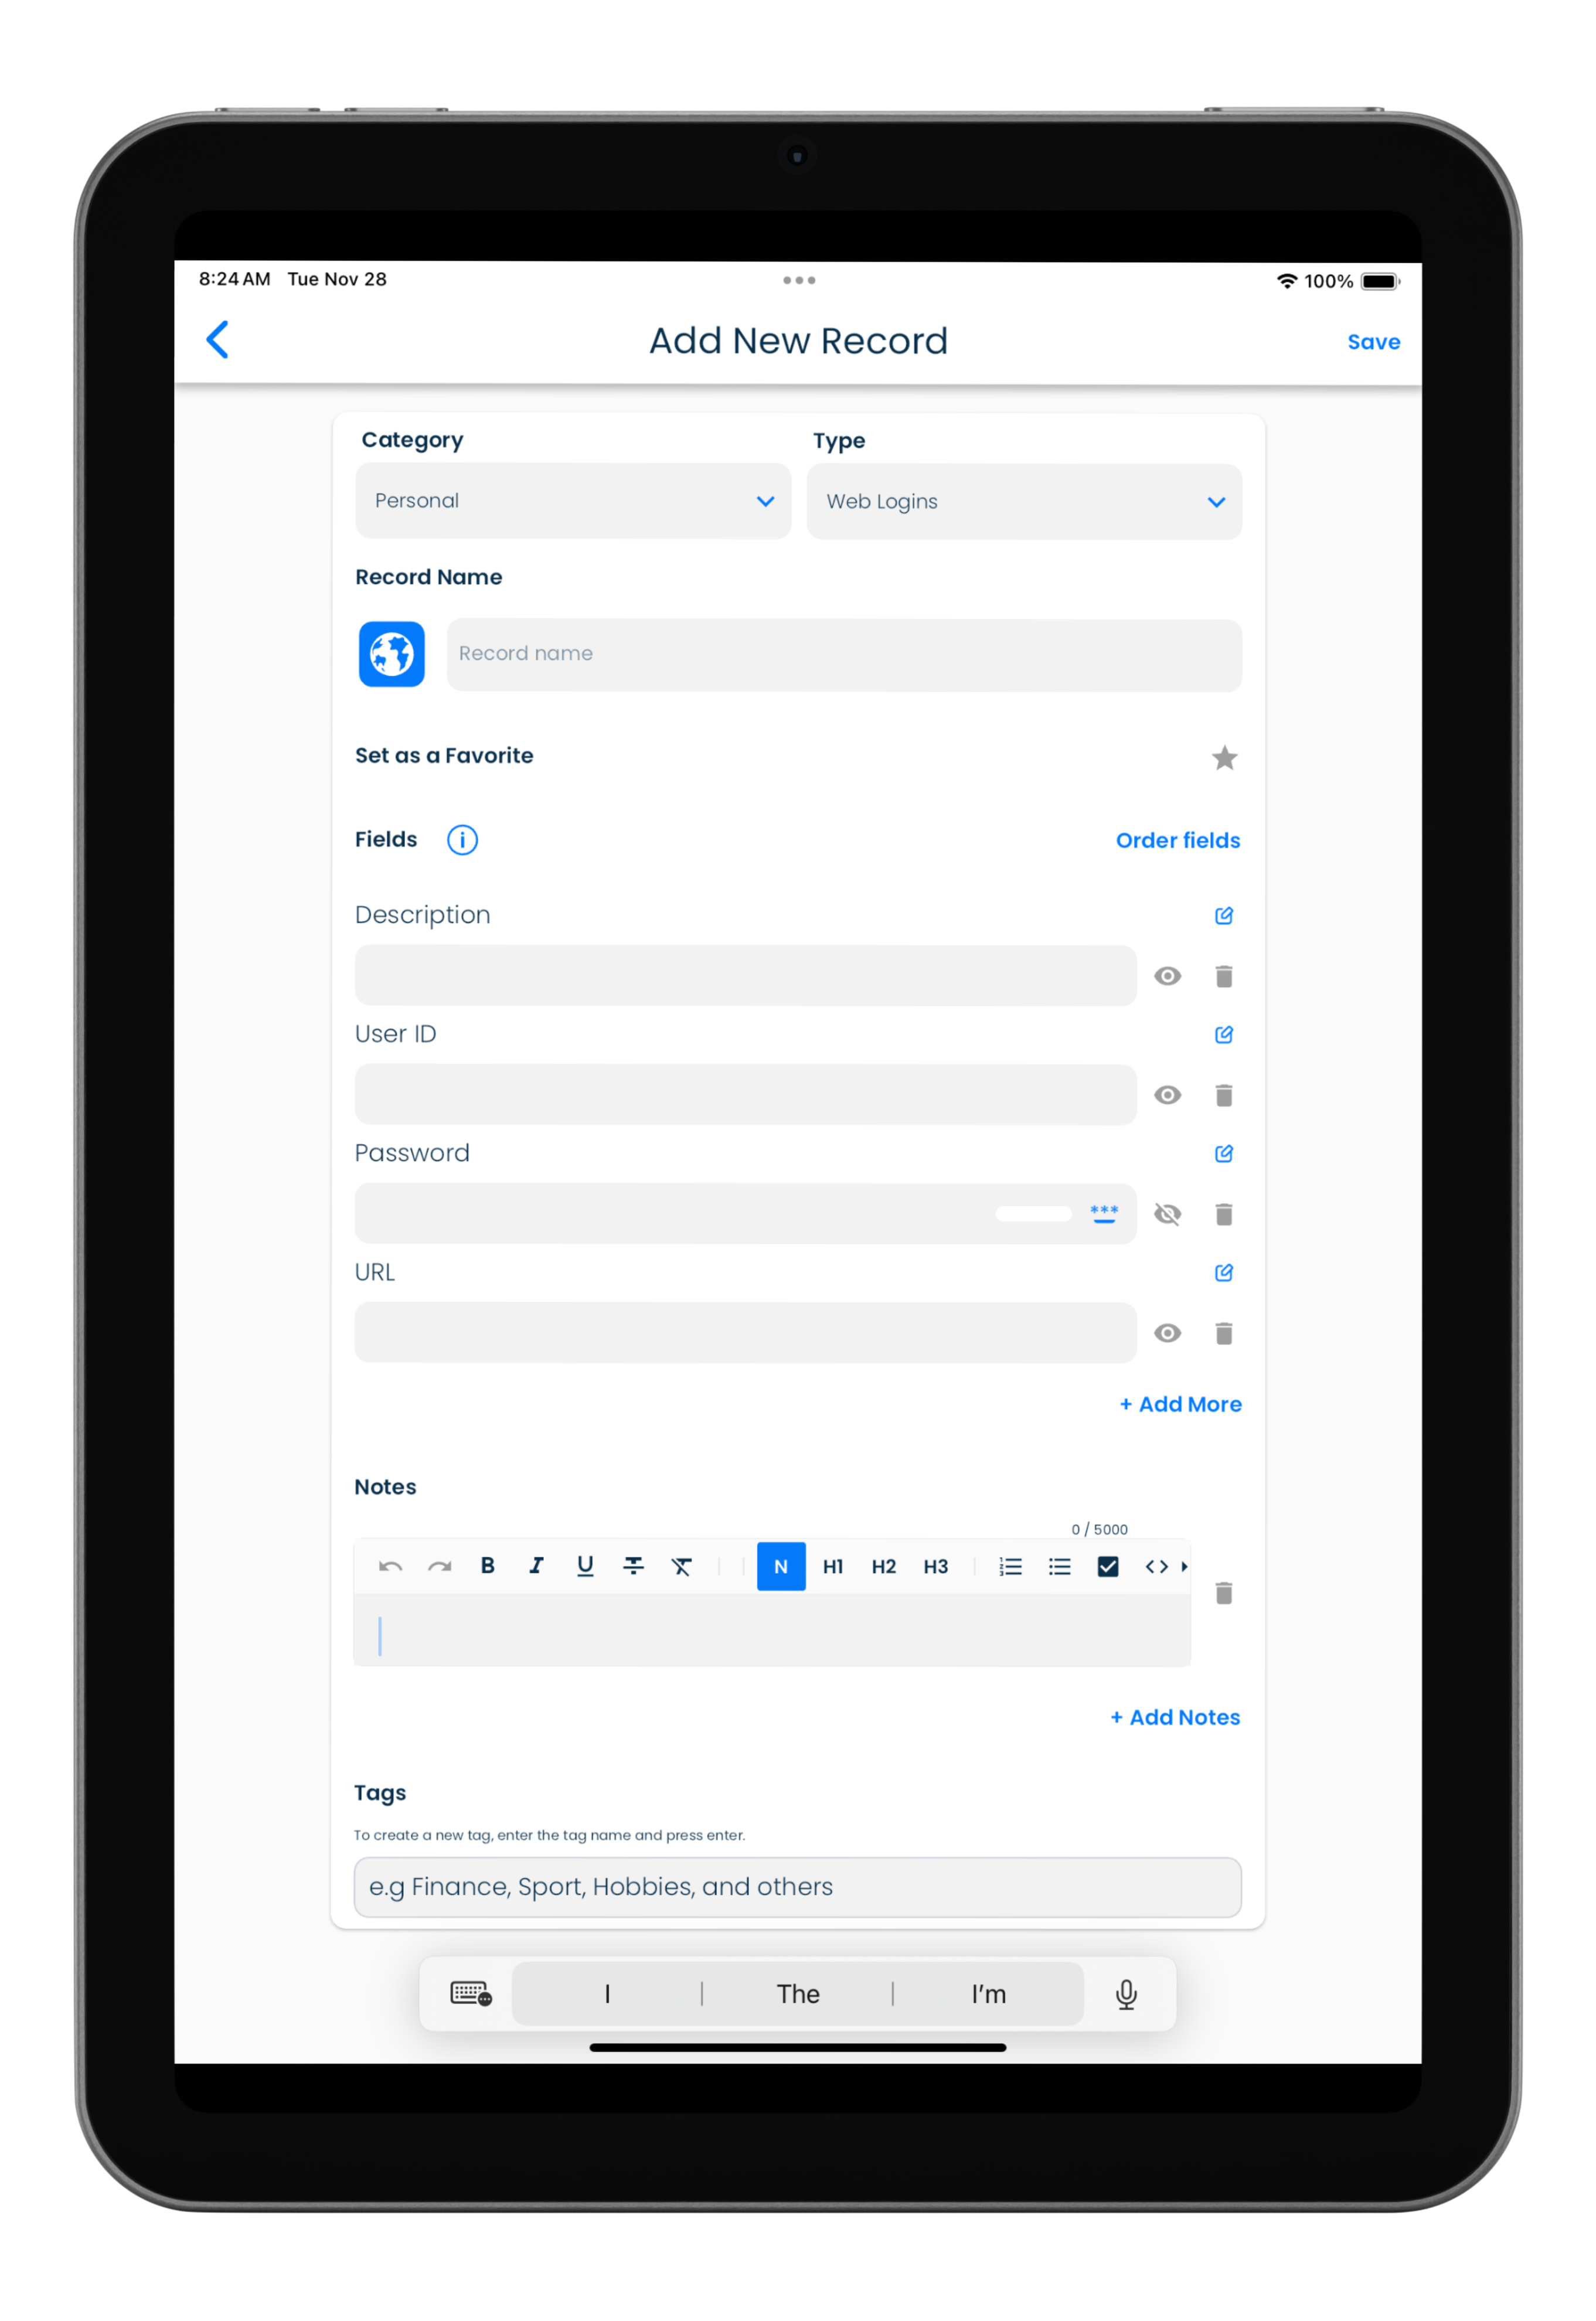
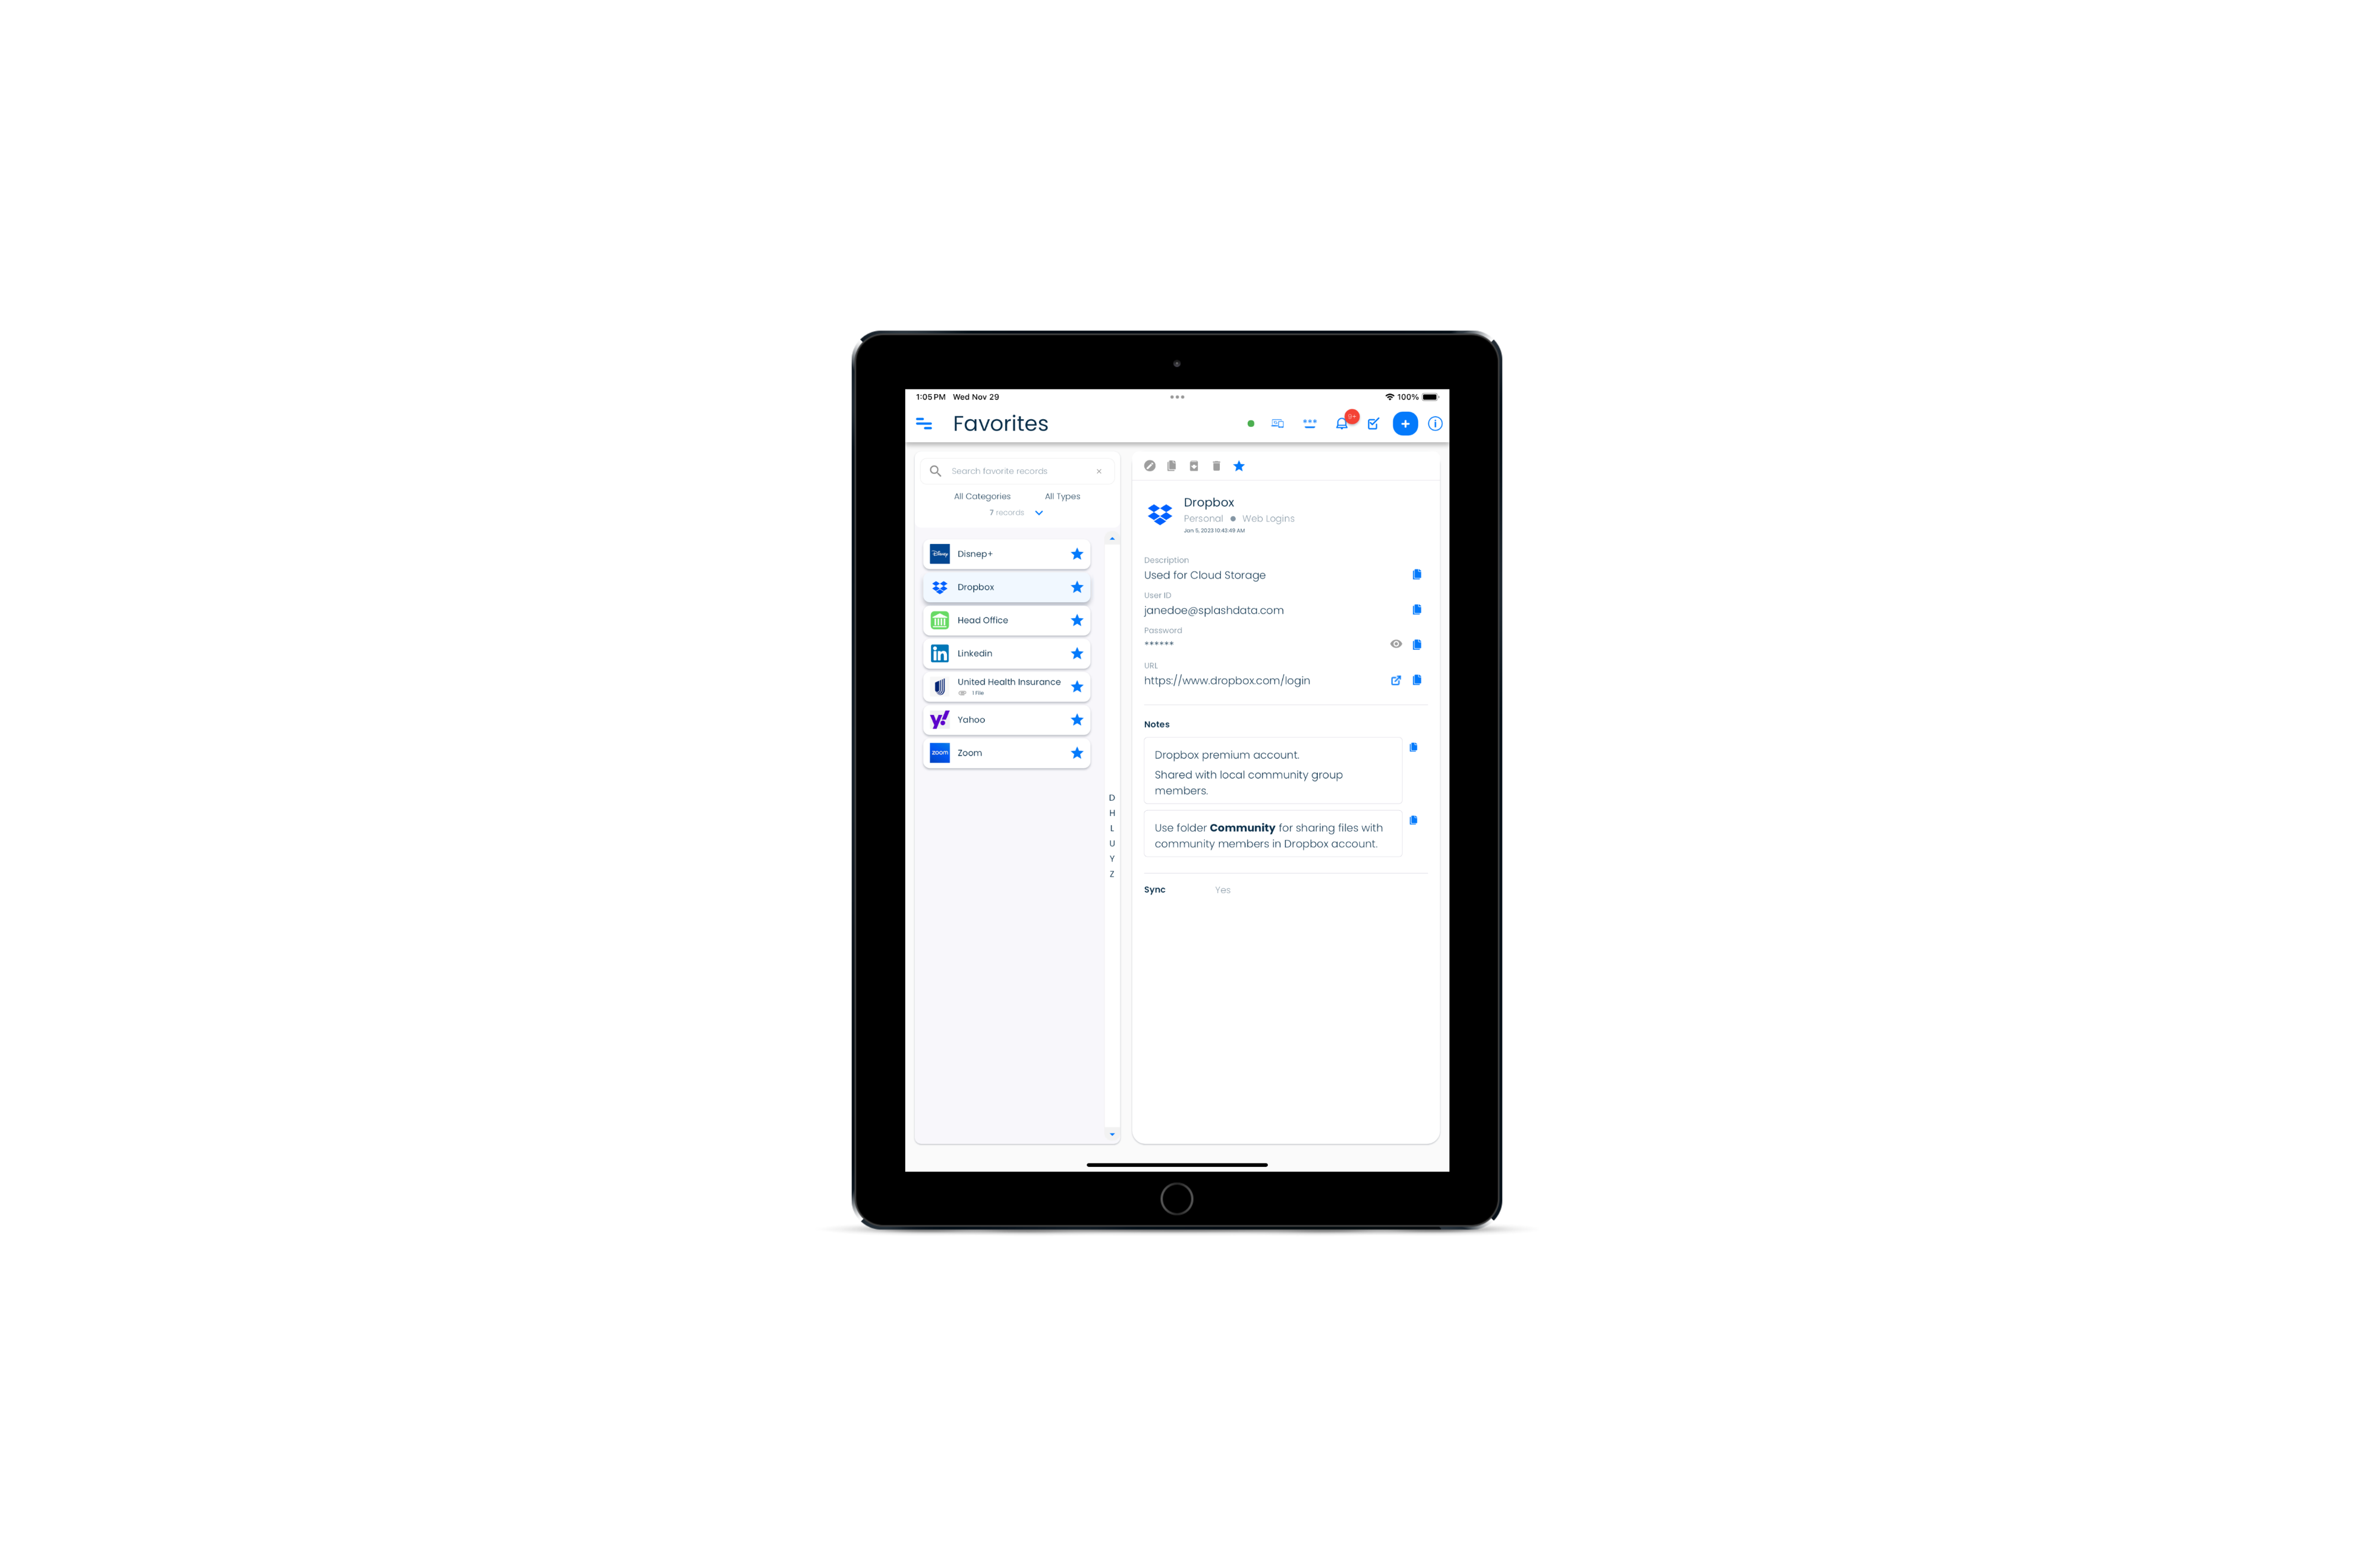
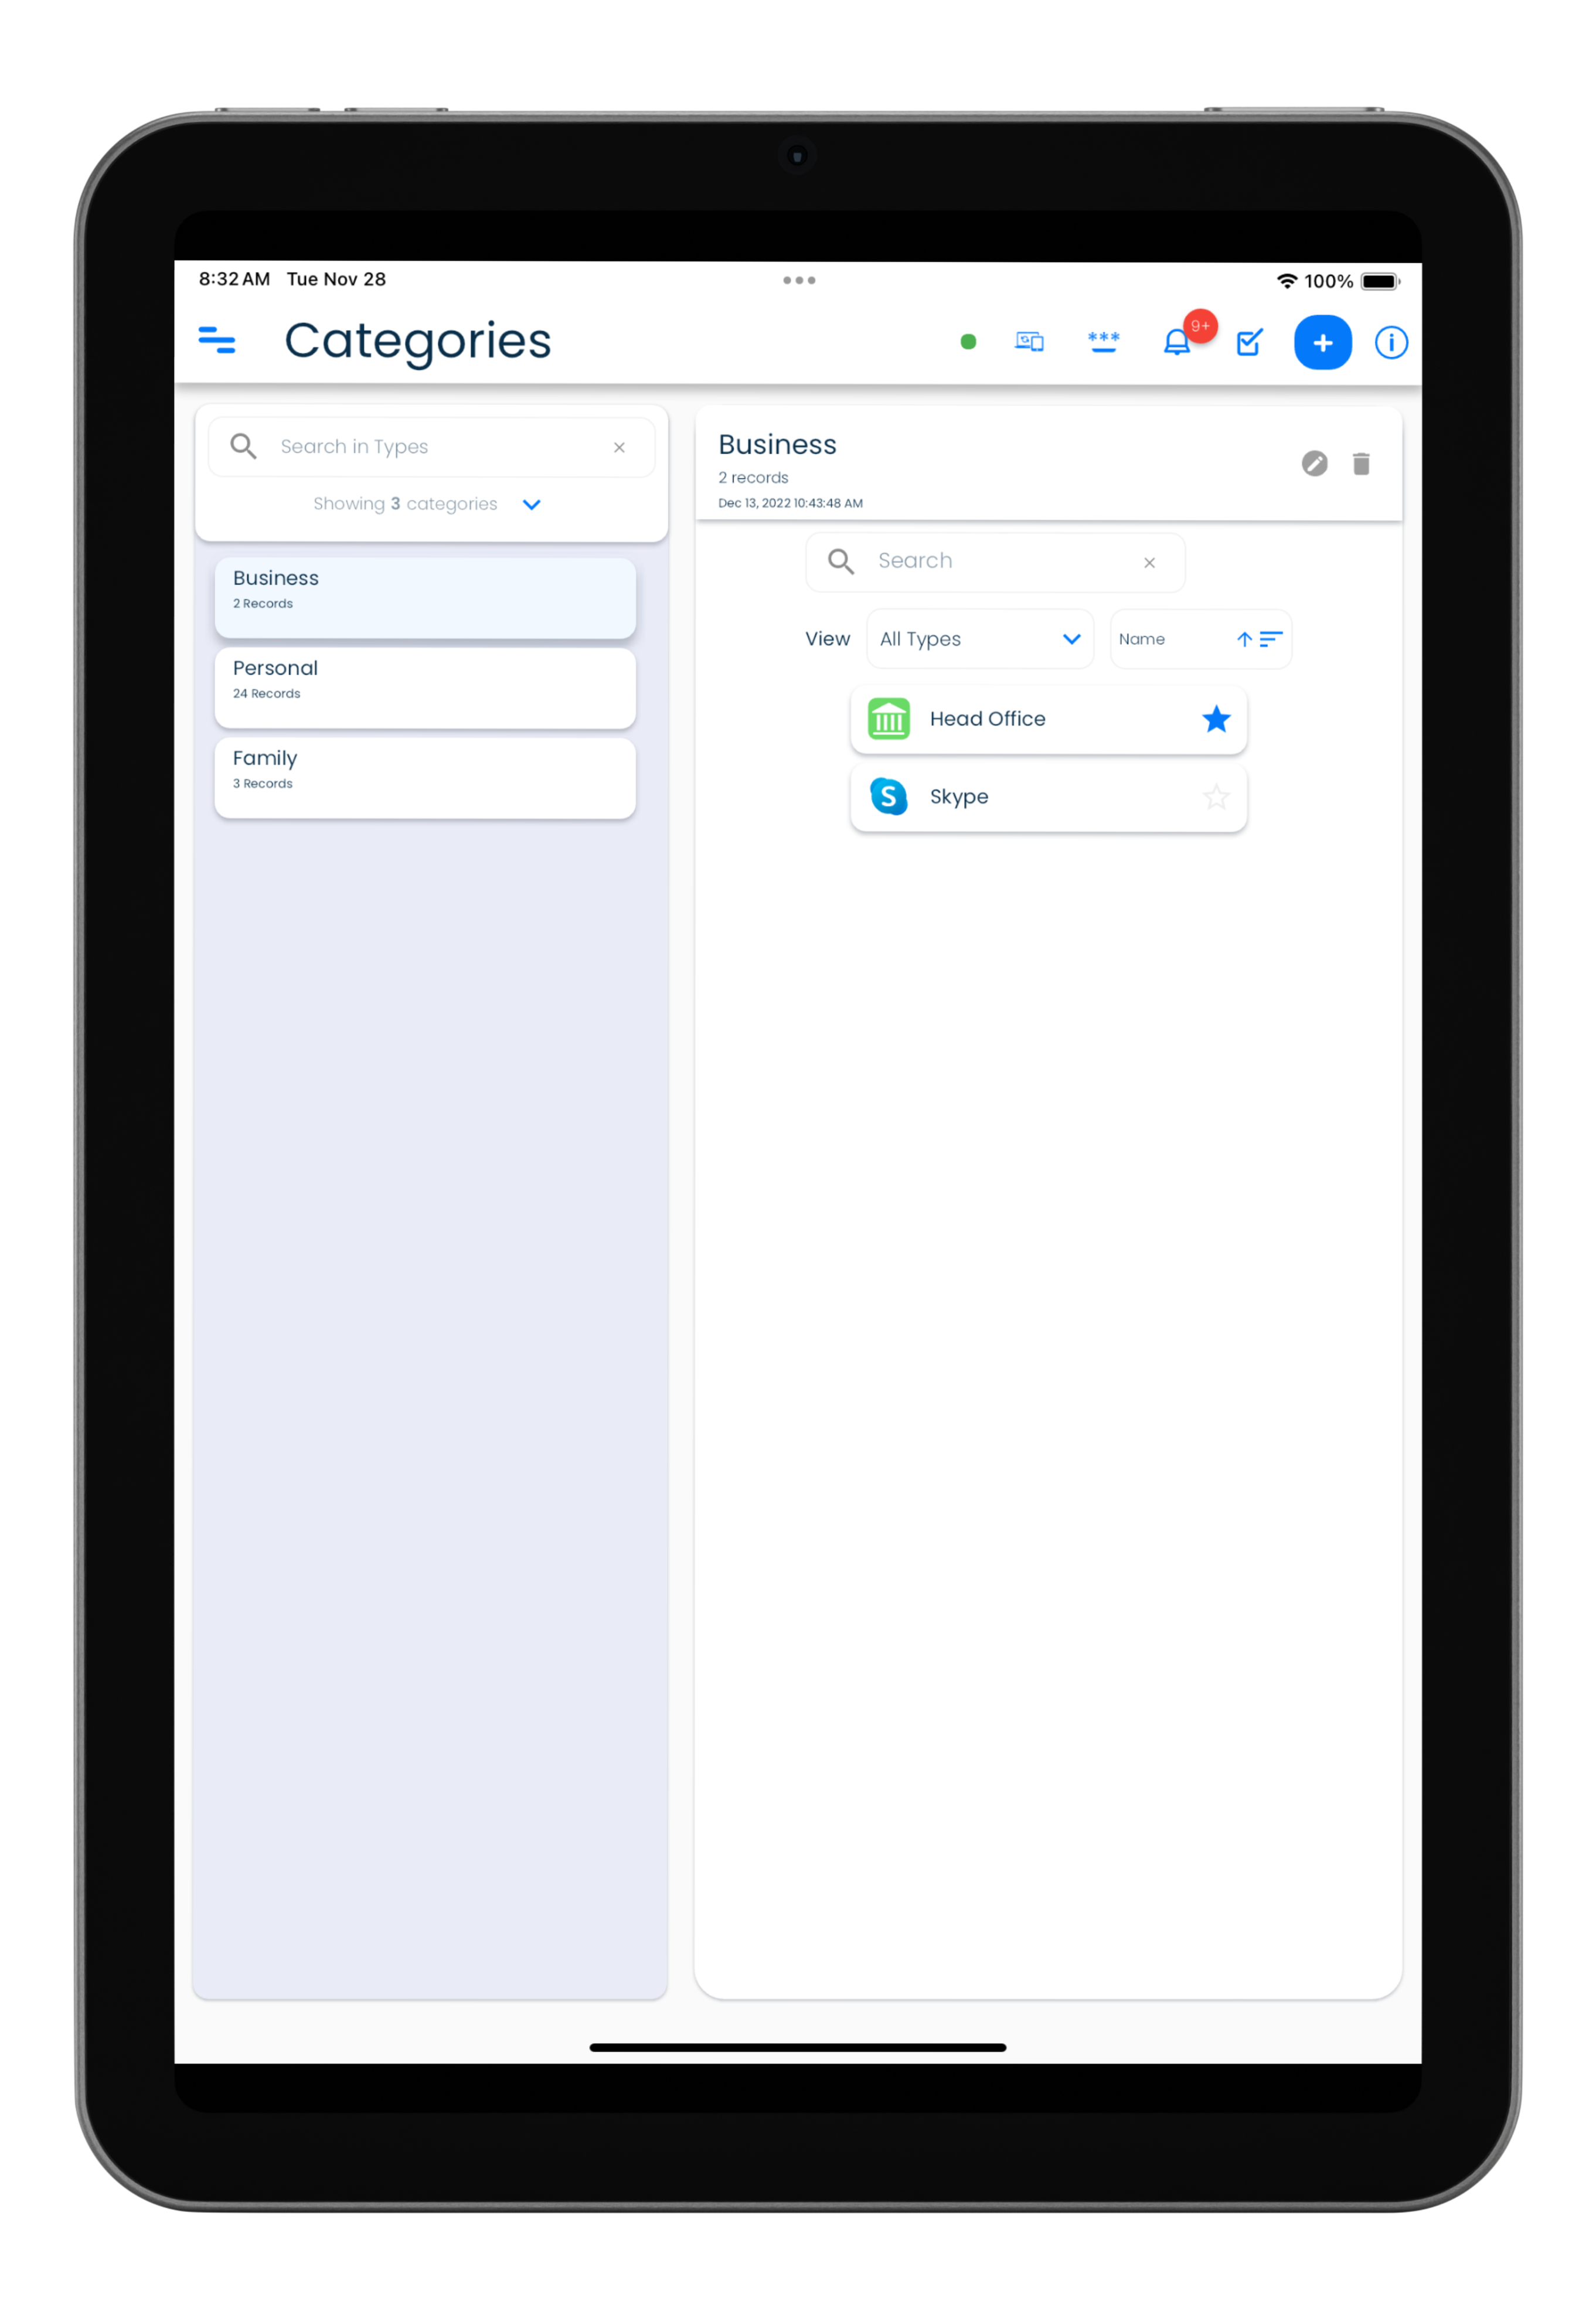
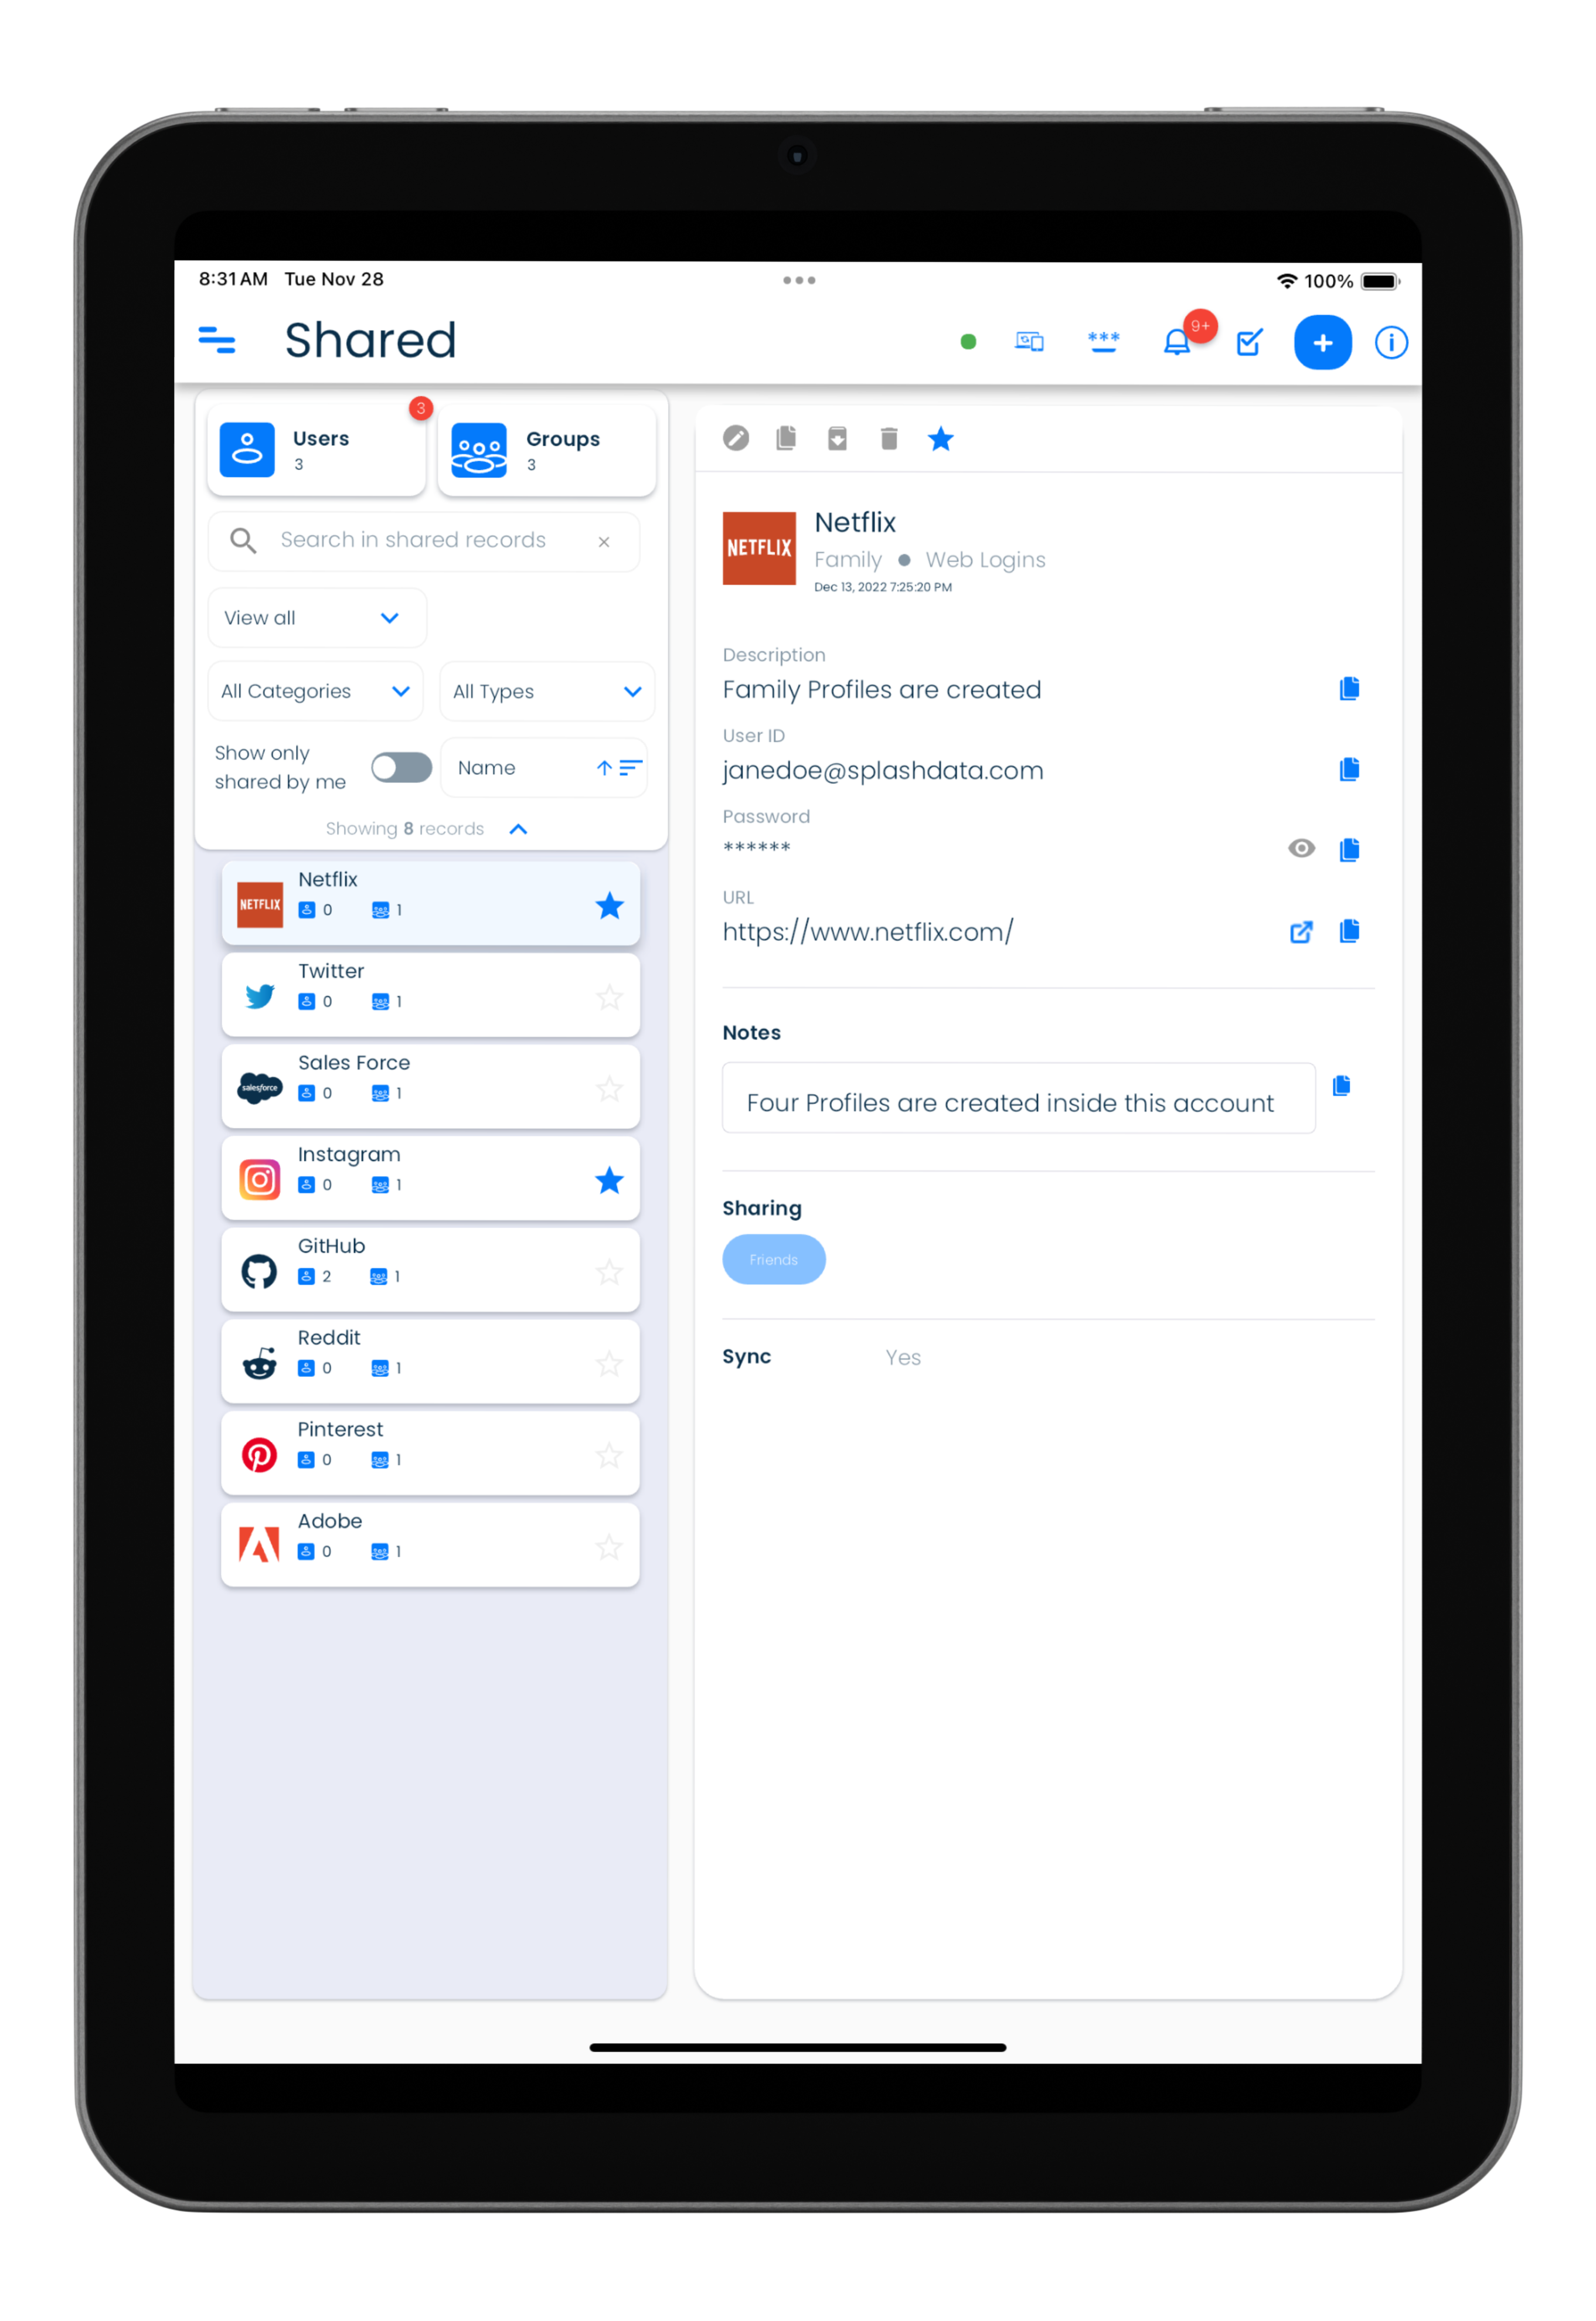
| Tablets | 2 panel layout |
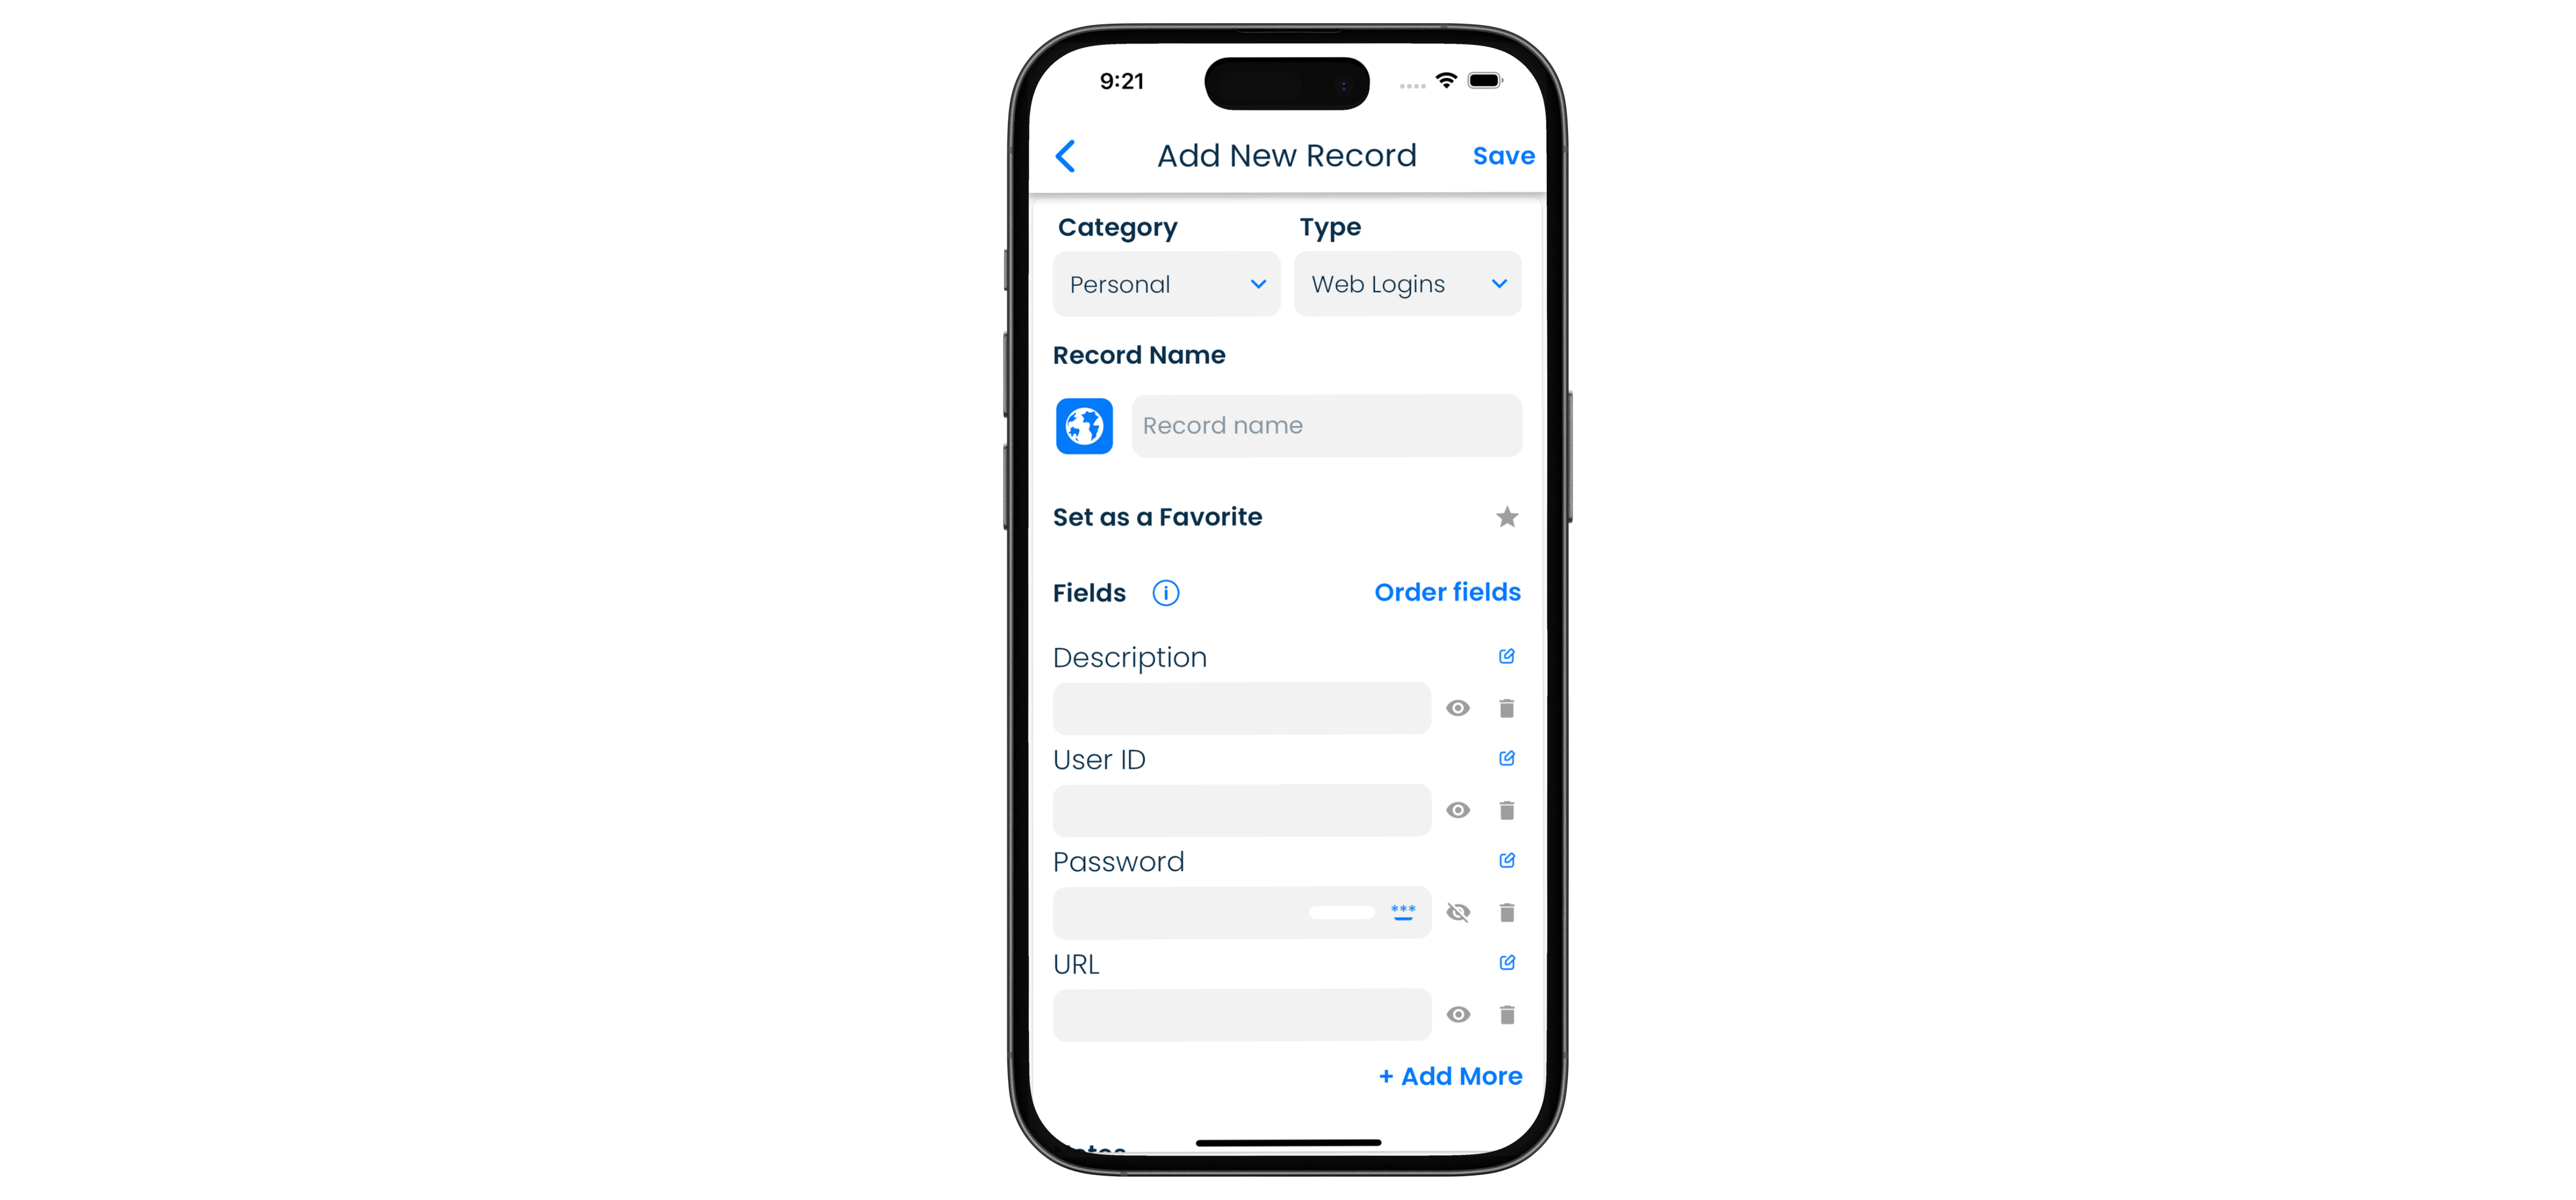
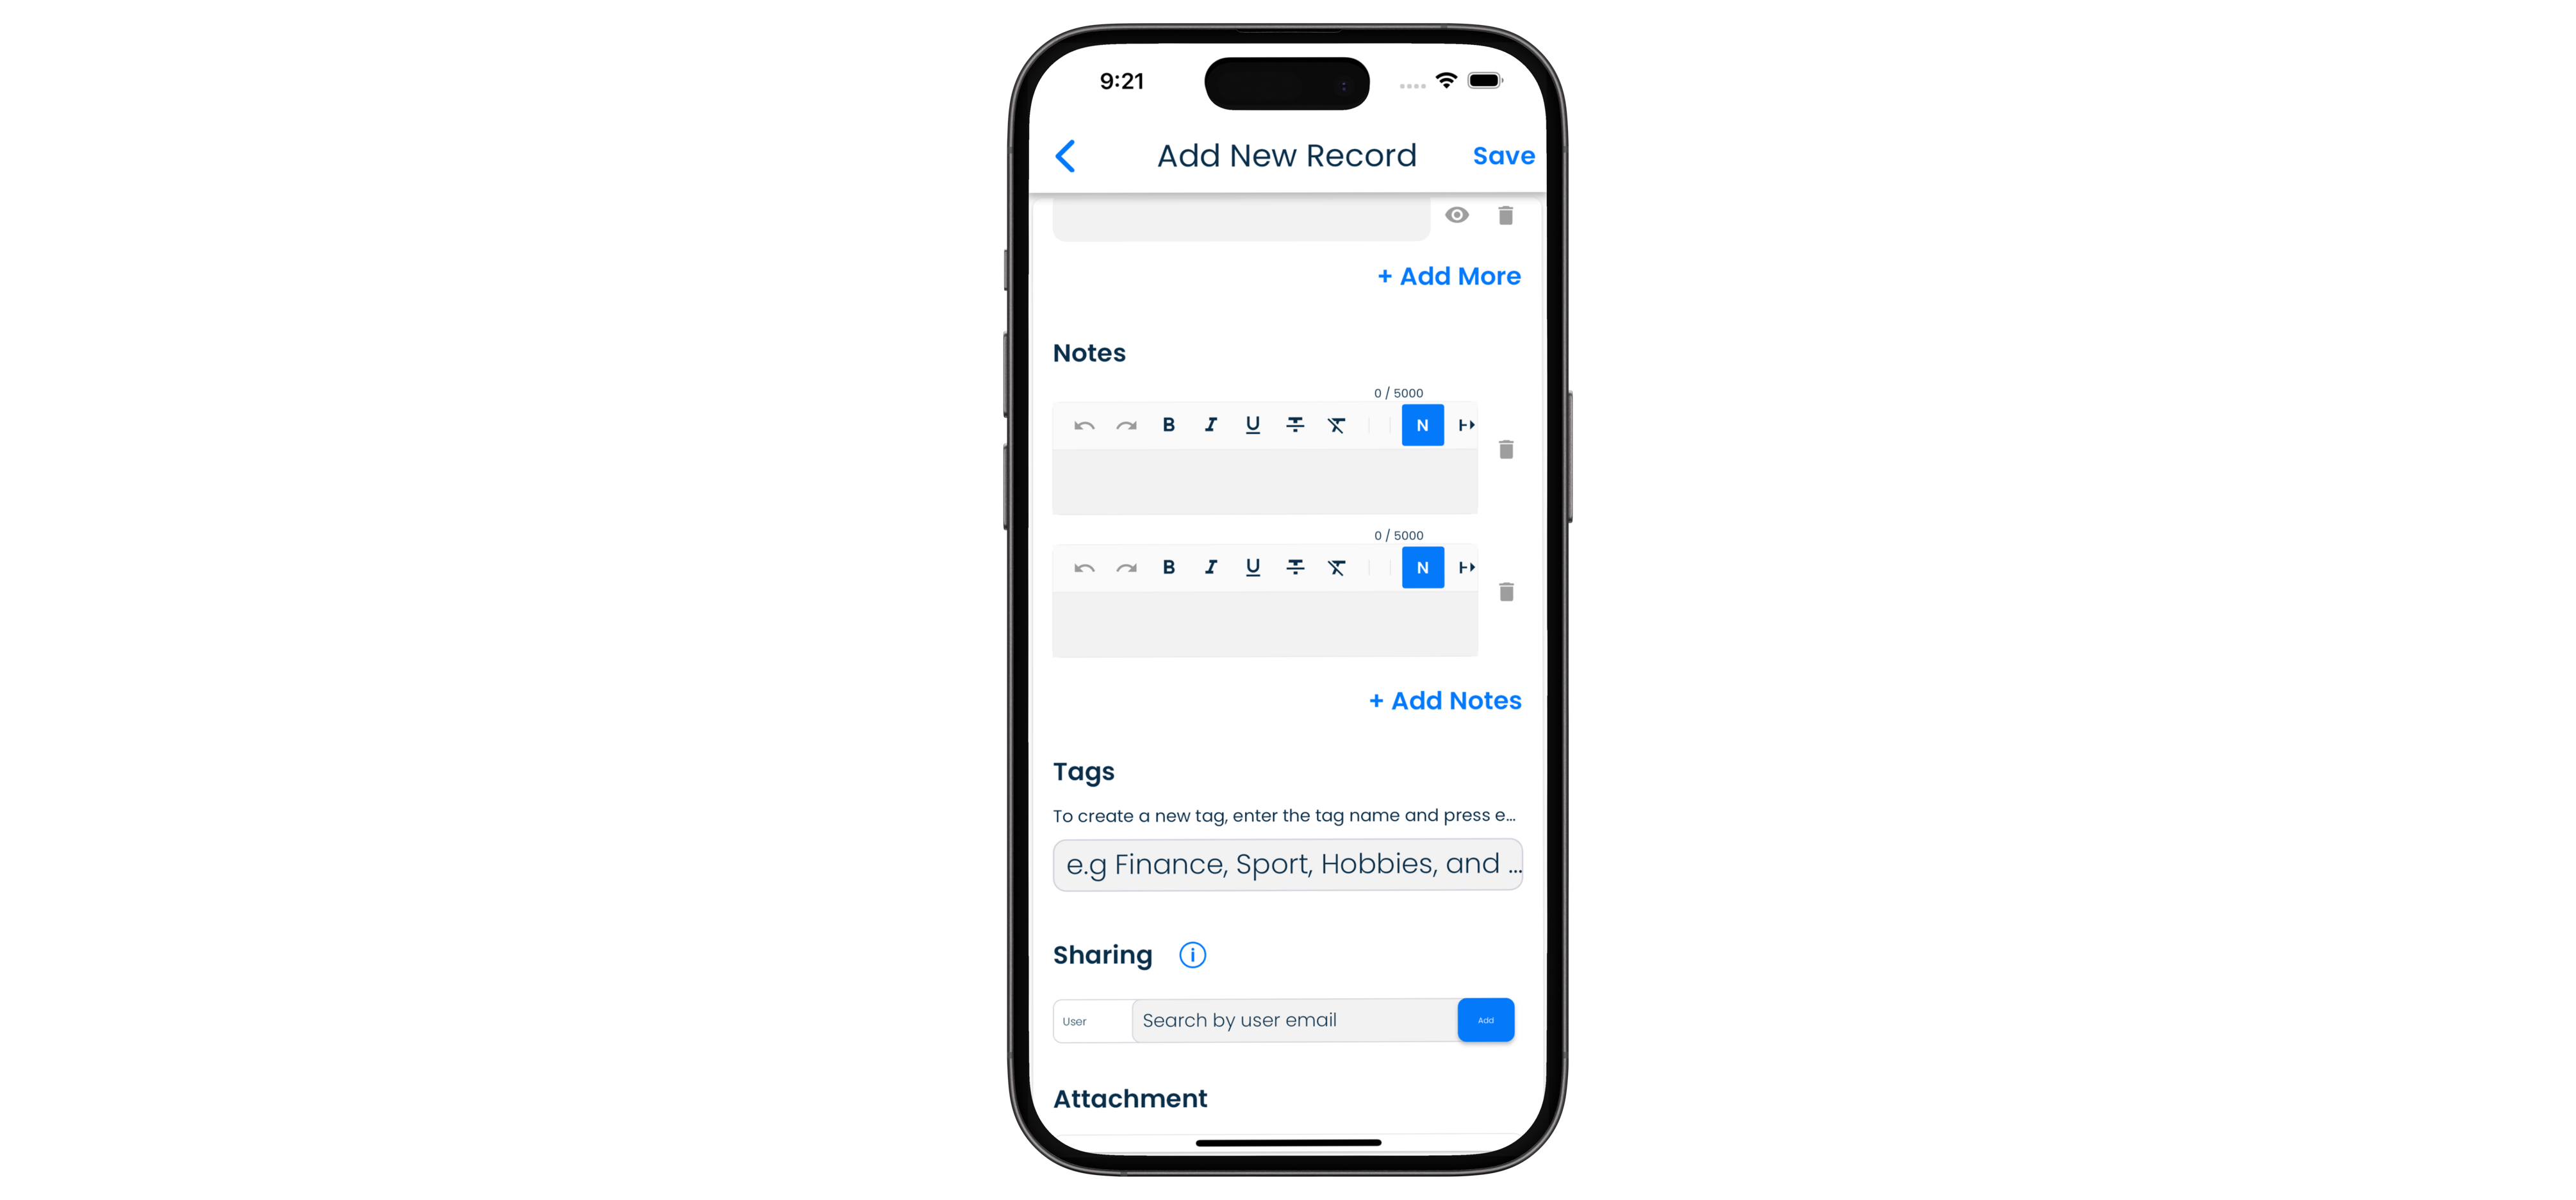
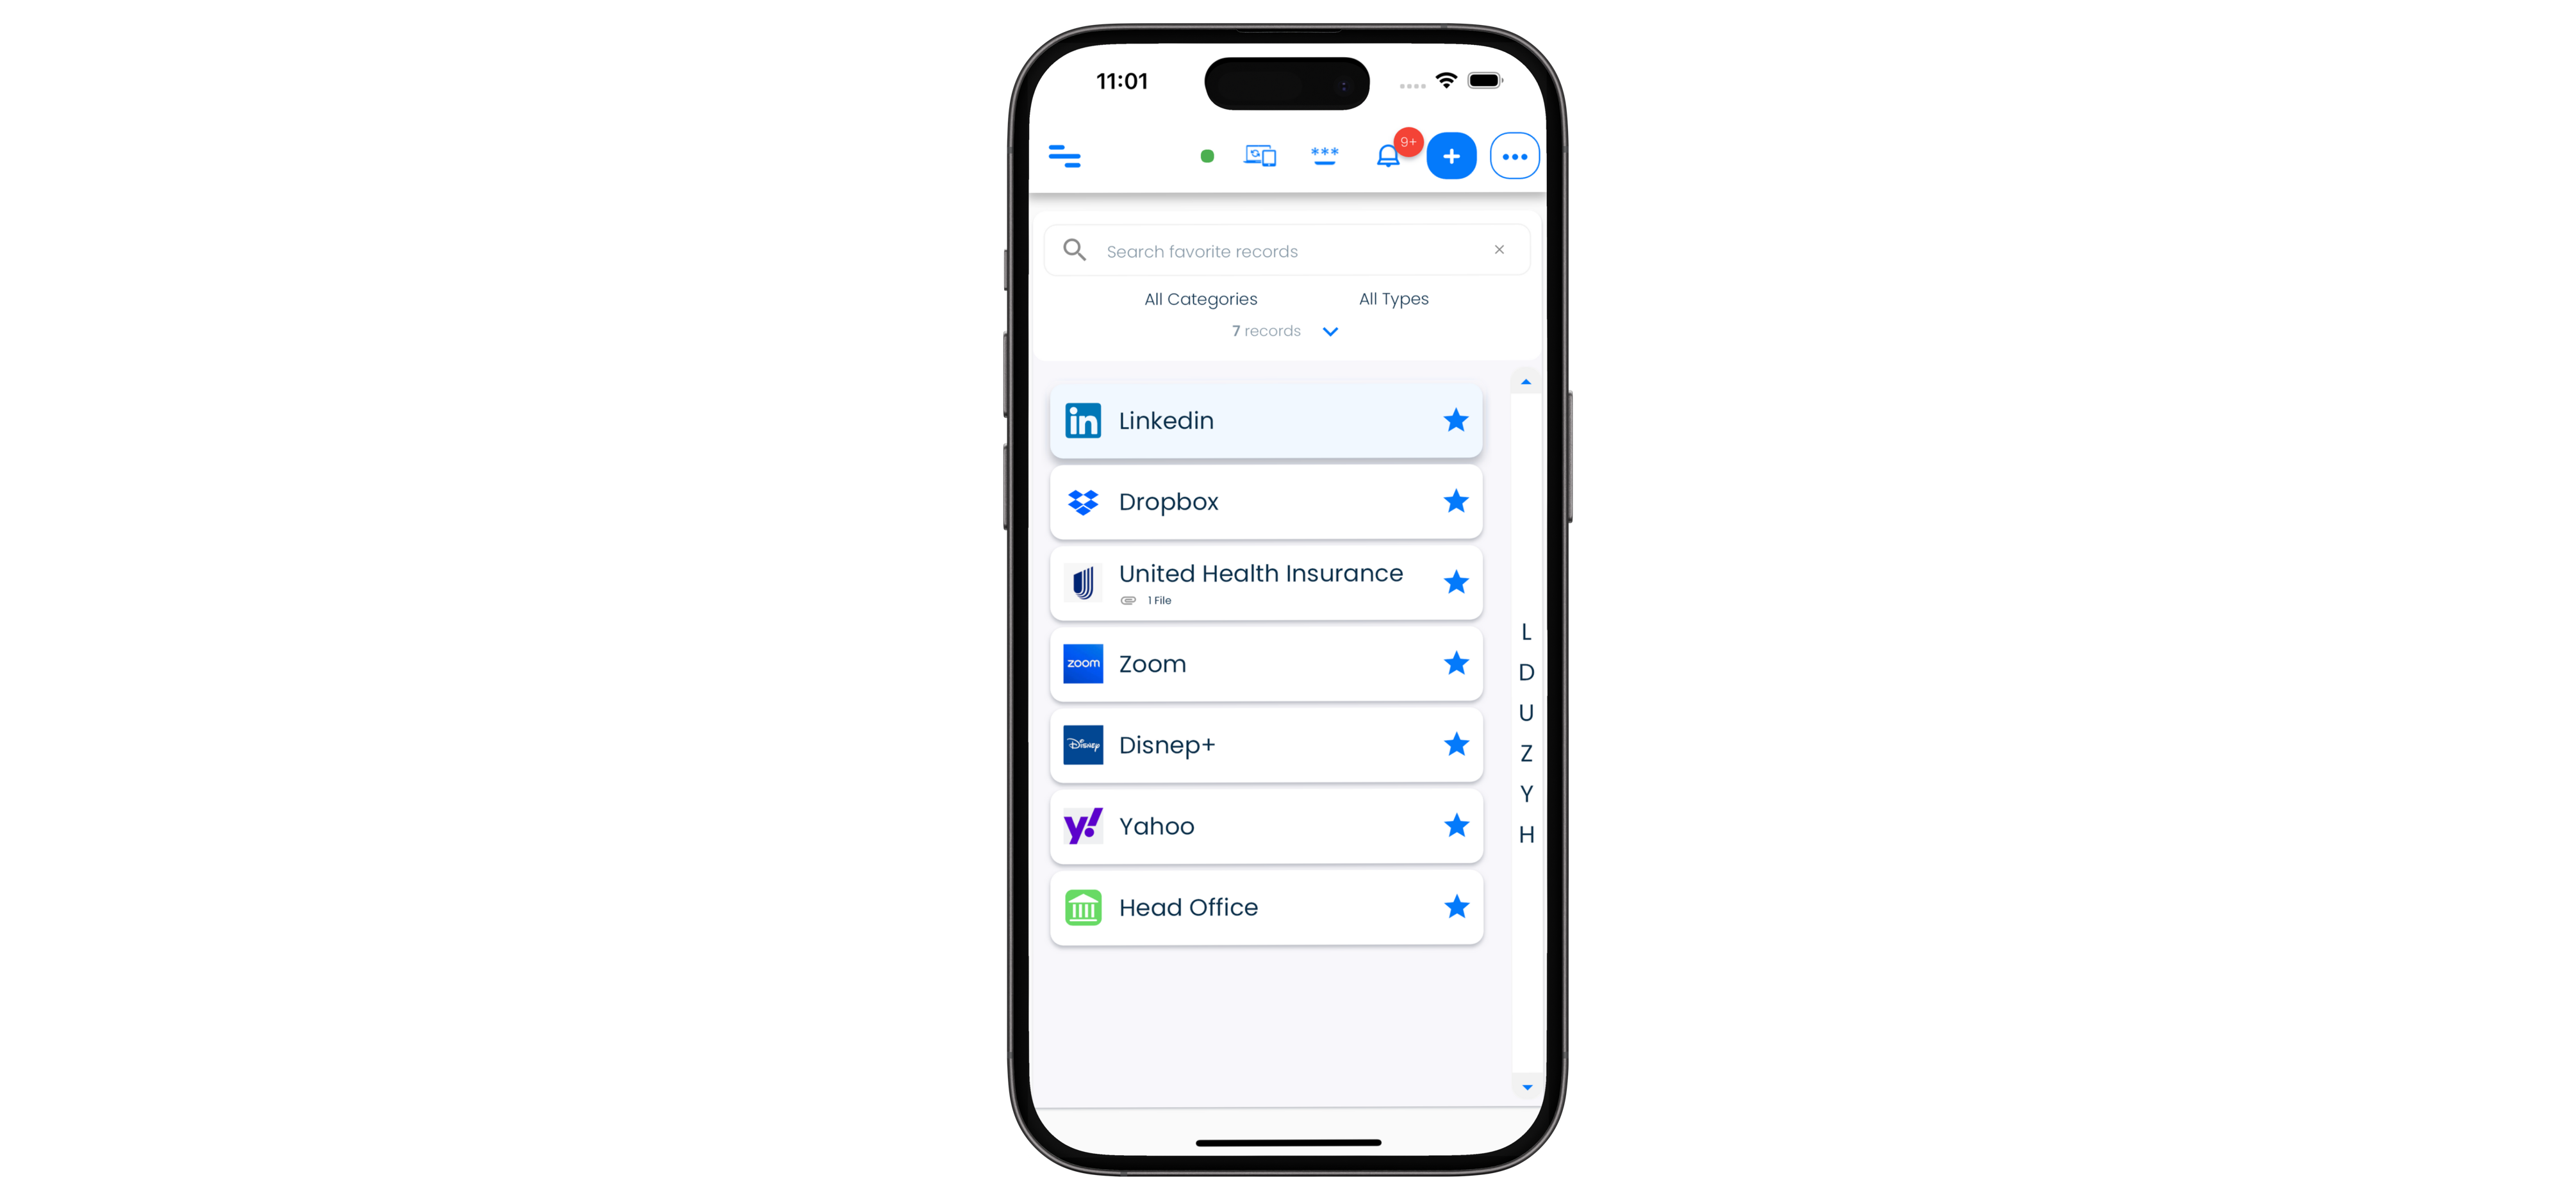
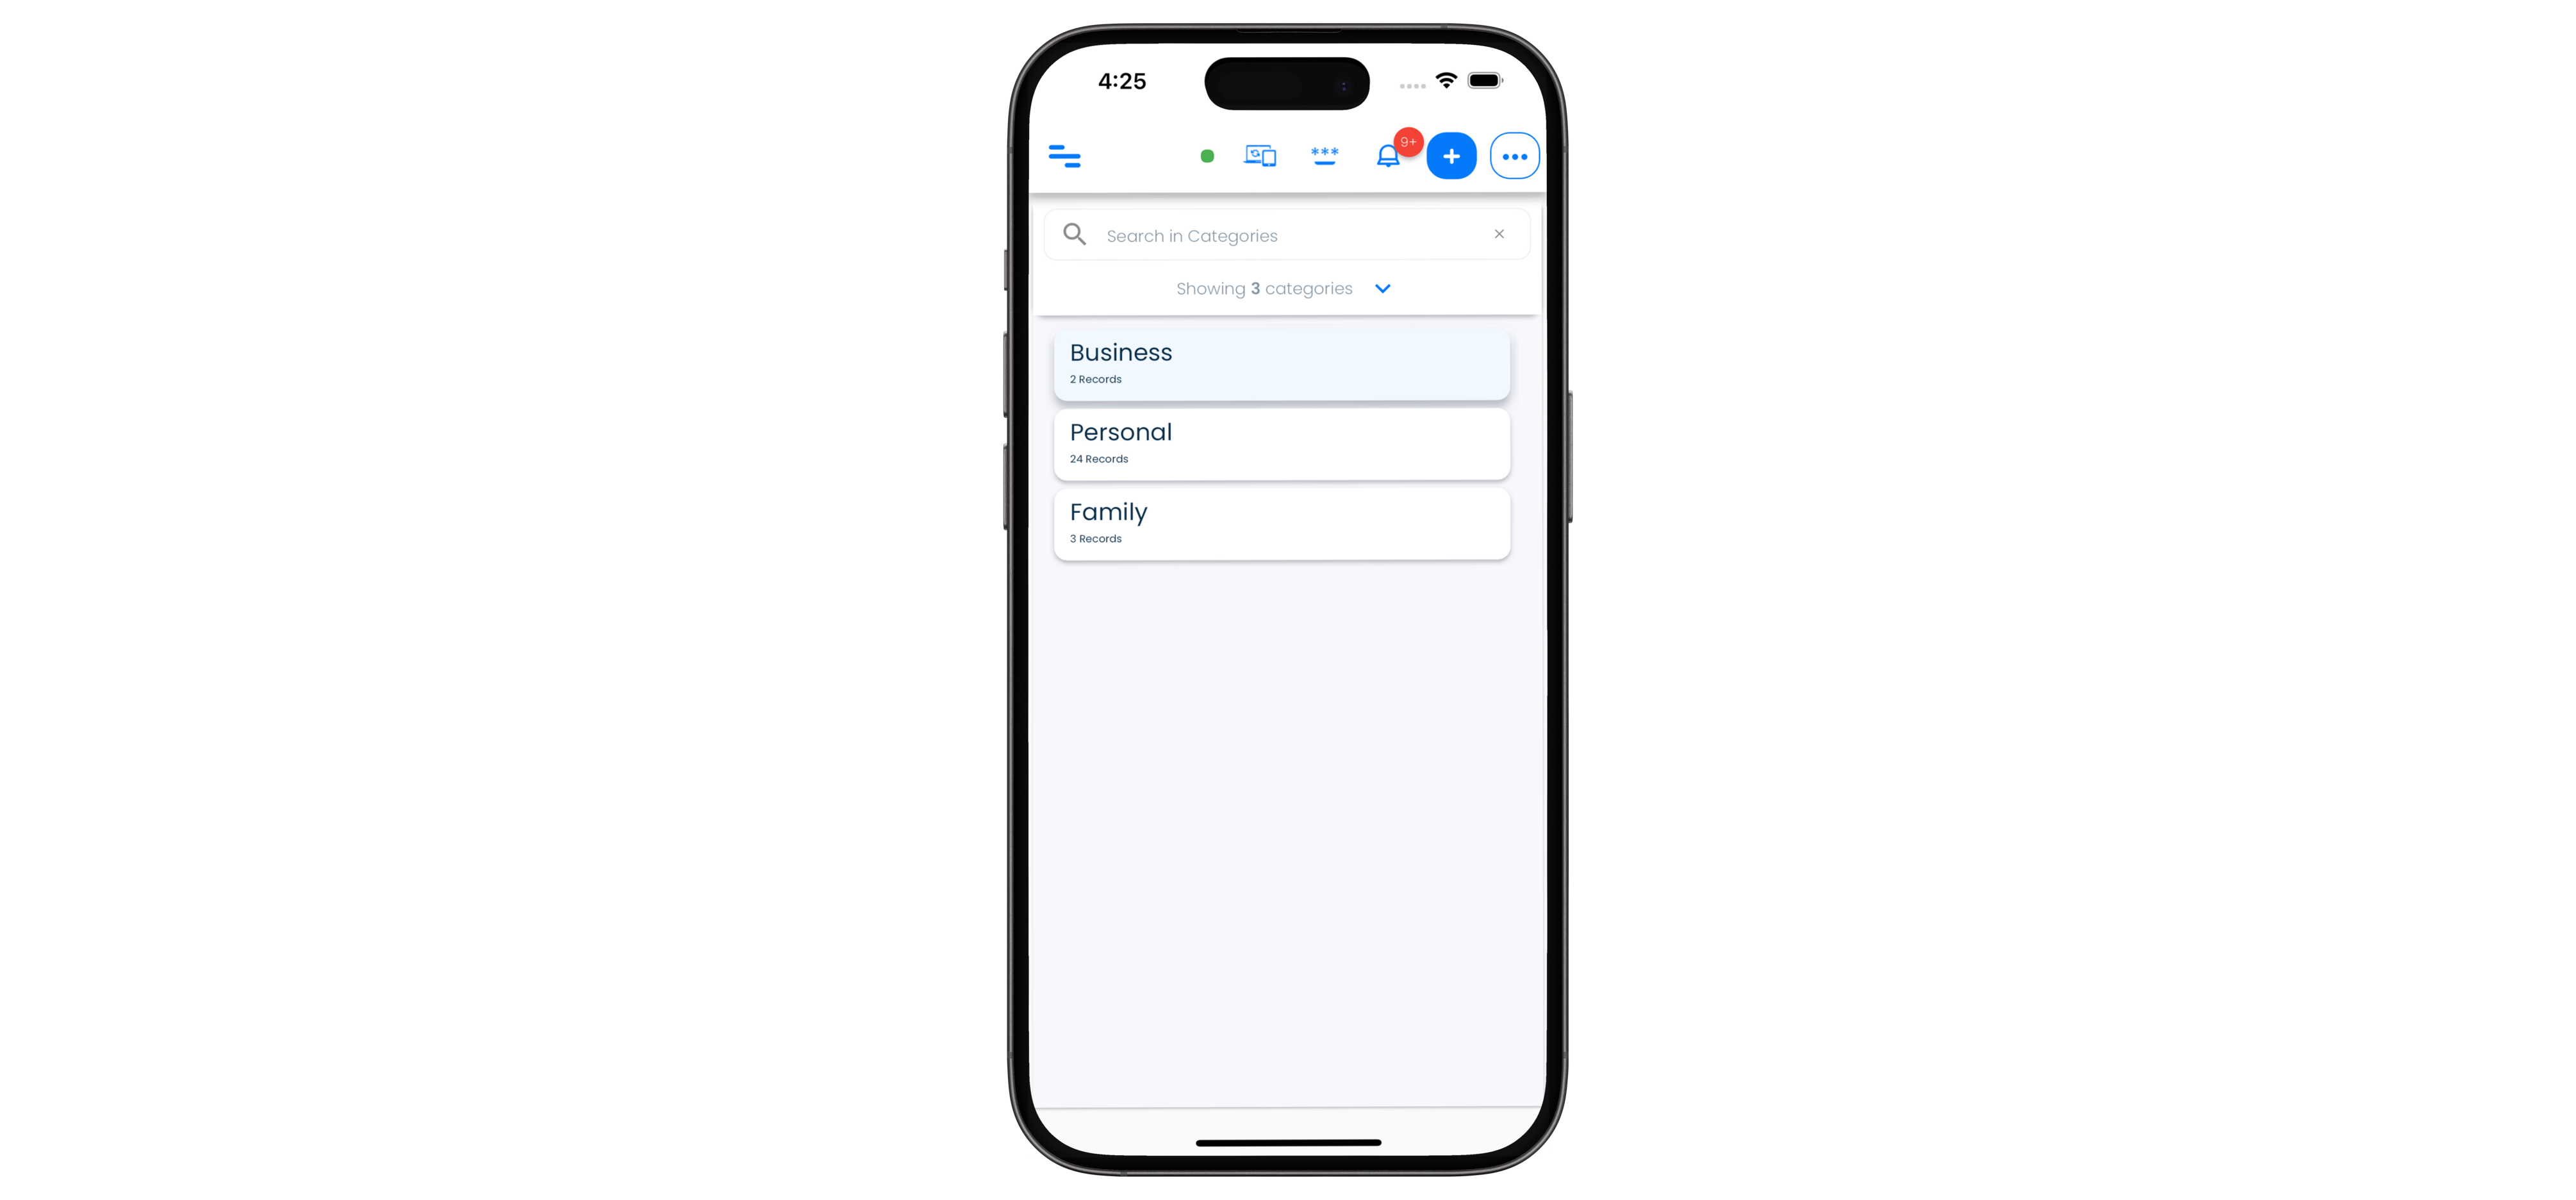
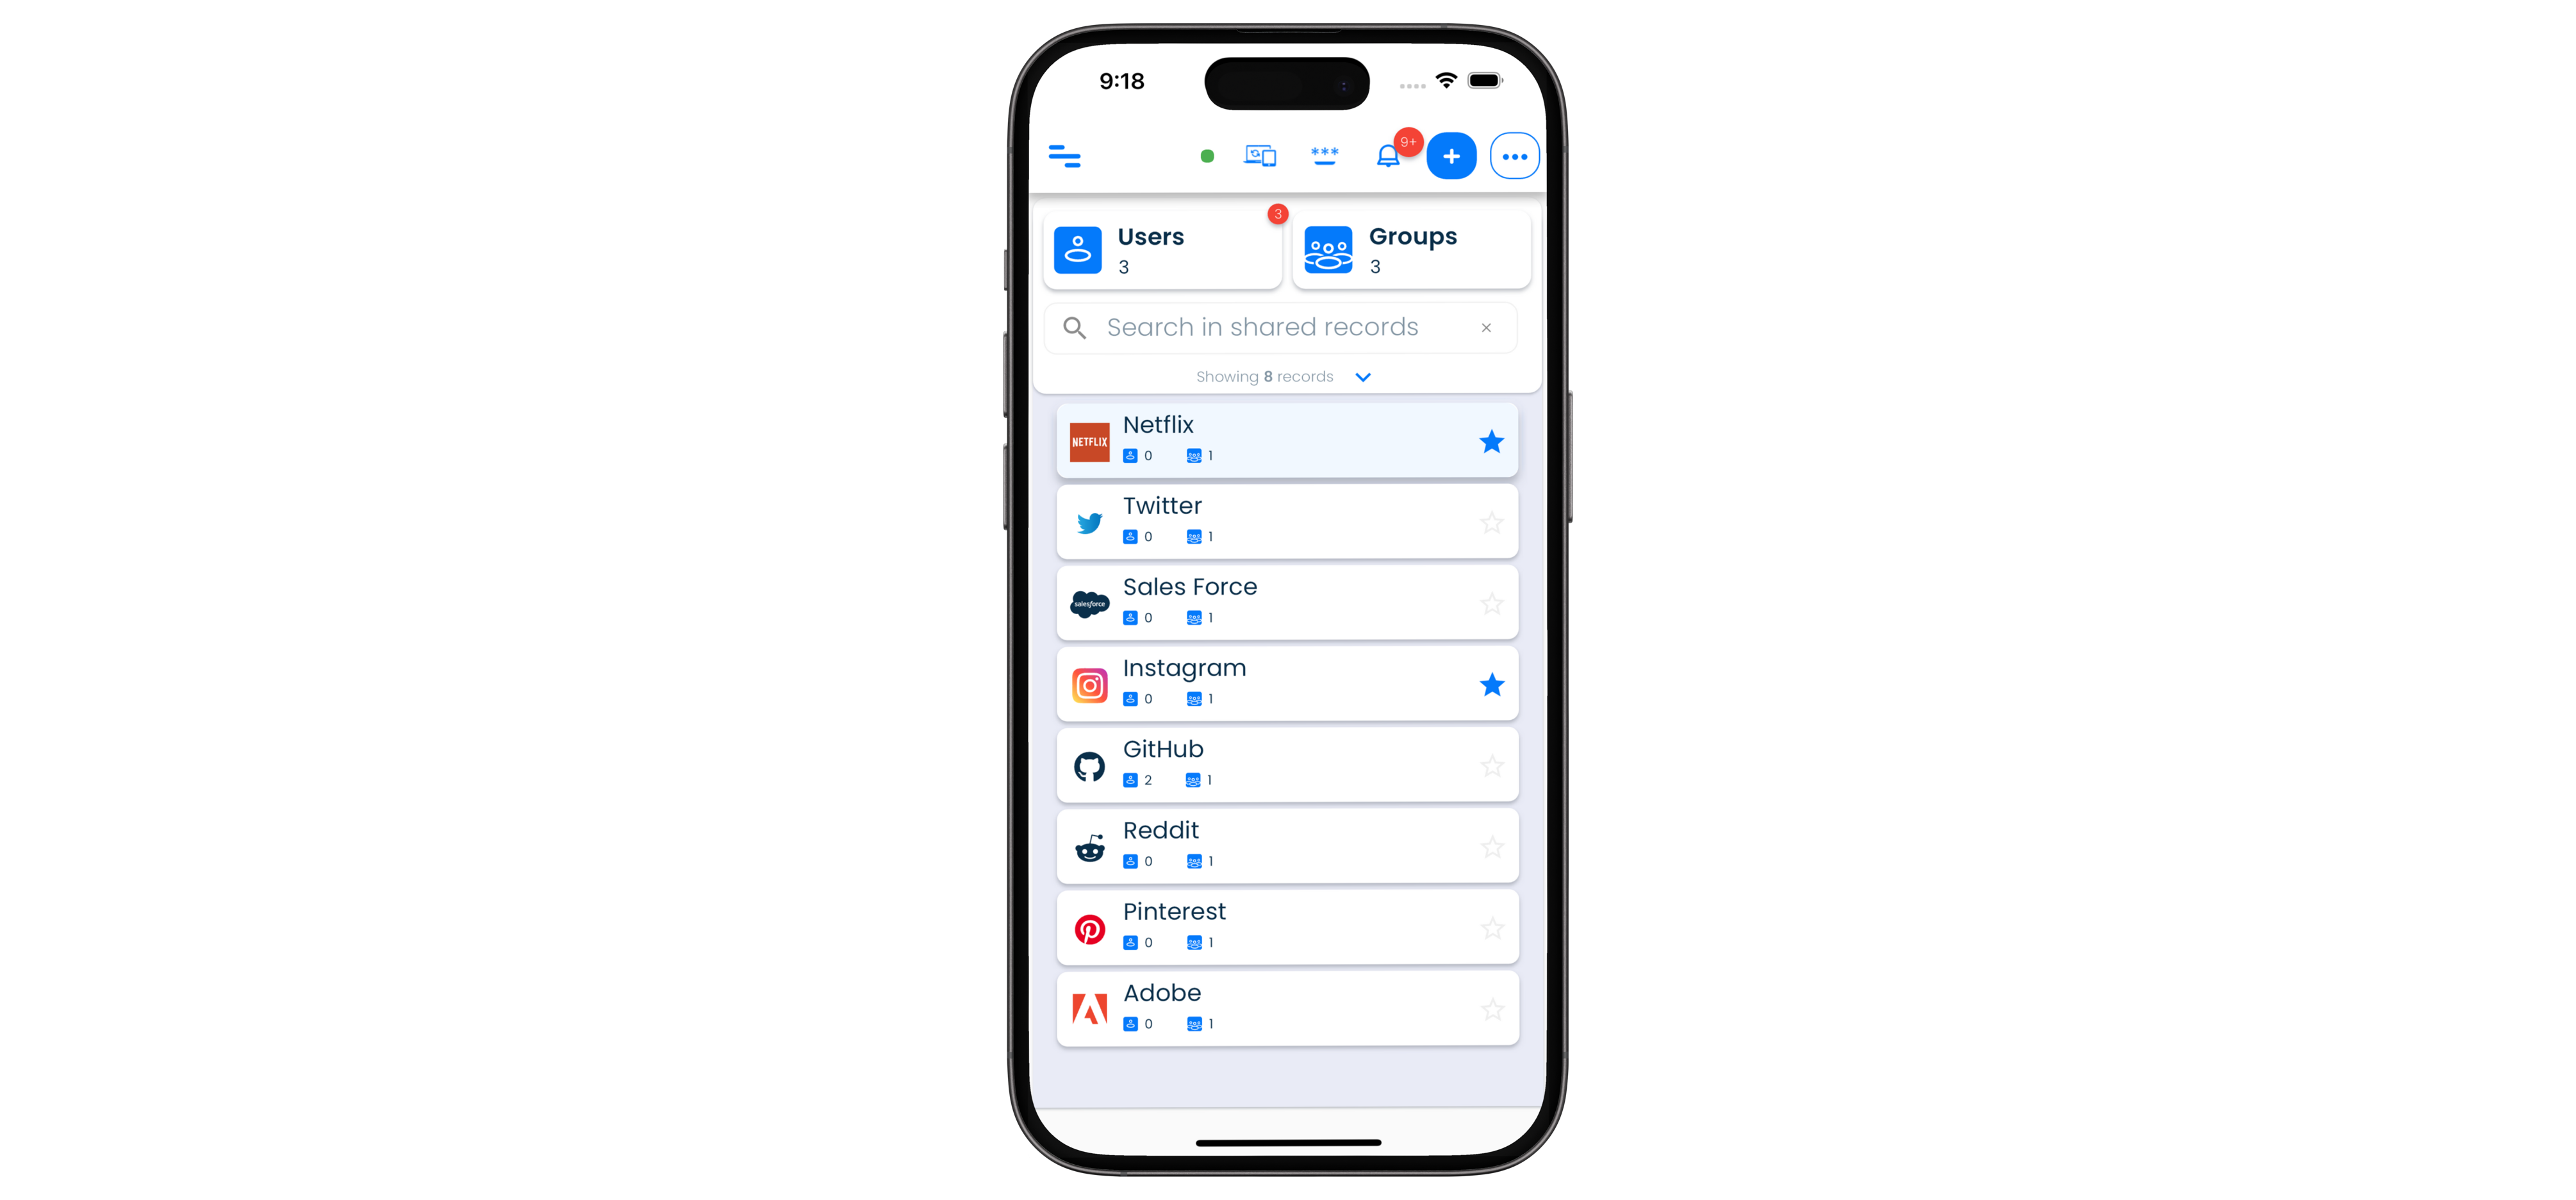
| Mobiles | 1 panel layout |
Desktops and laptops
On desktops and laptops, the records screens are organised into three columns as listed below.
| Column | Purpose |
|---|---|
| 1, the left panel | Shows the navigation menu for the application |
| 2, the center panel | Show a list of all records that can be sorted and filtered |
| 3, the right panel | Shows the details of the selected record |
Tablets
On tablets, the records screens are organised into two columns as listed below.
| Column | Purpose |
|---|---|
| 1, the left panel | Show a list of all records that can be sorted and filtered |
| 2, the right panel | Shows the details of the selected record |
The application menu can be seen by tapping on the menu list icon in the top left part of the application.
Mobiles
On mobiles, the records screens are shown with a list of records that can be sorted and filtered using the given options.
On selecting a record, the view will change to showing the details of the selected record. The details displayed include the record name, fields, notes, attachments, sharing details and update time.
The application menu can be seen by tapping on the menu list icon in the top left part of the application.
Navigation between screens
You can switch between different screens by clicking or tapping on an item in the application menu list. The application menu is displayed in the first panel in the 3 column view on desktops. In 2 column and 1 column views, the application menu can be opened by clicking or tapping on the menu list icon in the top left part of the application screen.
The table below summarises the application menu items.
| Menu item | Description |
|---|---|
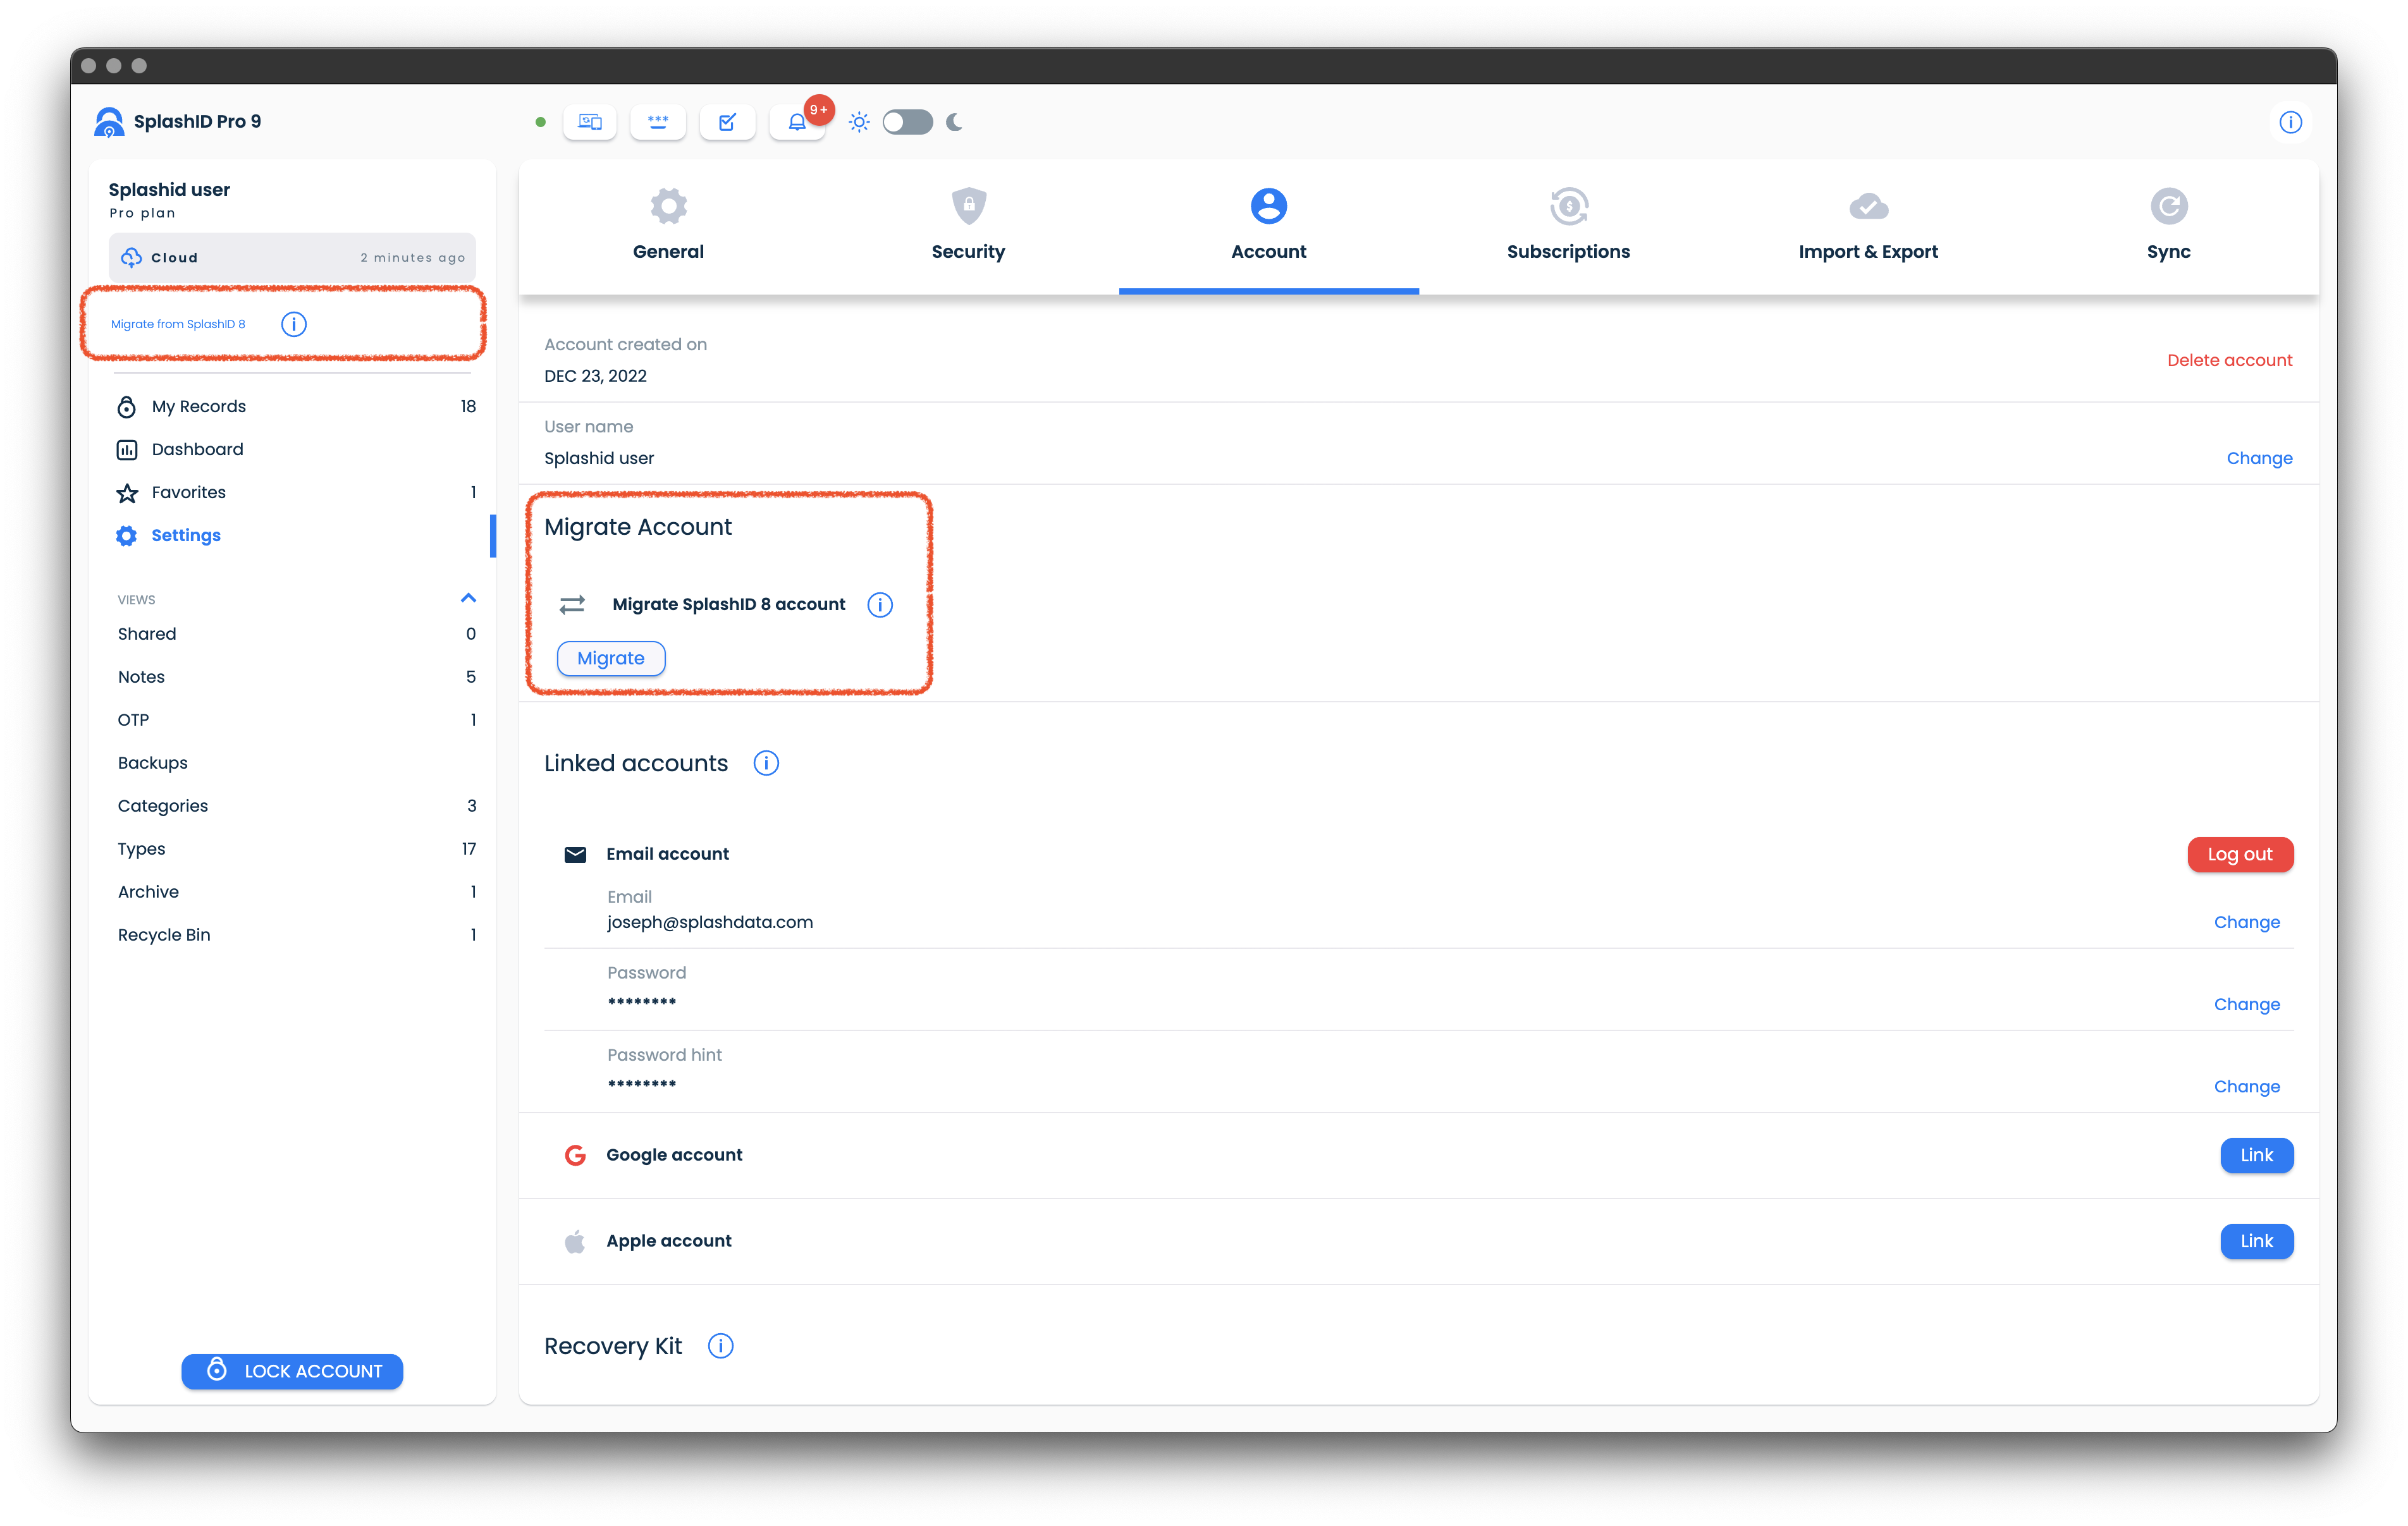
| My Records | Show a list of all your personal records. You can search, sort, filter and store personalised views that are a combination of search, sort and filters used. |
| Dashboard | Displays important information related to your account. |
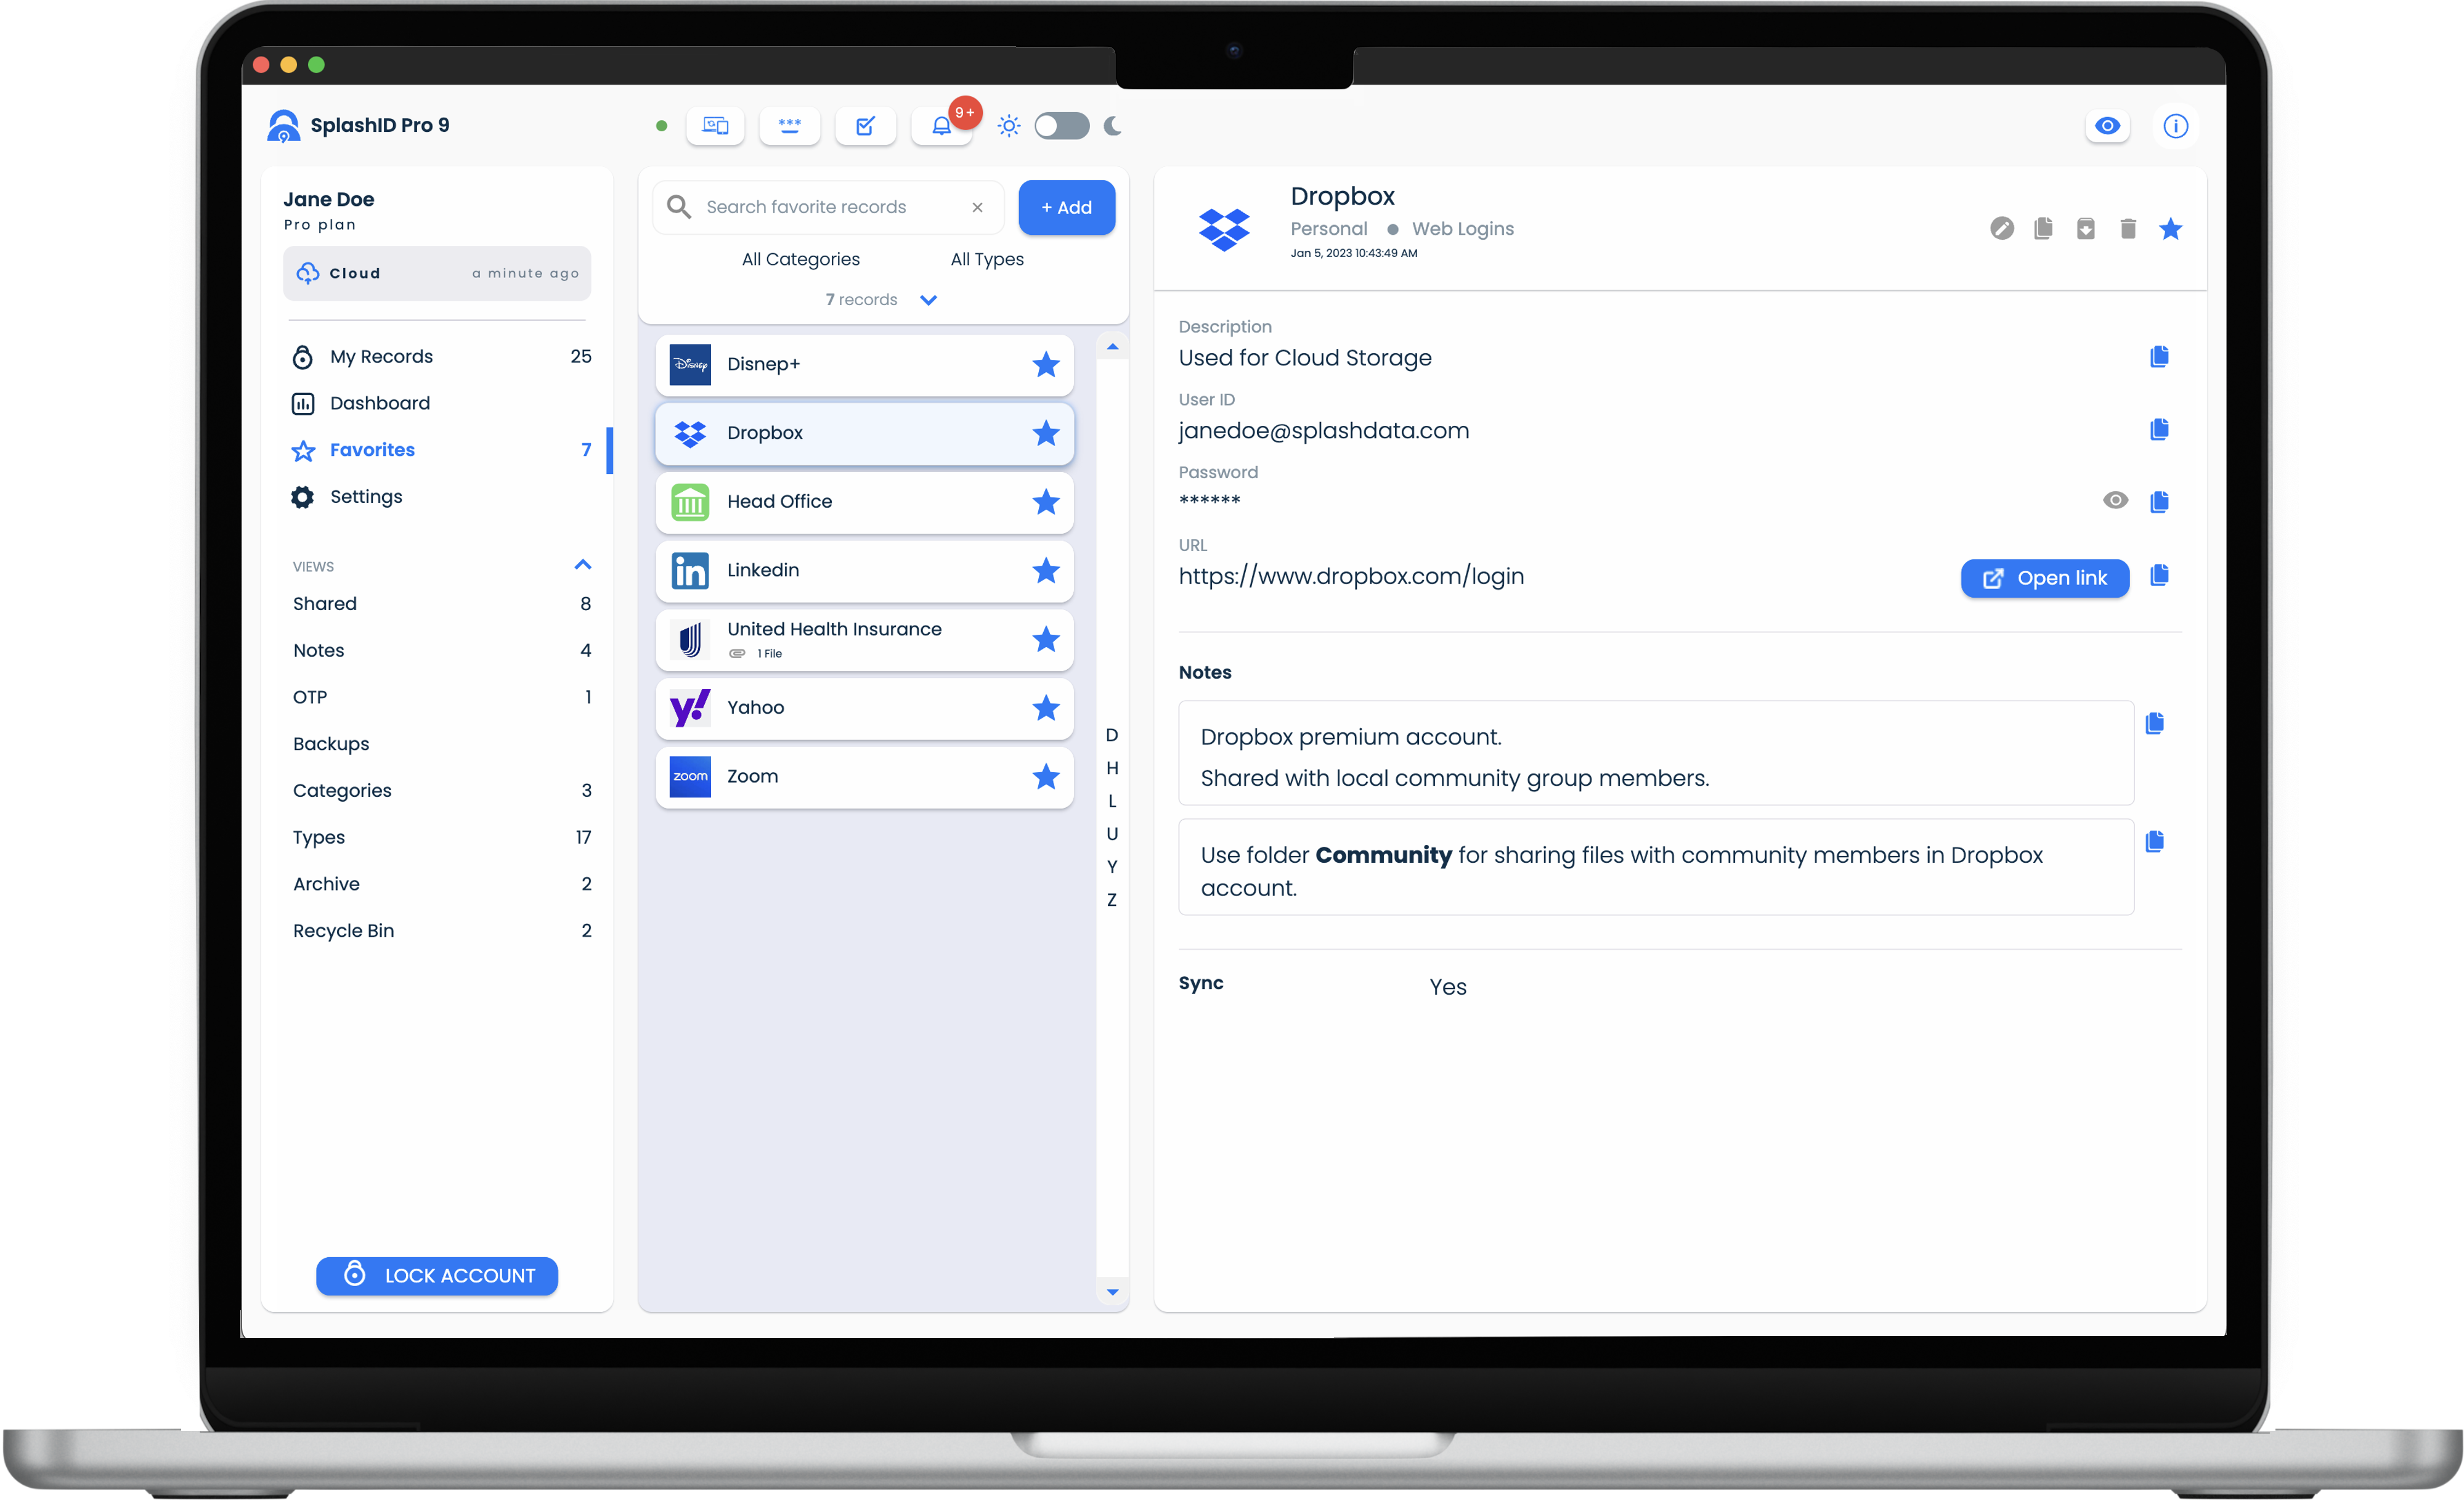
| Favorites | Shows all the personal records that are marked as favorites. |
| Settings | All the settings for SplashID Pro 9 and your account can be managed from this view. |
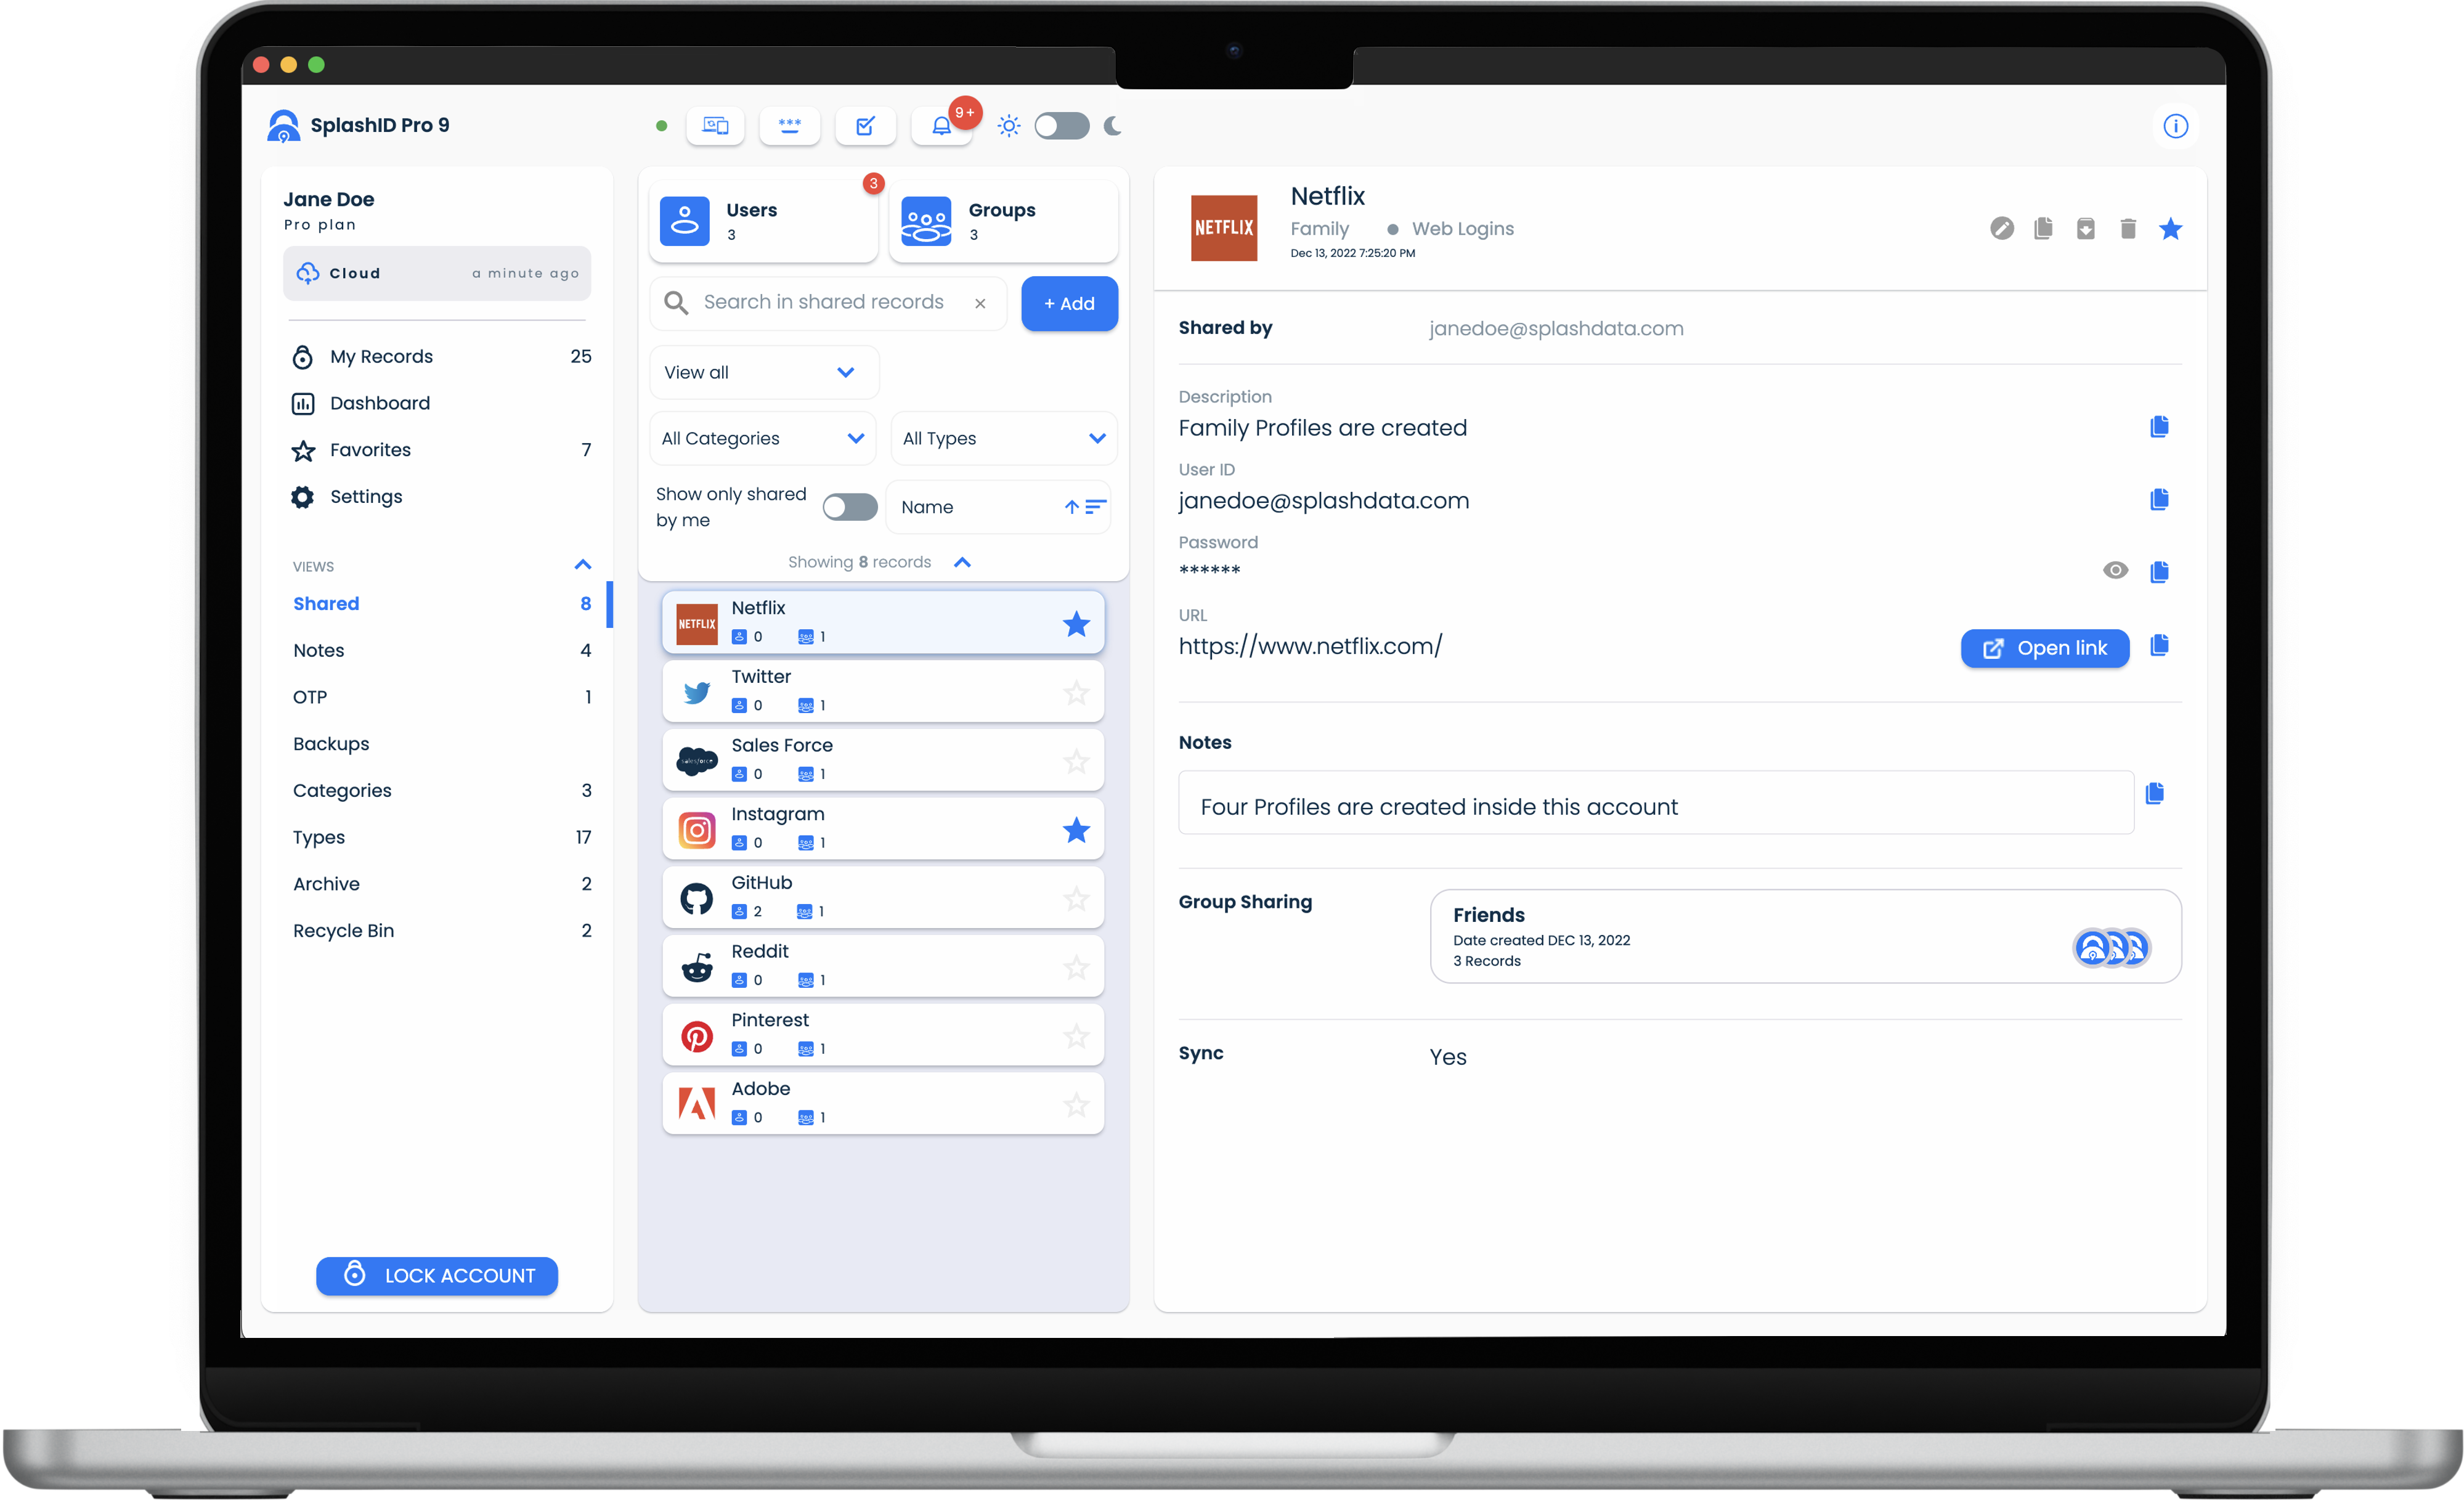
| Shared | Shows all the records that are shared with others, and those that are shared by others with you. |
| Notes | Shows all the notes that exist across all the records. |
| OTP | Shows all the authenticator fields that you have setup in all your records. These are the OTP codes that you use as 2 factor codes in other sites and applications. |
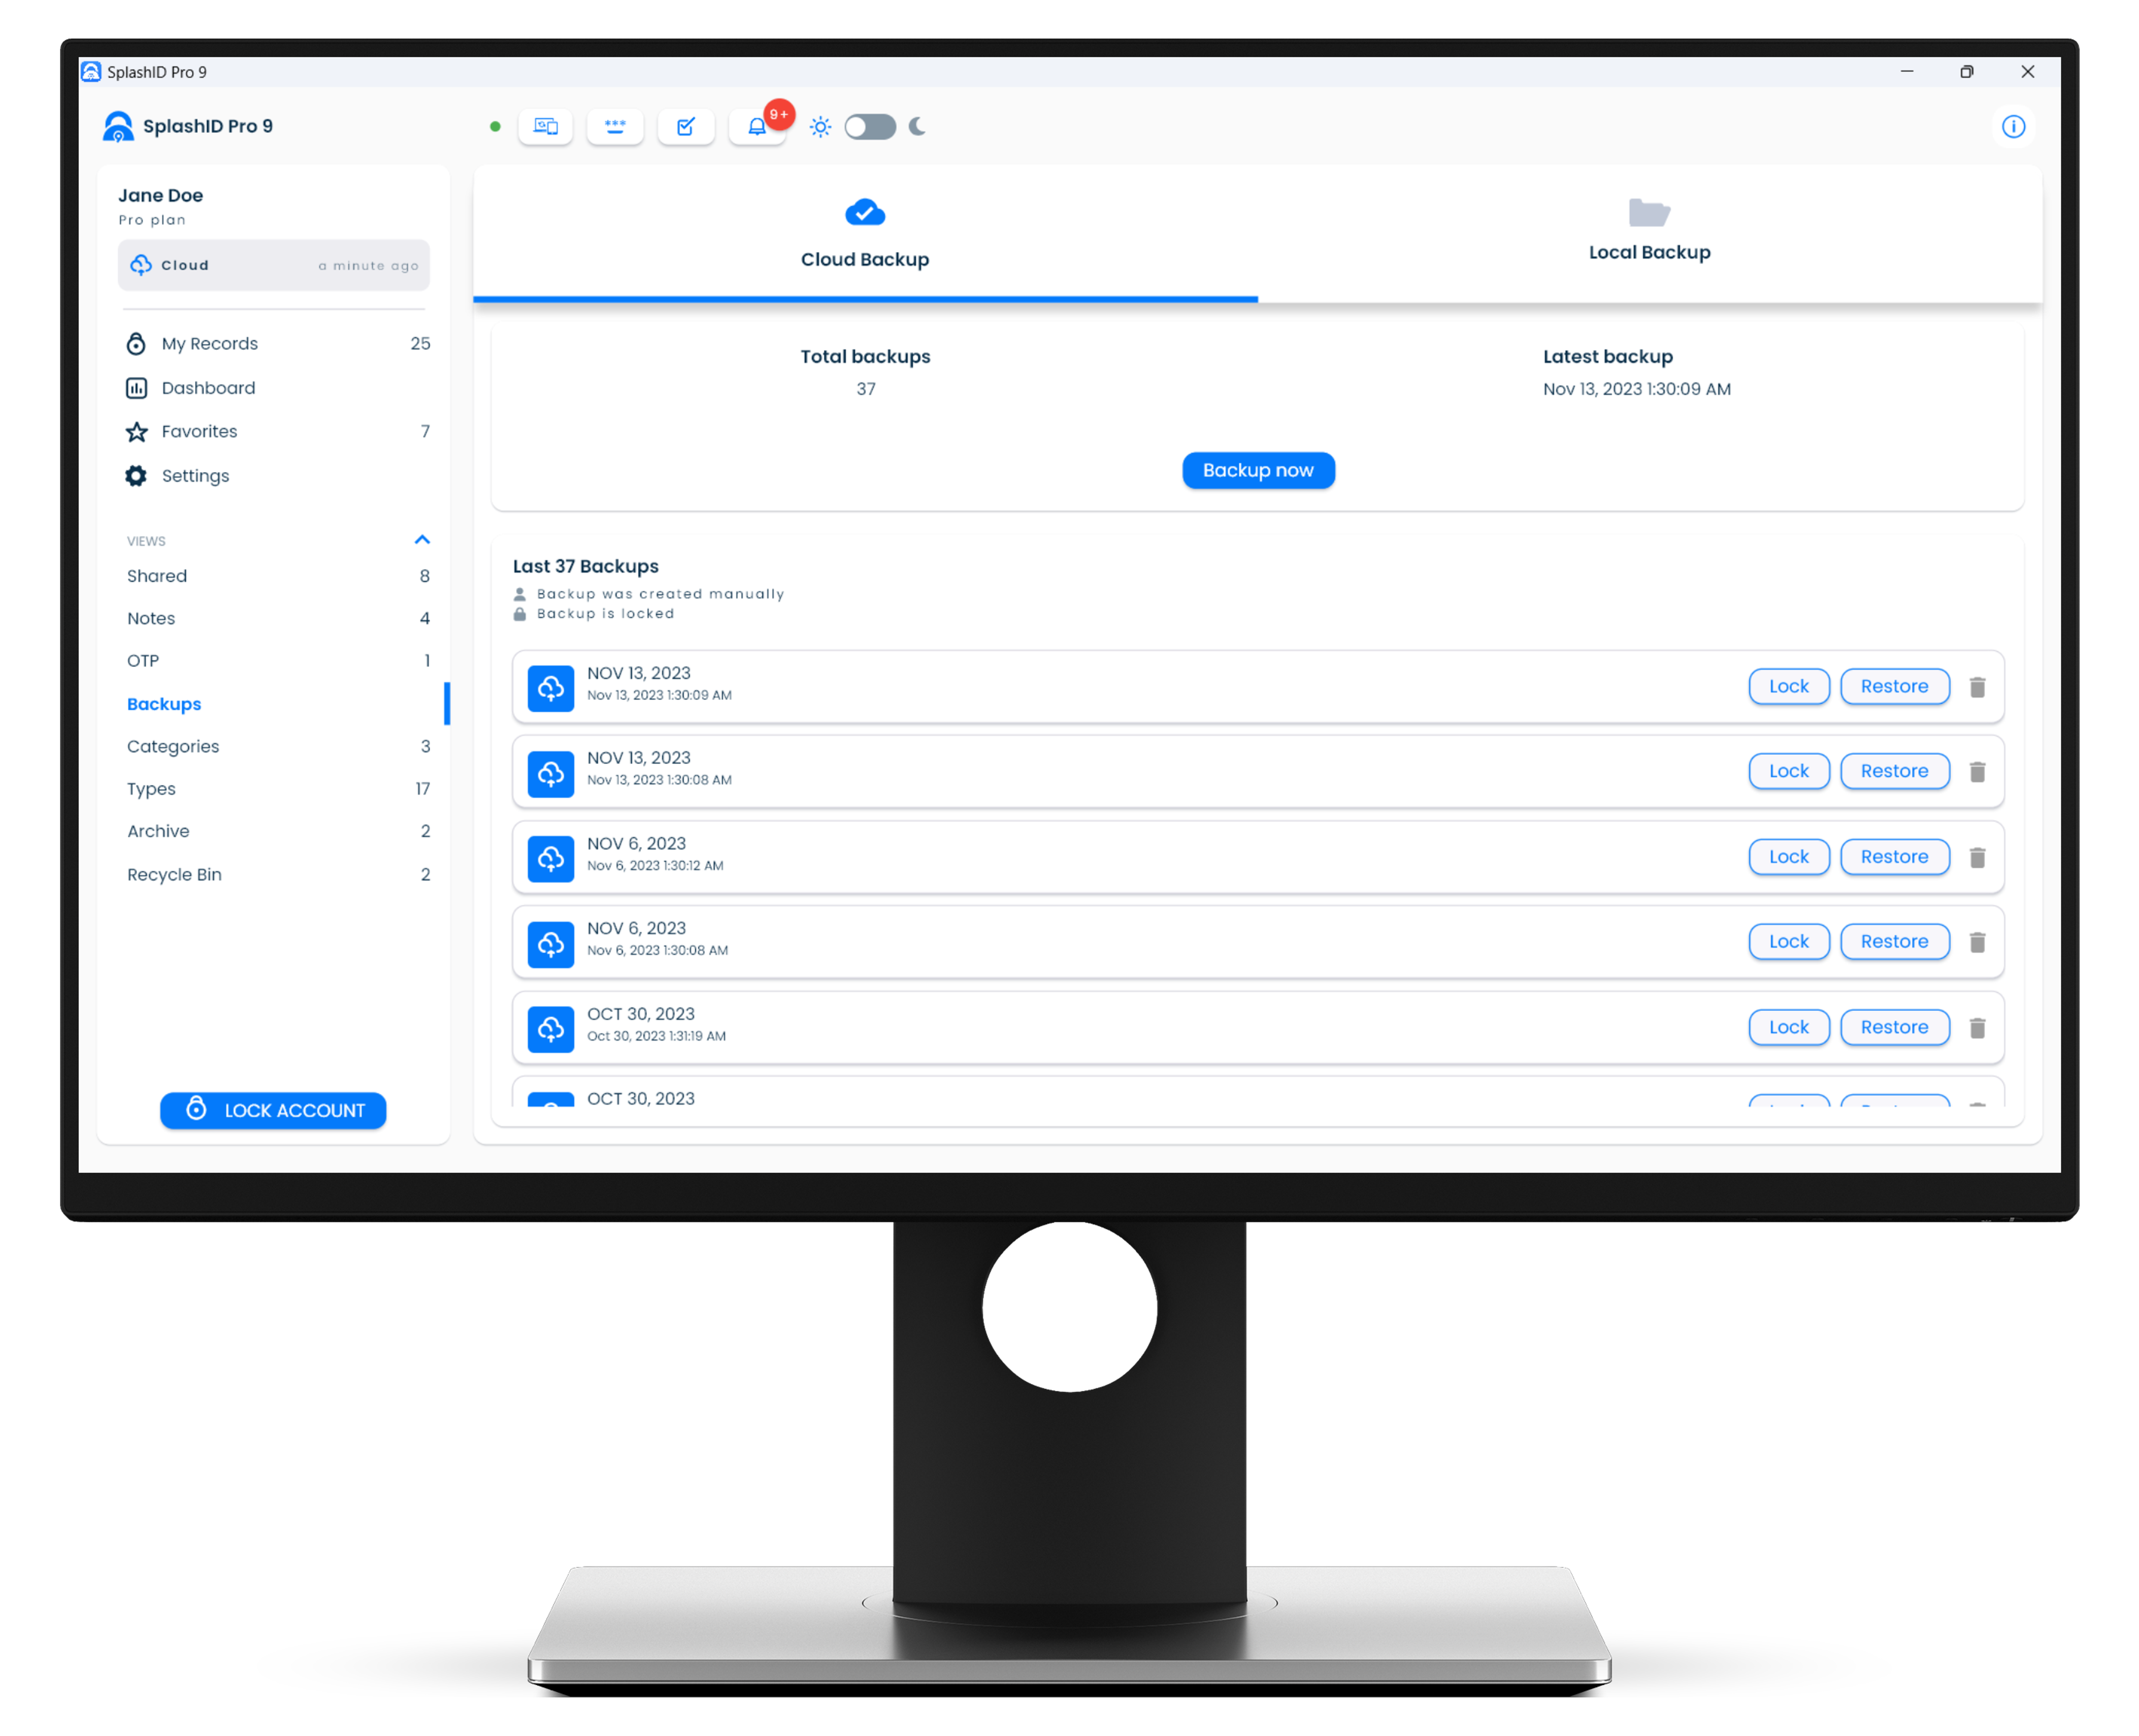
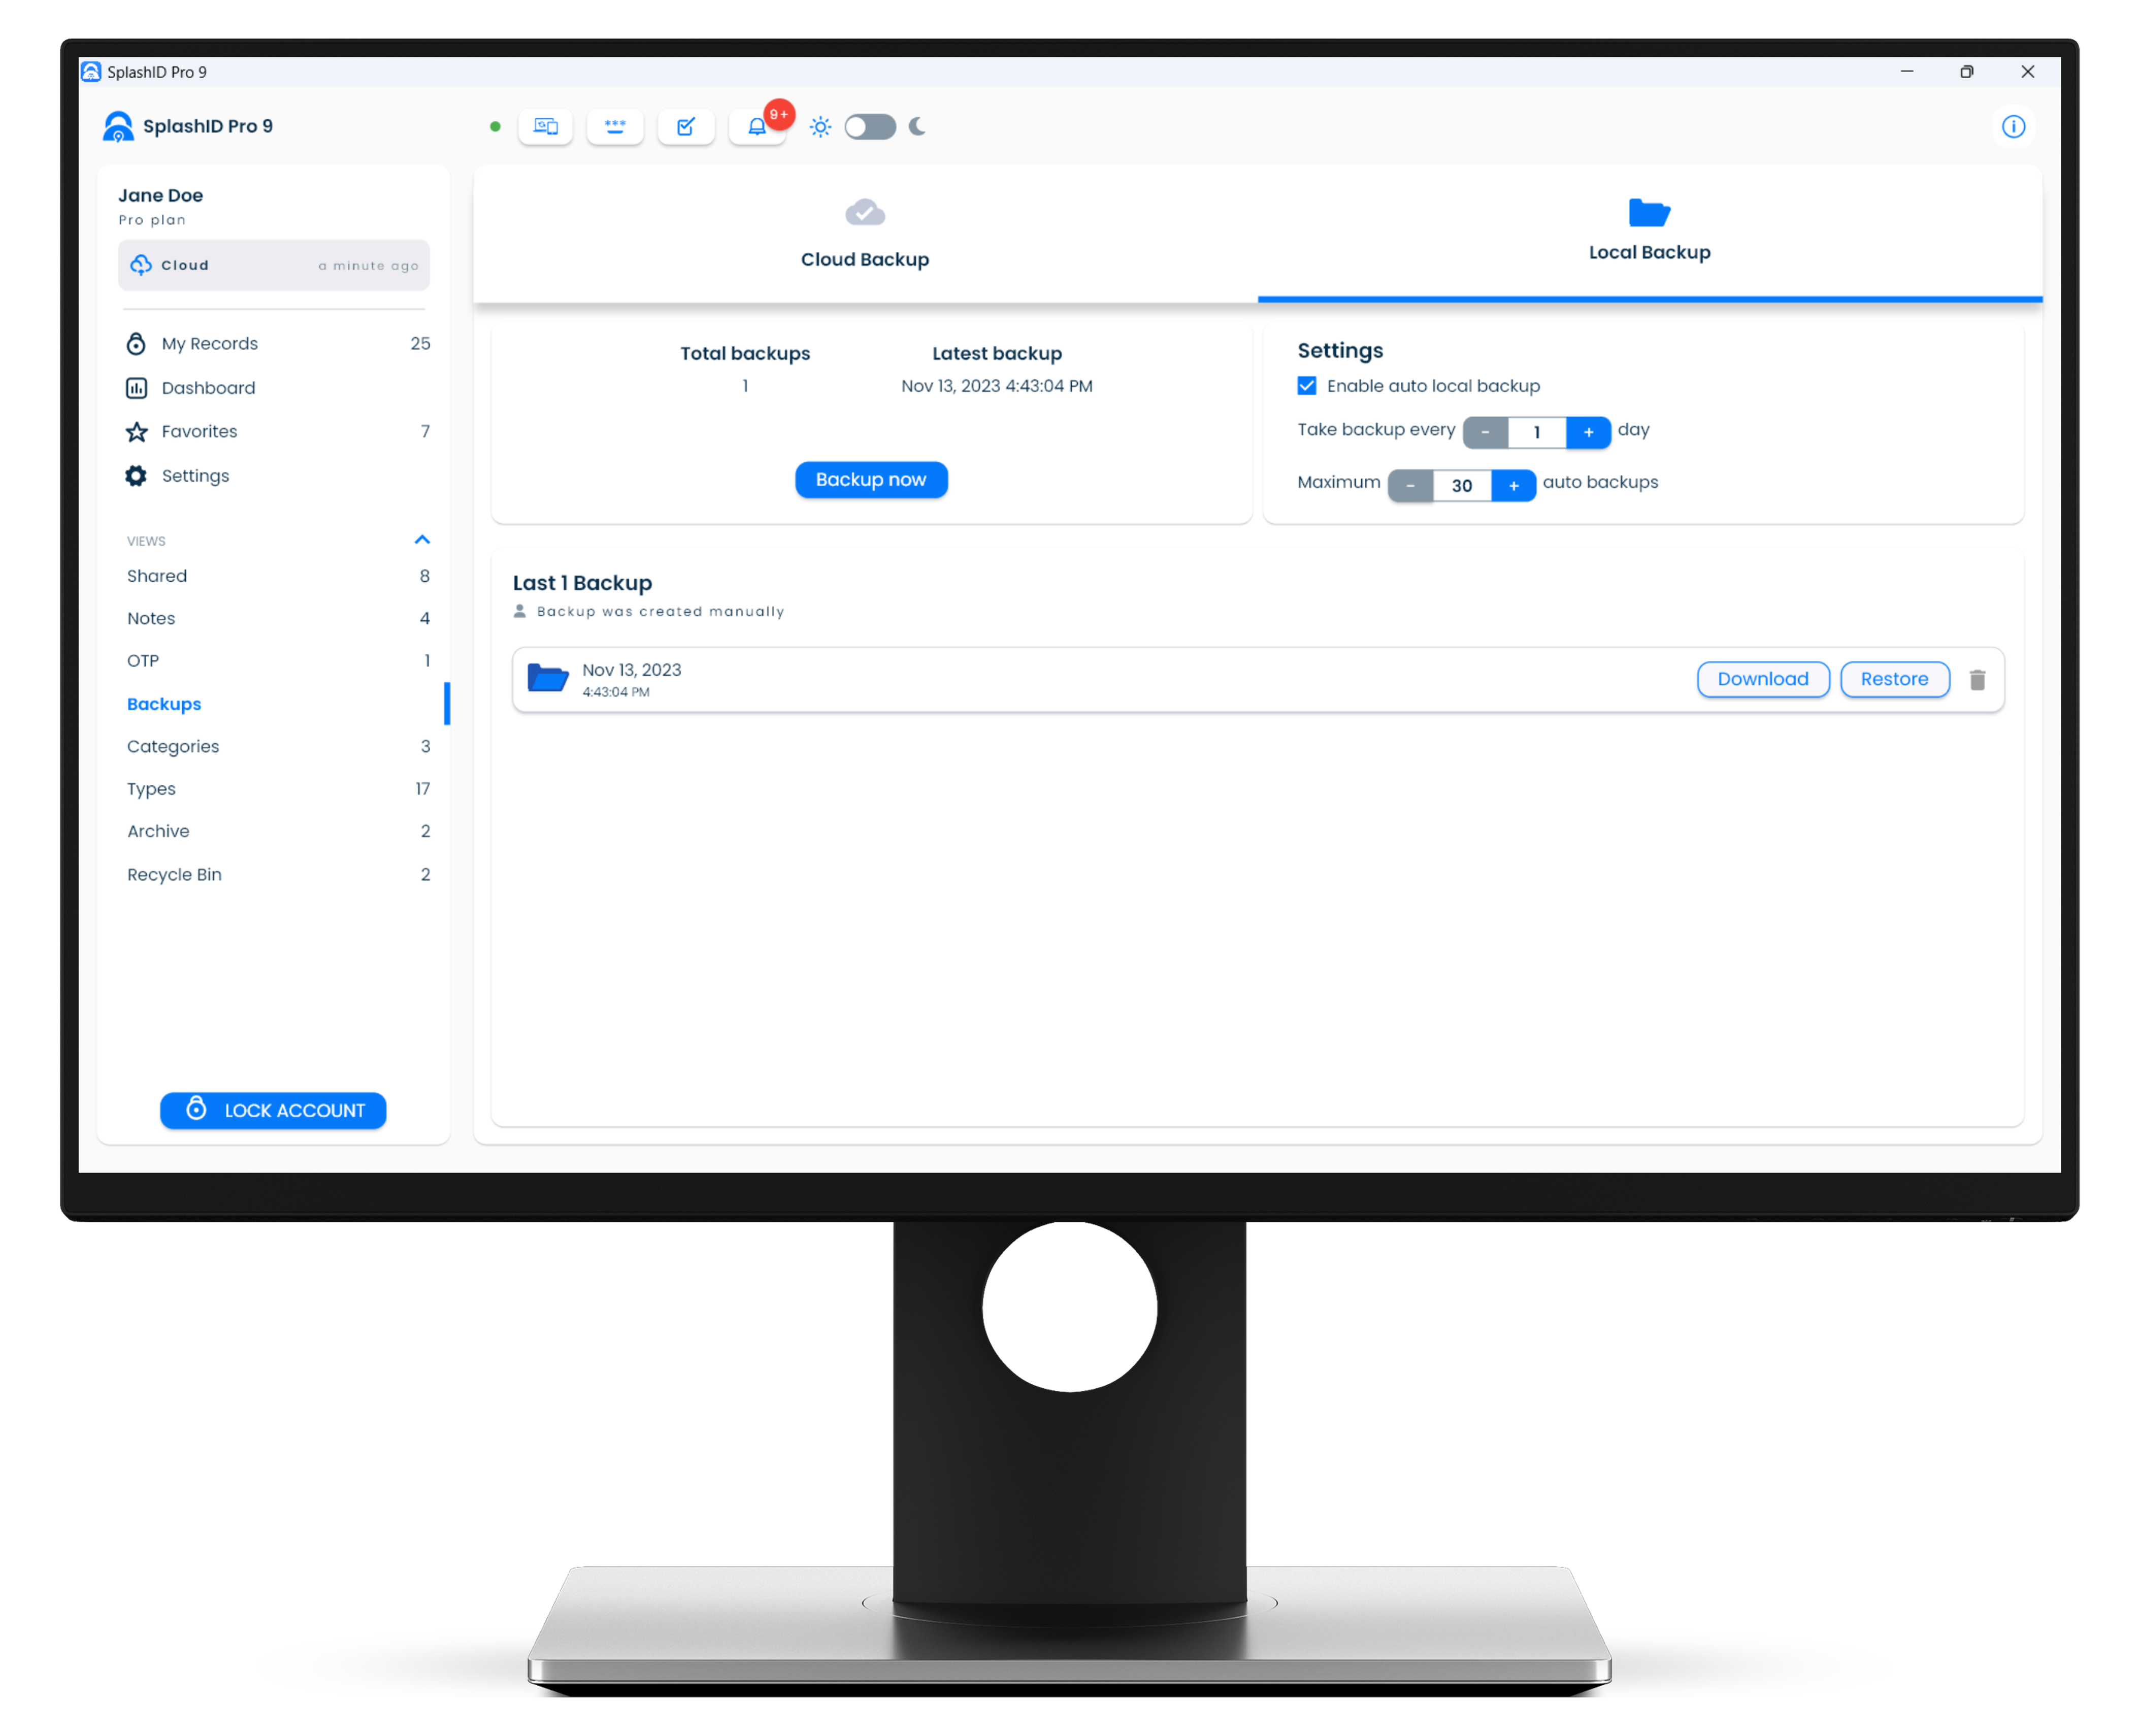
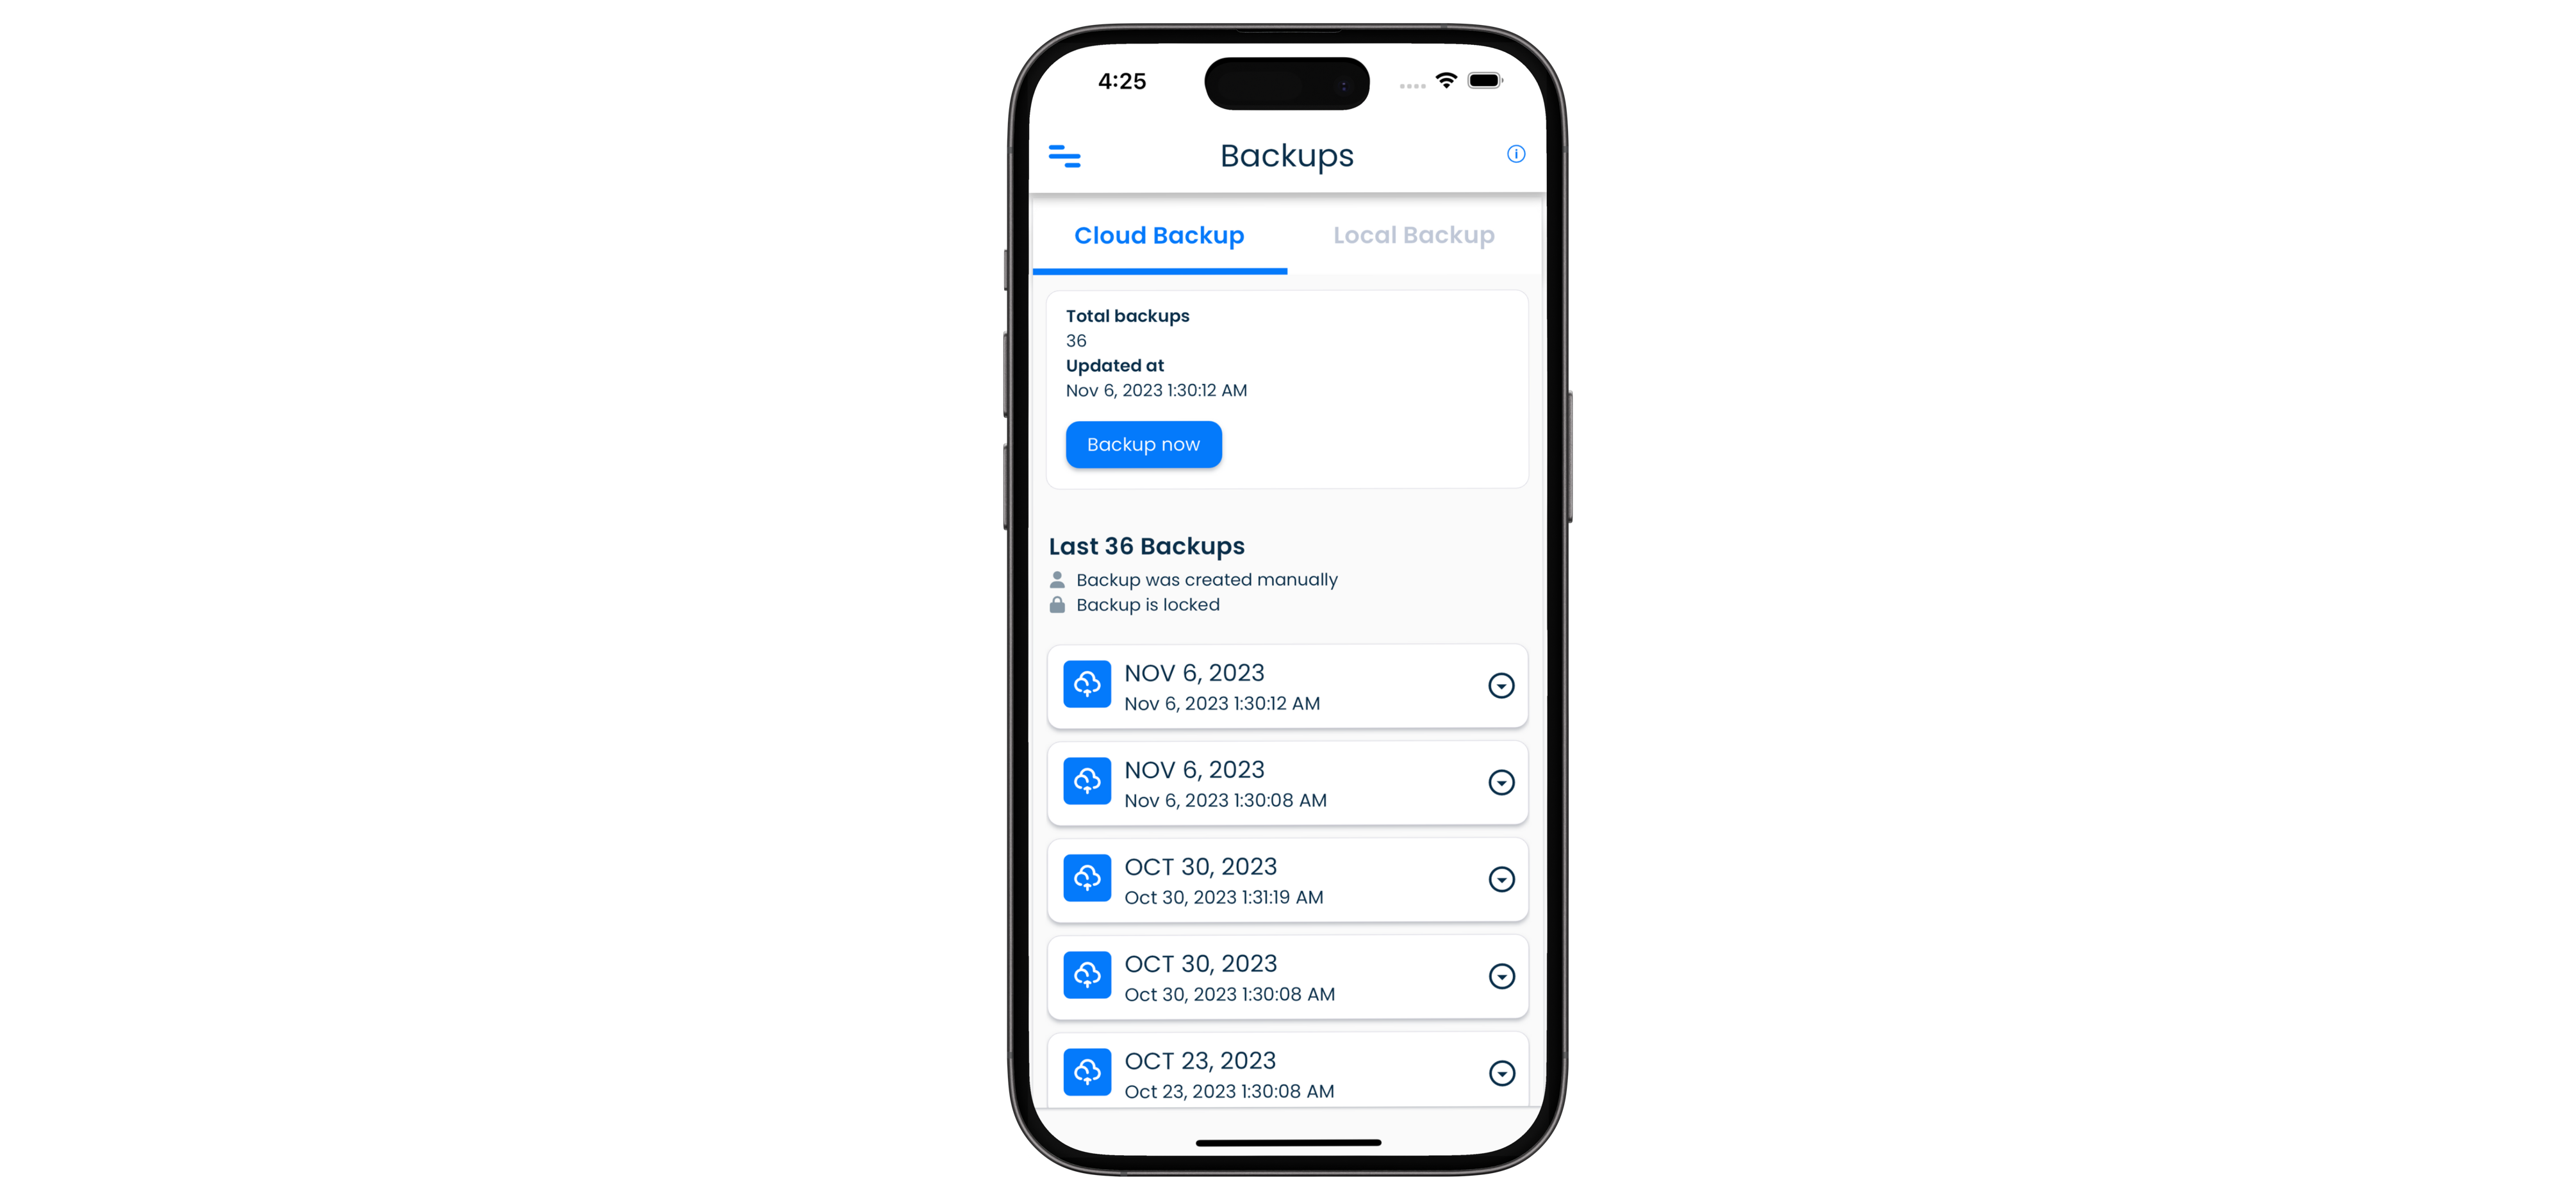
| Backups | You can see all the cloud and local backups for your account here. Cloud backups are available for paid users who use their account in cloud sync mode. Local backups are available for all users, and these exist only on the device where they are displayed. |
| Categories | Shows a list of categories that you have. Categories are used to organise your records into high level groups. |
| Types | Shows all the available templates of records in your account. Types contain a pre-defined set of fields that are used when a new record is created. |
| Archive | Displays all the records that you have archived. Archived records can be used to move personal records that you no longer actively use, and dont want to be shown as part of the main record lists. |
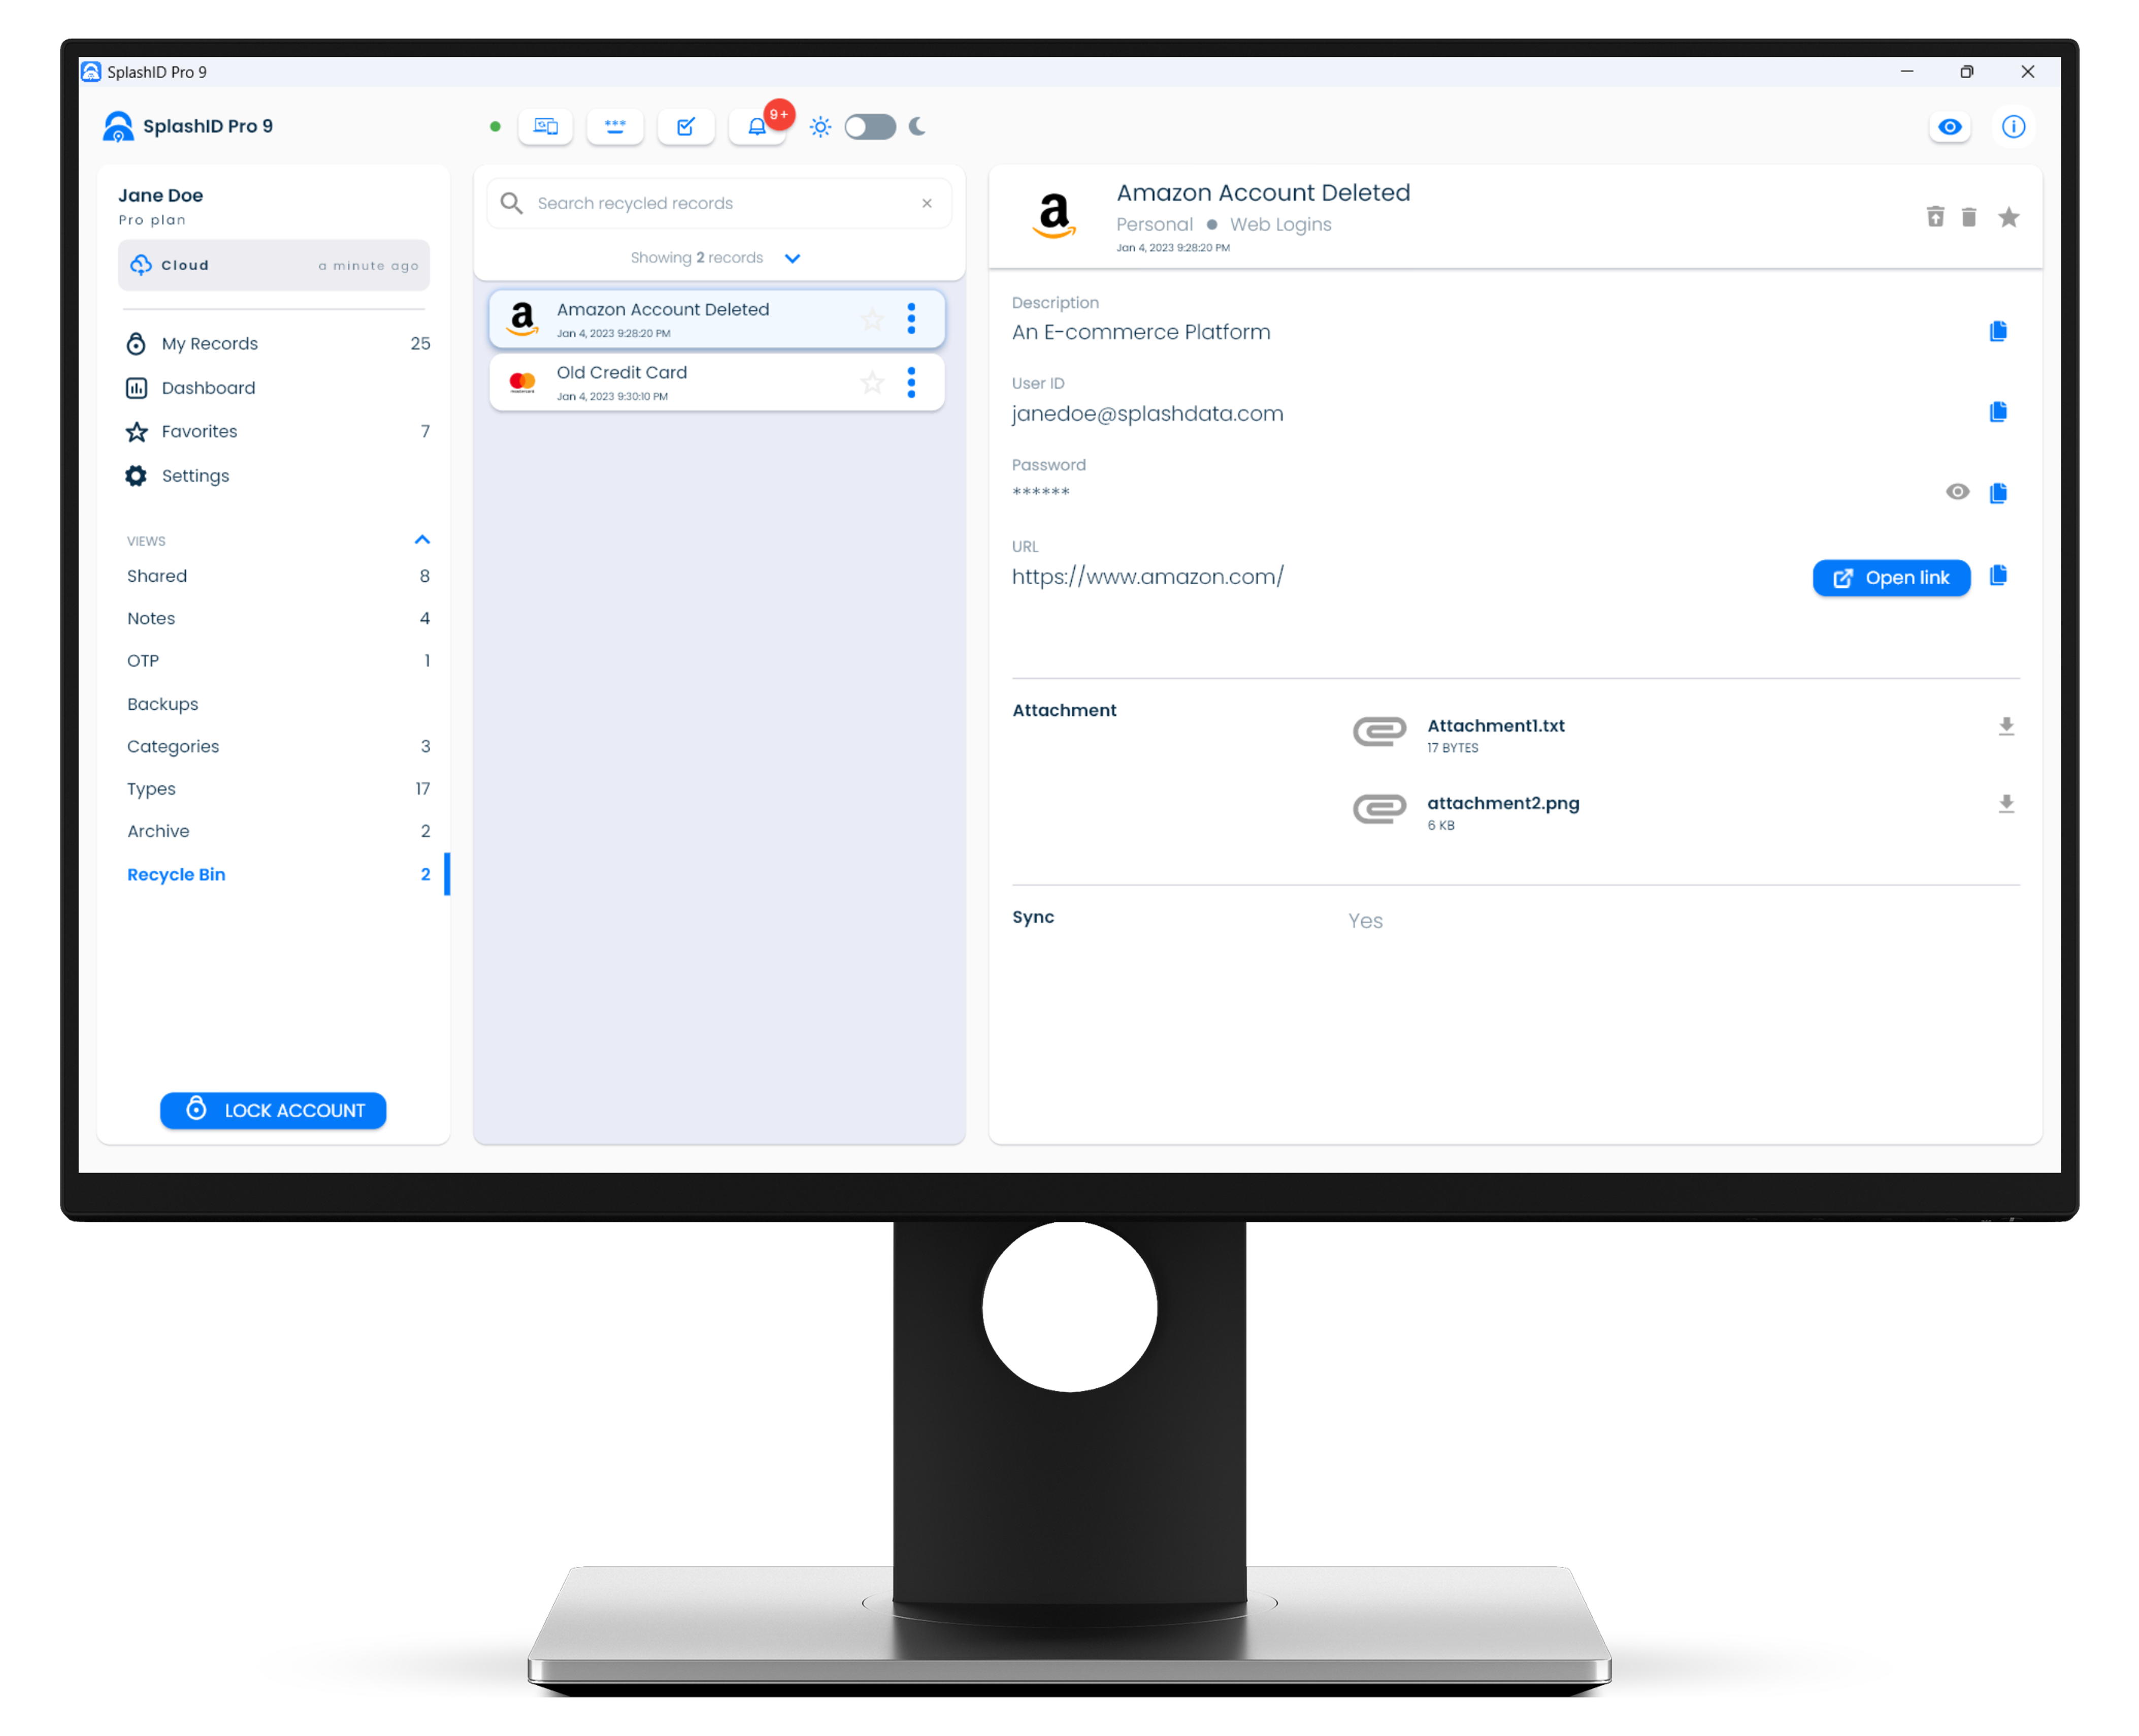
| Recycle Bin | All the personal records that you have deleted will be moved to the Recycle Bin. You can permanently delete them from here if you are sure that you no longer need them. |
Customising the navigation menu
You can customise the navigation menu to suit your preference. The actions possible are explained below.
Collapsing the views
If you do not want to see the links to the views in the navigation panel, then you can click or tap on the down or up arrow next to the VIEWS header to collapse or expand the list of available views.
Hiding views
You can hide the one or more of the following navigation menu list items if you do not use them.
- Shared
- Notes
- OTP
- Categories
- Types
To do this go to the Side Menu group of settings in the General section in Settings.
Create and use a SplashID Pro 9 account
Getting ready
Before you start to sign up please have the following two pieces of information handy.
- The email address you want to use for your account.
- A strong master password for your account.
You should use a combination of lowercase and uppercase characters, numbers and some special characters (!, @, #, $, %, ^, &, *,... etc.) for your master password, and it should be long enough to make it all the more secure.
We recommend that you have a master password that is 12 or more characters long, and that you do not use common words, names, dates or other known pieces of information about yourself.
SplashID Pro 9 security is designed in such a way that your account can be accessed only with a master password. To keep your account secure ensure that no one else knows it. Only you should know this critical piece of information.
This also means that we do not have any mechanism to reset your password if you forget it.
We cannot reset your master password
We do not have any mechanism to reset your password in case you forget it.
Please set up a password hint, and download a recovery kit after you sign up for your account. These are two ways by which you can ensure that you do not lose access to your account.
Account sign up
You can sign up for a SplashID account in a desktop, tablet or mobile application that you have downloaded and installed on your device from the application store for your device.
Alert
Account sign up is not possible in the web application.
The steps to create a SplashID Pro 9 account are:
- Install SplashID Pro 9 from the application store on your phone, tablet, laptop or desktop.
- Launch the installed SplashID Pro 9 app and accept any permissions that the device asks for. Not accepting any of the required permissions will likely cause some functions in the application to not perform as expected.
- Enter your email address, master password, confirm your master password, and accept the terms of our service. Click or tap on the Sign up button to start the account creation process.
- Once done, you will need to verify your email address by clicking on the verification button in the email you would have received.
- Next click on the Verify button in the application screen to complete the initial account creation.
- Proceed to complete the setup of your account with a chosen sync method, 2 factor method, user name and local pin. Finally generate a recovery kit and store it safely for later use.
Complete you initial account setup
In step 6 above, you will be presented with a series of initial setup screens. Follow through them to complete your account setup.
Choosing a sync method is mandatory. We also recommend you do the following.
- Setup a second factor authentication method for increased security of your account.
- Download the recovery kit and store the kit safely somewhere. If you forget your master password, the recovery kit contains a code that can be used by you to regain access to your account.
- We recommend using an authenticator application on your device for second factor setup.
Google account
You can sign up with your Google account on Android phones or tablets, iPhones, iPads and MacBooks. The email address used for your Google account will be used to identify your SplashID Pro 9 account.
Sign up with a Google account on Windows is not yet supported.
Link your Google account to your SplashID Pro 9 account
Alternatively, you can first sign up using your email and password initially as described above. Later, you can link your Google account sign in method in the Accounts section in the Settings screen.
Apple account
You can sign up with your Apple account on iPhones, iPads and MacBooks. The email address used for your Apple account will be used to identify your SplashID Pro 9 account.
Sign up with an Apple account on Android devices and Windows is not yet supported.
Link your Apple account to your SplashID Pro 9 account
Alternatively, you can first sign up using your email and password initially as described above. Later, you can link your Apple account sign in method in the Accounts section in the Settings screen.
Restrictions with using private Apple account option
If you choose to opt for not disclosing your Apple account email address during the sign up flow, then you will not be able to link a sign in method that uses your email address and password to this SplashID Pro 9 account of yours.
Sign in
Once you have completed creating your account, you can sign in to it for regular usage from any device you have installed SplashID Pro 9 on.
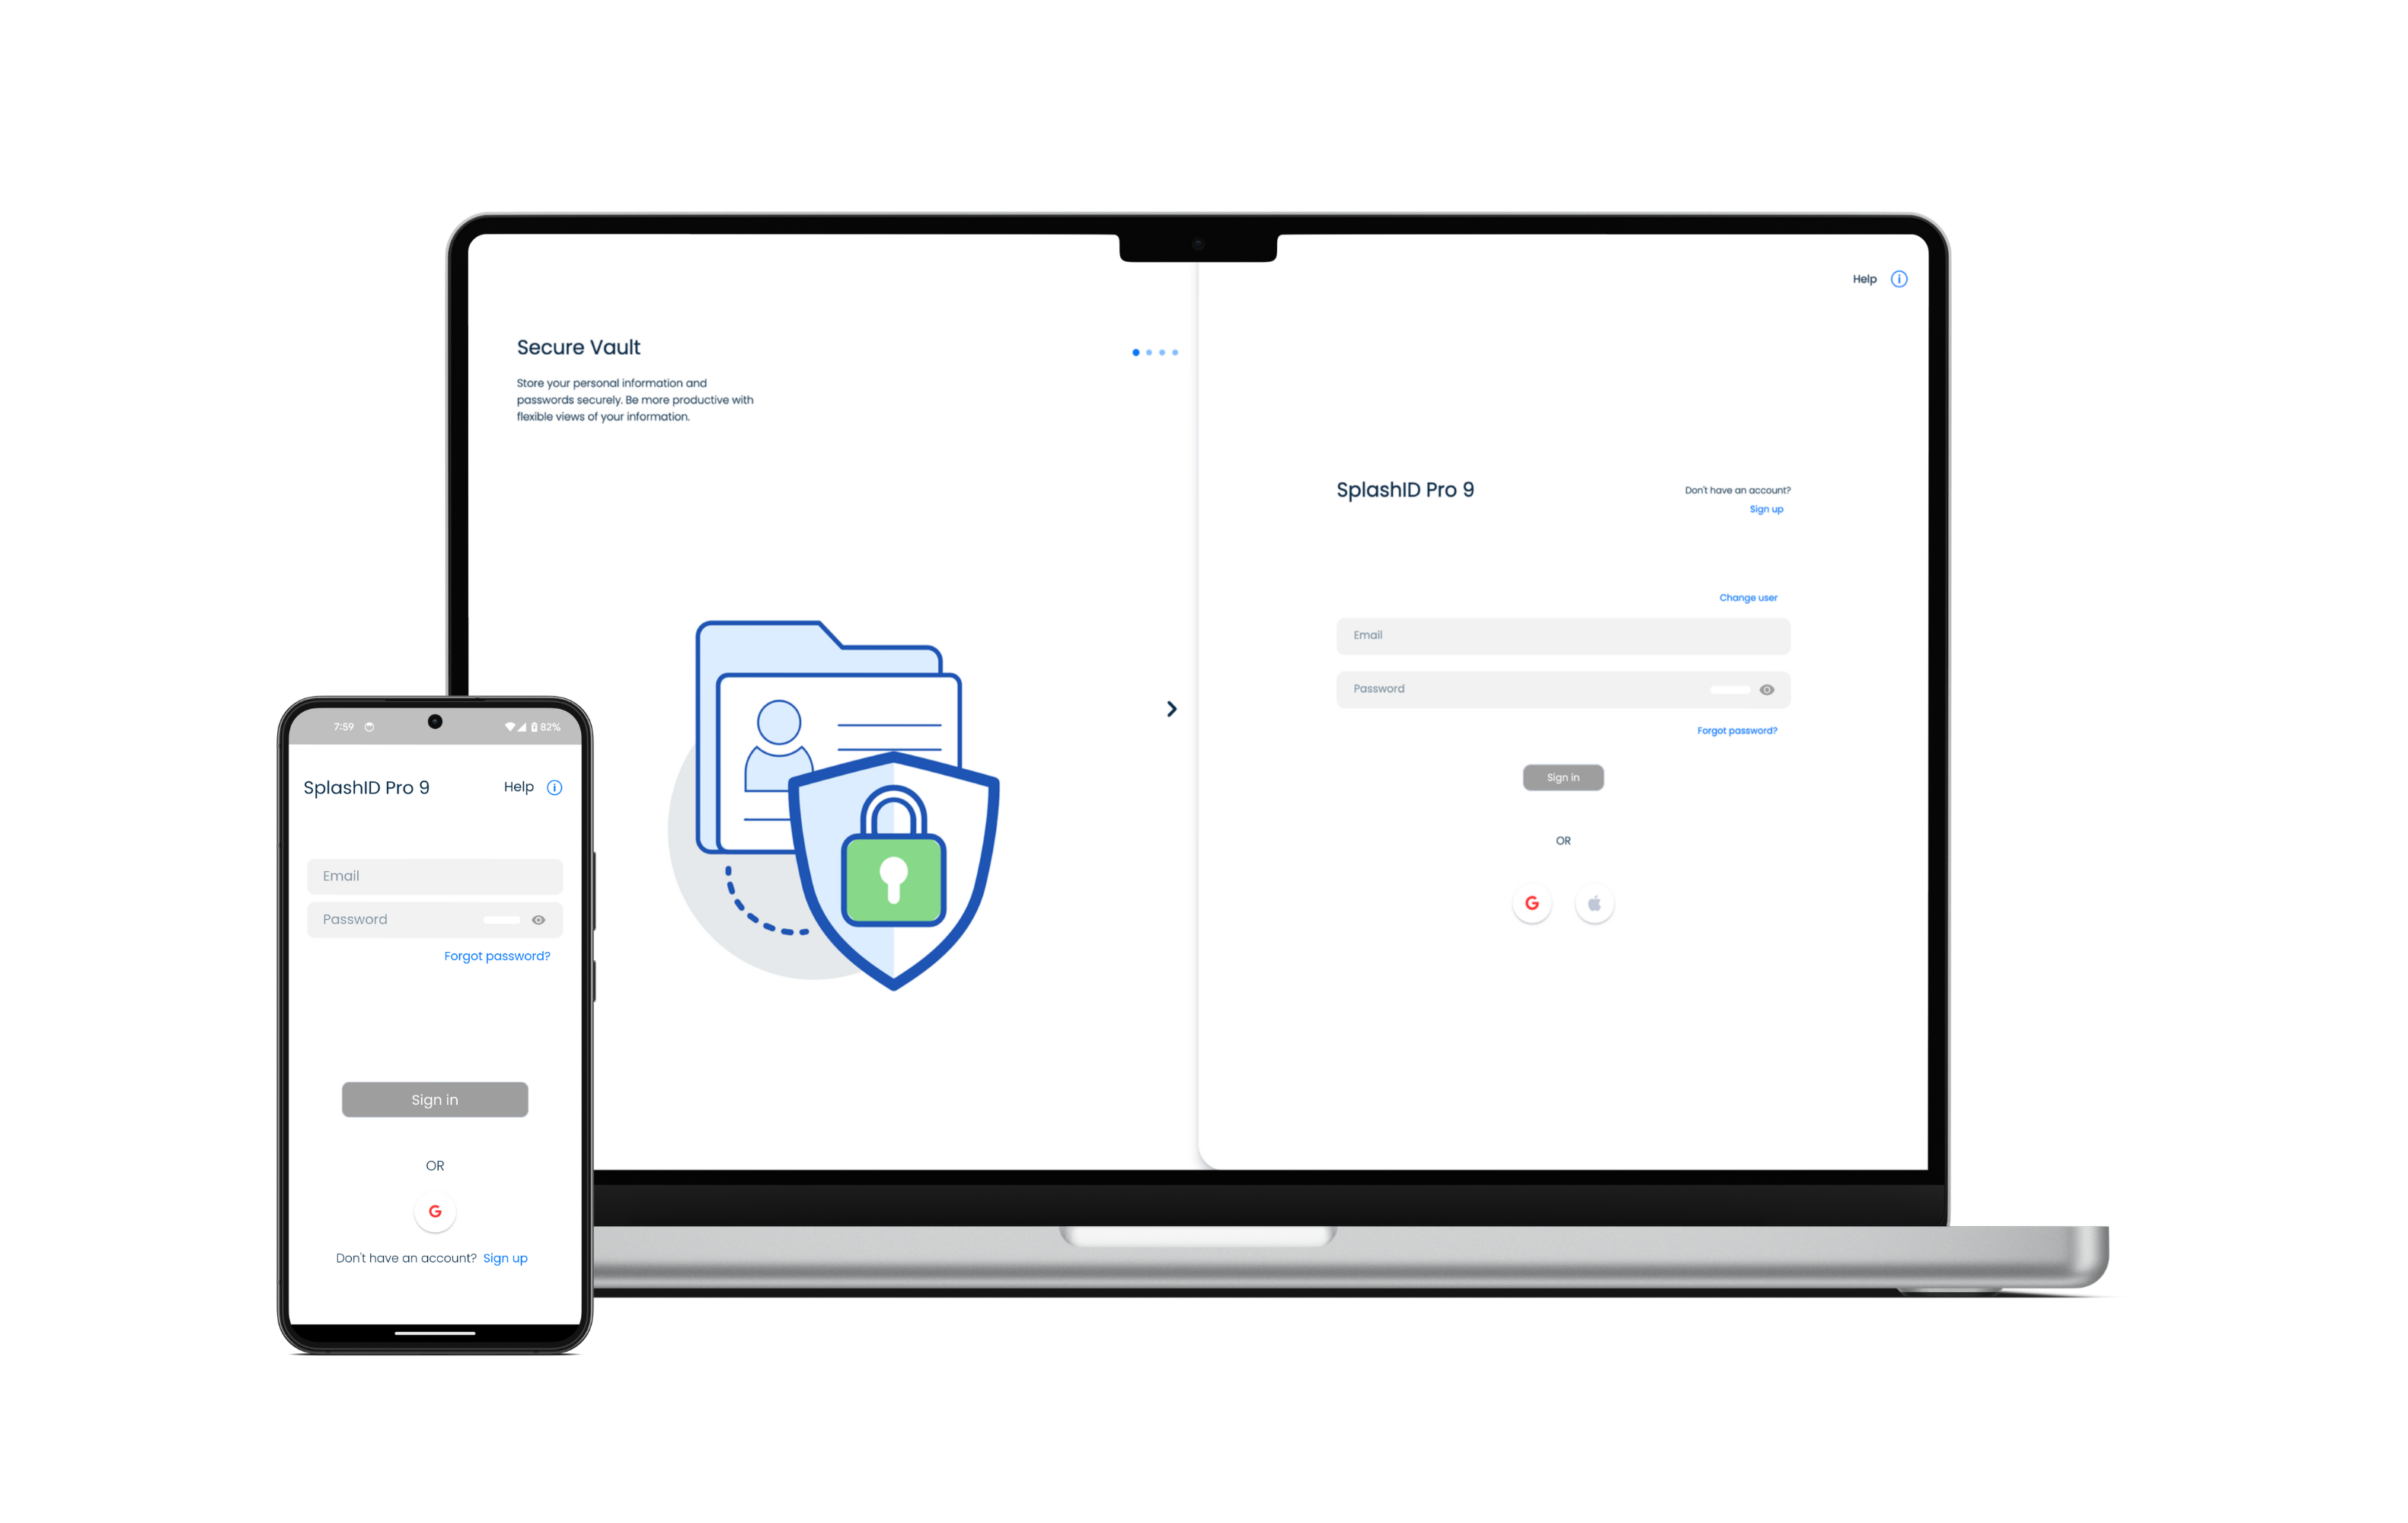
The steps to sign in to a SplashID Pro 9 account are:
-
Based on how you set up your account, choose one of the following options.
-
Email with master password
- Google sign in
- Apple sign in on supported devices
If you had previously signed in, then the account will be pre-selected for you. To change the account you want to use, click or tap on the Change user link.
- If you had setup second factor authentication, you will be prompted to enter a code. Open your authenticator application, email inbox or SMS inbox to get the code.
Enter the code and complete the sign in.
Password hint
A password hint can help you remember your master password, if you have set it.
Set a password hint
A password hint would have been optionally set by you when you had completed your account setup after signing up for it. In case you had not set your password hint or you want to change the password hint, then you can do so by following the steps below.
- Go to the Settings screen by clicking or tapping on the Settings entry in the application menu.
- Click or tap on the Account tab.
- In the Linked accounts section, click or tap on the Change button in the Password hint row to set a password hint.
Get a password hint
You can request for the password hint you had set before, to be sent by email to your inbox. This is useful if you need any help to remember your master password.
- On the Sign in screen click or tap on the Forgot password? link below the Master password entry box.
- Enter the email address of your SplashID Pro 9 account.
- Click or tap on the Send password hint button.
2 factor authentication
2 factor authentication provides a second level of authentication that will help you protect your account better from unauthorised access. It is strongly recommended that you use one of the 2 factor methods we provide.
Types of 2 factor methods
SplashID Pro 9 provides the following 2 factor methods.
- Recommended option - Authenticator OTP code generation
- Email OTP code
OTP delivery by SMS
SMS as a 2 factor method is no longer supported. Users who had previously setup 2 factor codes to be received by SMS can continue to use it till we take it off completely.
It is recommended that users change their 2 factor code generation using one of the options listed above.
Enable 2 factor
To setup 2 factor please do the following.
- Go to the Settings screen by clicking or tapping on the Settings entry in the application menu.
- Click or tap on the Security tab.
- In the Account section, click or tap on the Setup link.
- Select one of the 2 factor methods displayed. We recommend using an authenticator app on your phone to use the Authenticator App based 2 factor method. Refer to the section below for help on how to setup using an authenticator app.
- Follow the instructions on the screen to complete the 2 factor setup. After setting up, on the next login you will be asked for entering an OTP code after you provide your master password.
Using an Authenticator App
Please download and install one of the following popular authenticator apps from the App Store or Play Store on your phone. You can use any other authenticator app too; just make sure that it is installed from the App Store or Play Store, and is known to not have any security issues.
- Google Authenticator
- Microsoft Authenticator
- Authy
These apps have their own help guides to assist you in setting up OTP records. Please refer to their documentation if you have problems in setting up OTP records.
In a nutshell, after installing one of these authenticator apps and setting it up on your phone, do the following.
- Start addition of a new entry.
- Use the in built QR code scanner and scan the QR code displayed inside SplashID Pro 9 while setting up the 2 factor method.
- Edit and change the name of the newly setup entry if desired.
- Open the entry and use the code generated to verify it in the SplashID Pro 9 screen.
You can also manually add the long key in step 2 above to setup the entry. This is error prone and you will need to double check the key you entered before you save the entry.
Disable 2 factor
To disable 2 factor please do the following.
- Go to the Settings screen by clicking or tapping on the Settings entry in the application menu.
- Click or tap on the Security tab.
- In the Account section, click or tap on the Disable link.
- Enter your master password and click or tap on the Confirm button to disbale the 2 factor setup.
Modify 2 factor
To modify the 2 factor method you need to first disable the previosuly set up method, and set it up again.
It is recommended that you logout from all other devices you use SplashID Pro 9 on, before you proceed to disable 2 factor from one of your device.
Recovery kit
It is possible that you might not remember your master password, and the password hint you had set before does not help you. If that happens, the only way to reset your master password is by using a recovery kit.
We strongly recommend that you download your recovery kit and store the kit safely somewhere. It is very important to keep this safely and securely. Anyone with access to this document can access your account and lock you out of it.
The personalised recovery kit is a PDF file that can be opened with any PDF viewer software like the free Adobe Acrobat reader. It contains a 32 character recovery code that can be used by you to regain access to your account and change your master password to a new one.
Use the latest generated recovery kit
Only the latest downloaded recovery kit will be valid. Any previously downloaded recovery kits can no longer be used.
Keep the latest recovery kit very safely, and discard the old recovery kits to prevent any confusion in the future.
Download kit
You can generate and download a new recovery kit on your device by following the steps given below. Please ensure that the device or desktop is connected to the internet.
- Launch and sign in to your SplashID Pro 9 account on your desktop, mobile or tablet.
- Go to the Settings screen by clicking or tapping on the Settings entry in the application menu.
- Click or tap on the Account tab.
- In the Recovery Kit section, click or tap on the Download Kit button to generate the recovery kit.
- Using the file explorer on your device navigate to the Downloads folder to get hold of your recovery kit.
- Open the recovery kit and verify that it has a code generated for your account.
- Copy the file somewhere very safe.
Recovery kit name
The downloaded file will be called
SplashID-Pro-9-Recovery-Kit-DATE-AND-TIME.pdf
Storing your kit
- Take a print of the recovery kit document.
- Write down some hints to help you remember your password. If you can remember your password with your hint then you wont need to use the recovery kit to regain access to your account.
- Keep it in a safe or locker. Only you, or people you trust should have access to this document.
- You might choose to store this document in a cloud drive if you are aware of the risks with it. In the event that your cloud drive account gets hacked, then you are at serious risk of this document getting into the wrong persons hands.
Recover account
To recover your account and change the master password, locate your recovery kit document and keep your personalised 32 character recovery code ready.
Then follow the steps listed below. Please ensure that the device or desktop is connected to the internet.
- Launch and sign in to your SplashID Pro 9 account on your desktop, mobile or tablet.
- On the Sign in screen click or tap on the Forgot password? link below the Master password entry box.
- Enter the email address of your SplashID Pro 9 account in the displayed form.
- Click or tap on Recover account. This will send a code to your email inbox for verification.
- Verify your email account by entering the code received in the email.
- Enter the recovery code from the recovery kit document in the application screen.
- Tap or click on Recover account to start the recovery process.
- Set a new master password and a password hint, and tap or click on Continue.
- [Optional] It is recommended to download a new Recovery kit once a recovery code has been used.
Unlock account
Your account will get locked if 10 successive failed sign in attempts across all devices. The account will remain locked for 60 minutes, and will automatically get unlocked after this time period.
If you want to unlock your account before the 60 minute time period expires, then you can also use your recovery kit to unlock your account.
Follow the steps below to unlock your account yourself.
- Launch and try to sign in to your SplashID Pro 9 account on your desktop, mobile or tablet.
- On the Sign in screen click or tap on the Unlock Account button displayed. You can also see the time left till the account gets unlocked automatically.
- Enter the email address of your SplashID Pro 9 account in the displayed form.
- Click or tap on Recover account. This will send a code to your email inbox for verification.
- Verify your email account by entering the code received in the email.
- Enter the recovery code from the recovery kit document in the application screen.
- Tap or click on Recover account to start the recovery process.
Unlocking an account
Unlocking an account makes use of the account recovery procedure.
You should set a new master password if you suspect that your master password was compromised.
Additionally, you should create a new recovery kit after you sign in to ensure that only you have a recovery code from that moment onwards.
Records ↵
How to store and access information?
Screenshots can be zoomed
You can zoom the screenshots shown in this guide by clicking or tapping on them. This will allow you to see the details in the screenshot.
Overview
Your information in SplashID Pro 9 is stored as records.
Each record belongs to a category and is of a particular type. Use categories and types to organise your records as you wish.
Each record contains
- A name
- A category and a type
- Unlimited fields with labels
- Unlimited notes
- Upto 5 attachments
- Tags
- Sharing information
- Sync option
- Dates and times to track its creation and updates to it
Records screens
All your personal records can be viewed in the My Records screen. The My Records screen can be reached by clicking on the My Records link in the application menu.
Some examples of records are shown below. You can use your imagination to store information in the way you like it.
- Login information to a website or application
- Personal ID
- Driving license
- Passport details
- Insurance details
- Bank accounts
When you sign in to the application on your device, you will be taken to the screen that shows all your own records by default. You can search, filter or sort them to see them in the way that suits you.
The sections below explain more about records, and other related elements that you will use to manage your information in records.
My Records
The My Records screen displays all your own records that have not been shared with others. This is the first entry in your application menu.
The structure of this screen differs on mobiles, tablets and desktops as explained below.
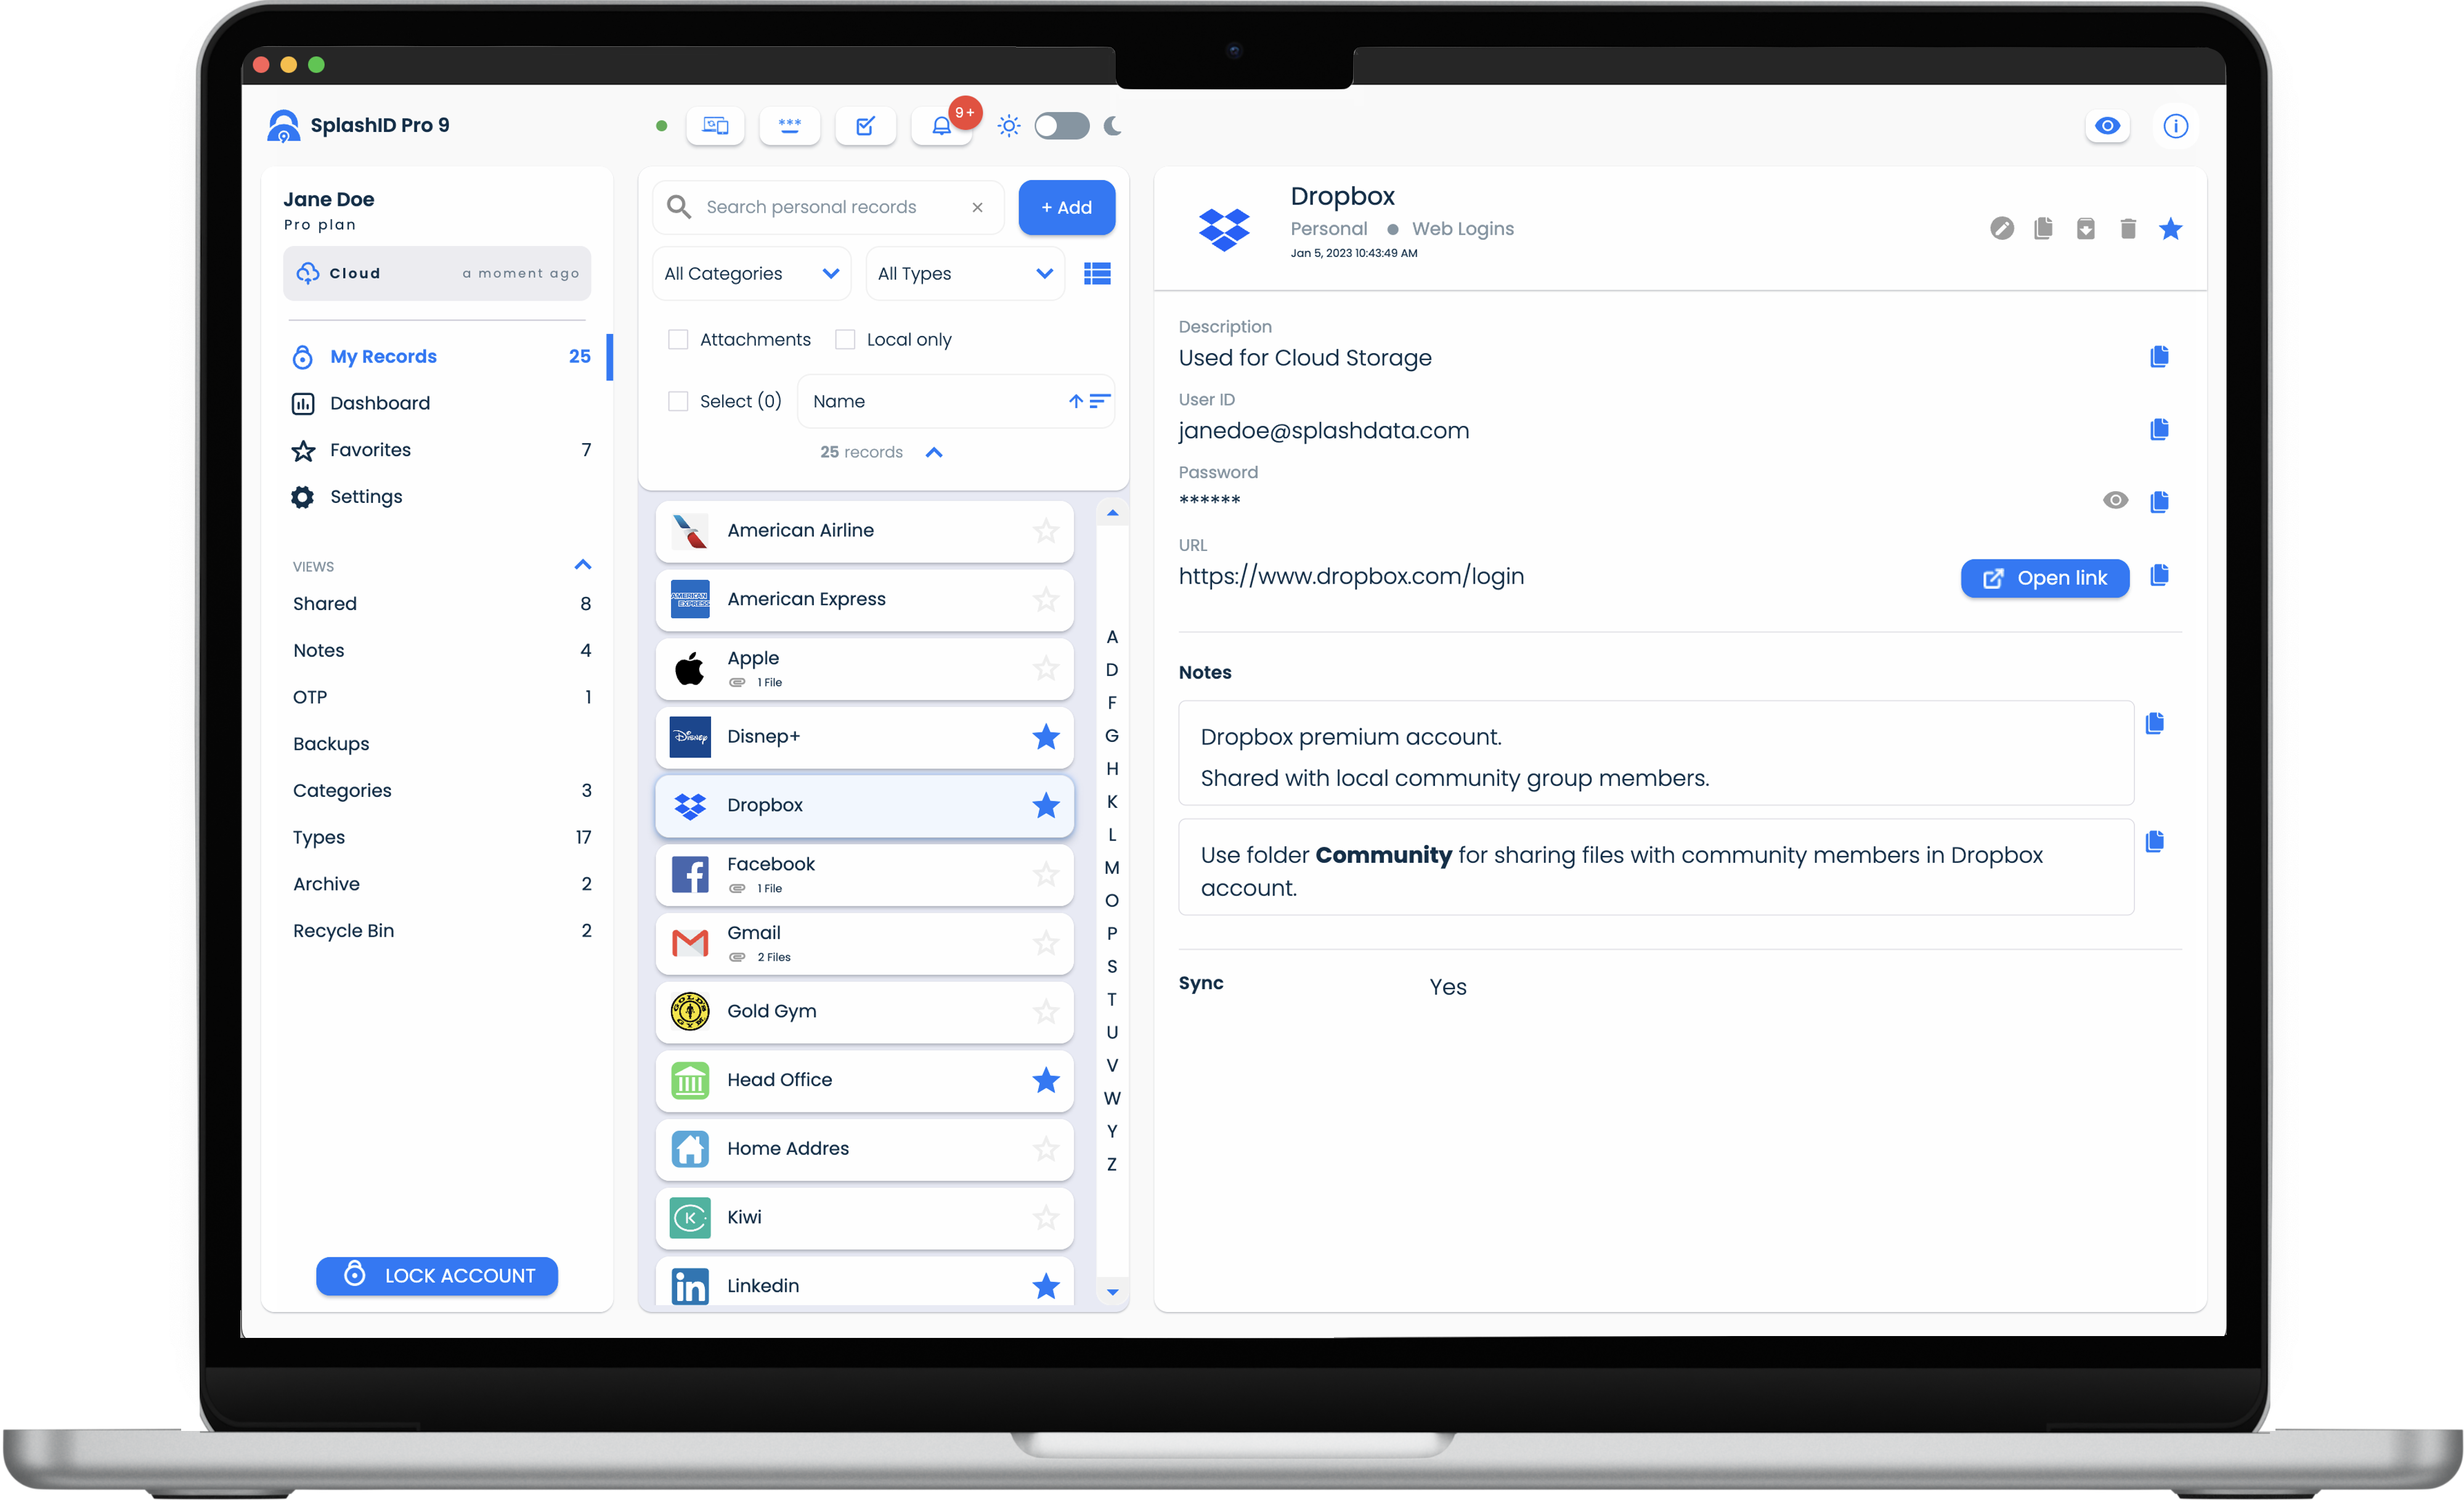
In a desktop, the view consists of 3 parts.
- The application menu in the leftmost panel.
- A list of records displayed in the middle panel.
- Details of a selected record displayed in the right panel.
| Mac | Windows |
|---|---|
 |
 |
Application menu in mobiles and tablets
In mobiles and tablets, the application menu can be opened by tapping on the list menu icon in the top left part of the screen.
Record fields
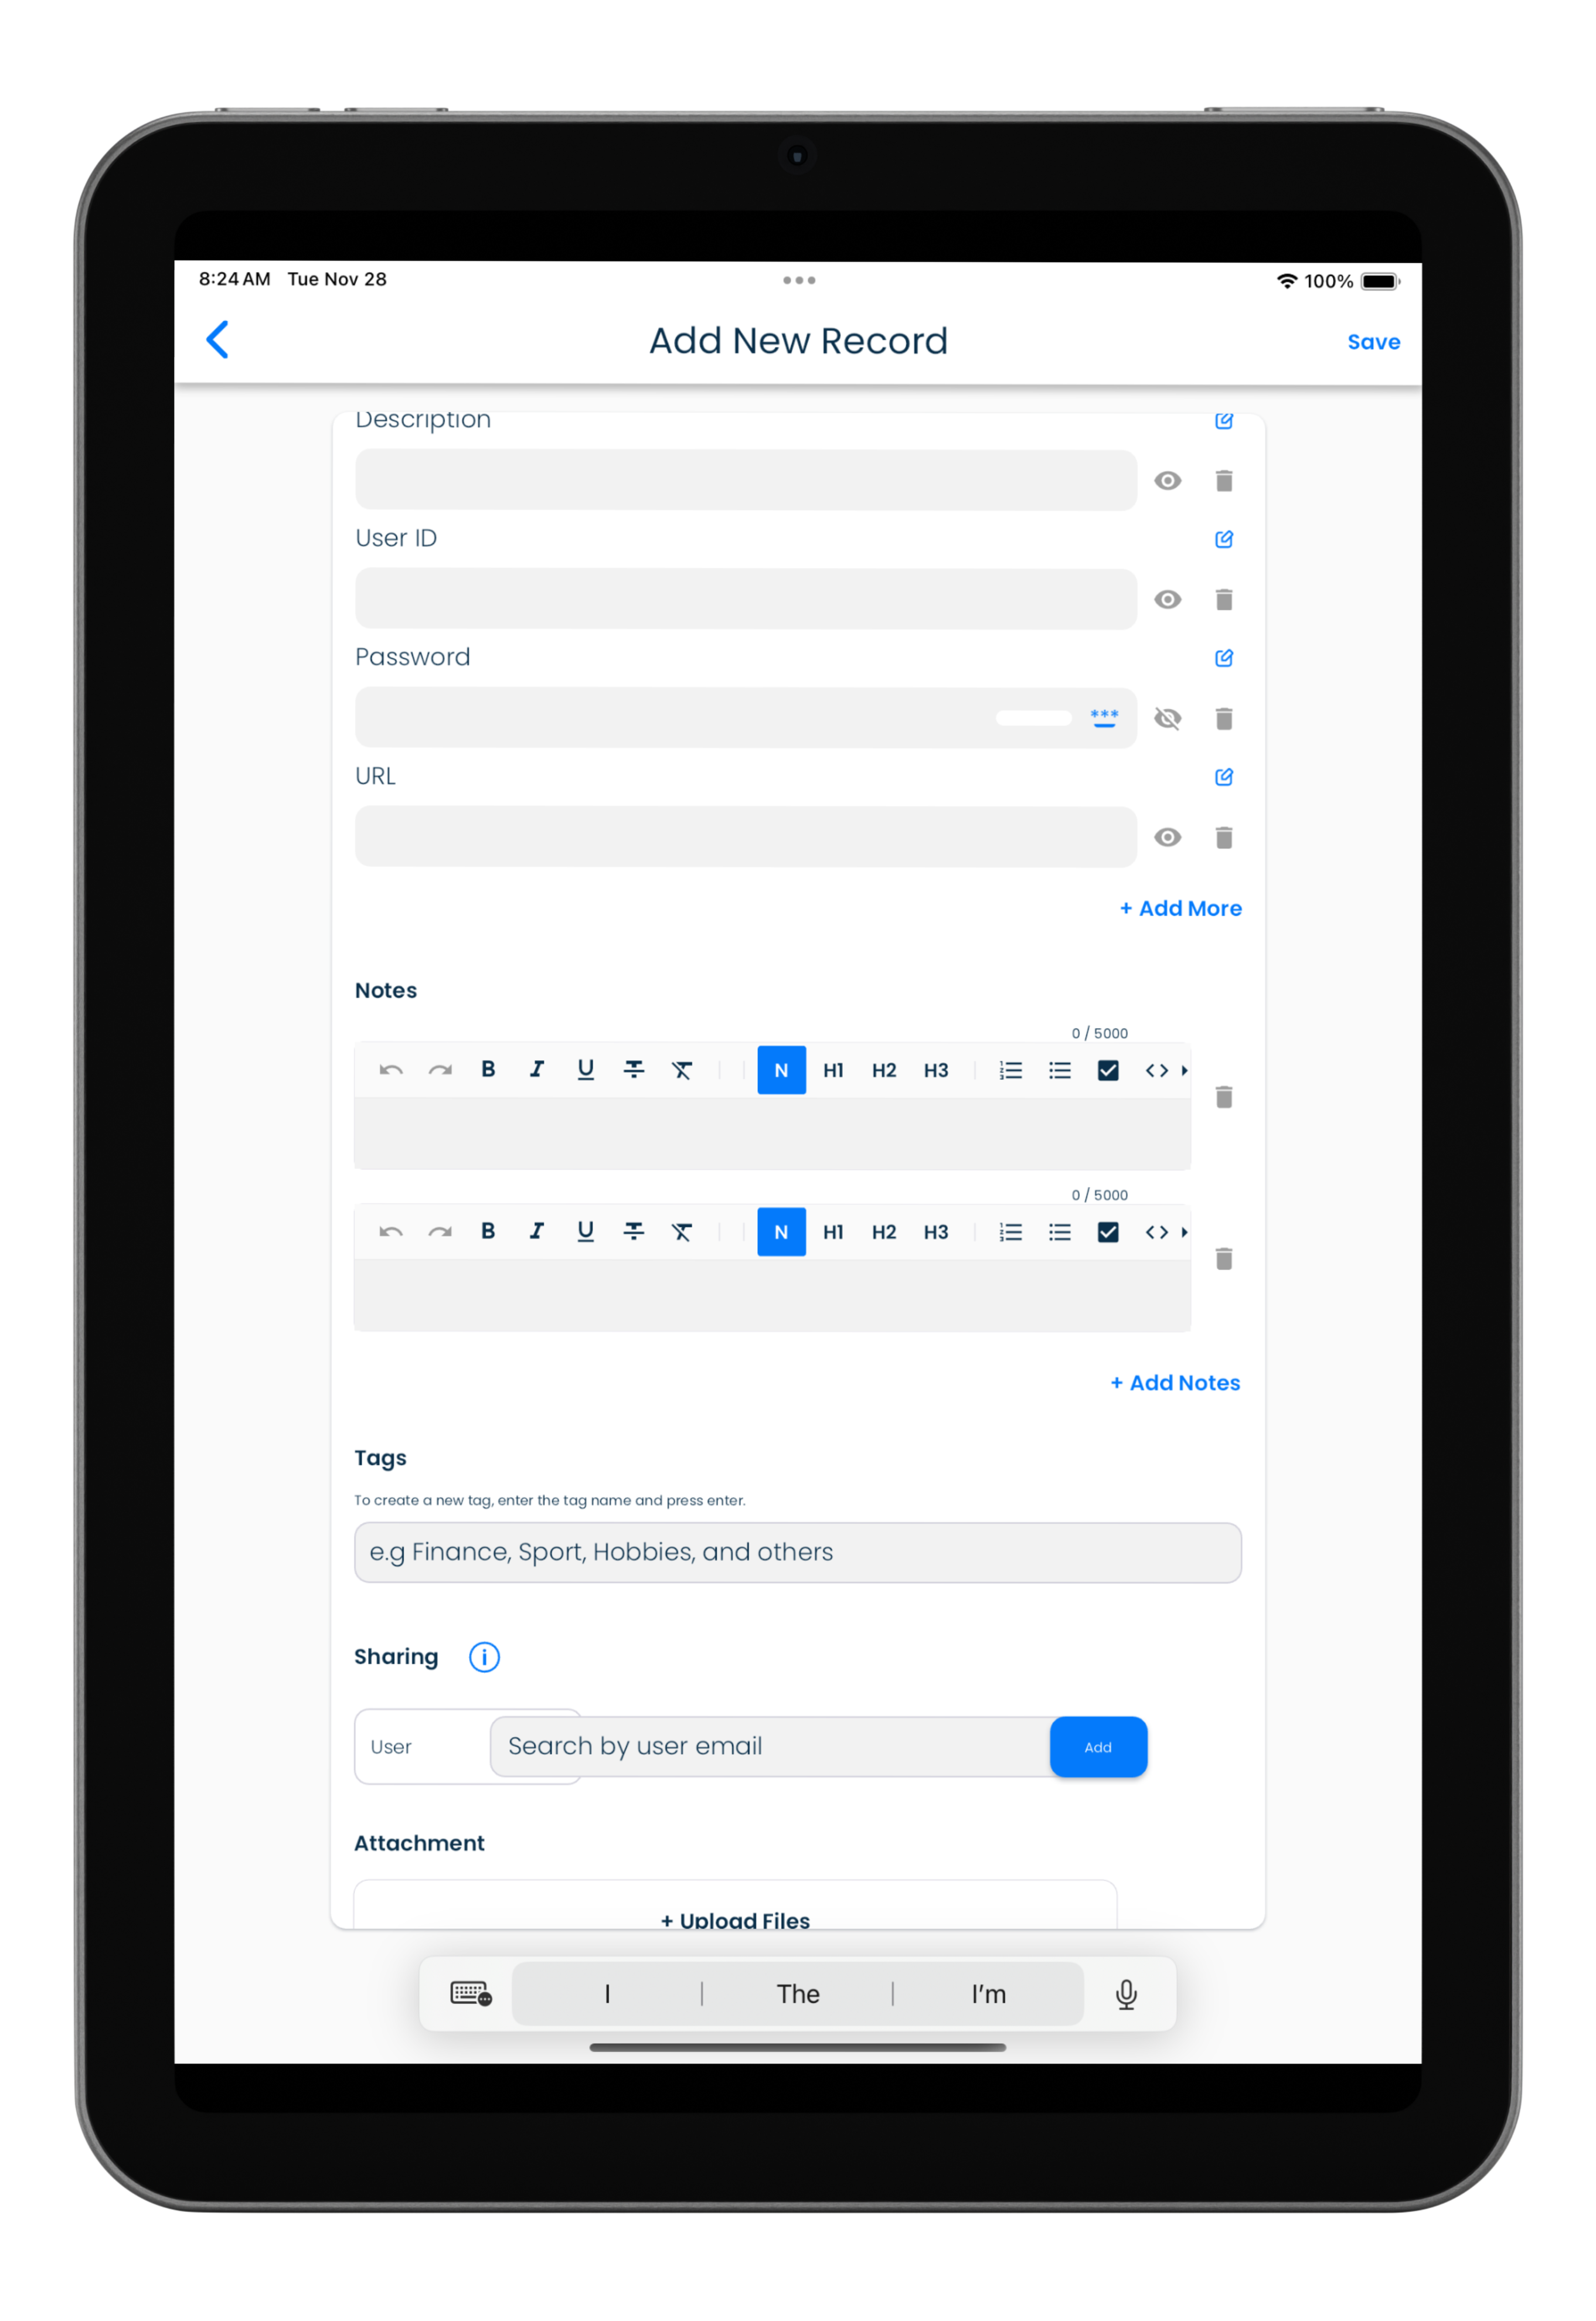
Record fields allow you to store information of different types like simple text, pin codes, email addreses, web site addresses, OTP code generators, and passwords among others.
Label and value
Each record field is a pair of values. It contains a label and a value. The field label helps you identify what is the value contained in the field. The labels and values can be edited as per your needs.
Managing fields
When you add a new record, you can select a type and the predefined fields in the type will be displayed for you to enter your information in the record.
You can also delete individual fields, or add more fields to the record. There is no limit on the number of fields you can have in a record.
Record fields also have actions associated with them that are useful while accessing the information in them.
Record fields can be ordered in the way you want. By default, when you add a new field it gets added to the end of the list of fields.
Copy to clipboard
Most of the record fields will have a copy to clipboard button that is displayed to the right of the field when the record is being viewed.
Masked fields
Masking hides the display of the field content in the record views for fields that need to be normally secure. You can unmask the field and see the actual content by clicking or tapping on the eye icon to the right of the masked field.
Password fields are masked by default when records are viewed. You can also mask any other fields that you want to.
URL fields
These fields can hold web site addresses. They display an Open link button to the right of the field that will open the web site in your browser.
Records
You can manage your records by performing the following operations.
Adding a record
Editing a record
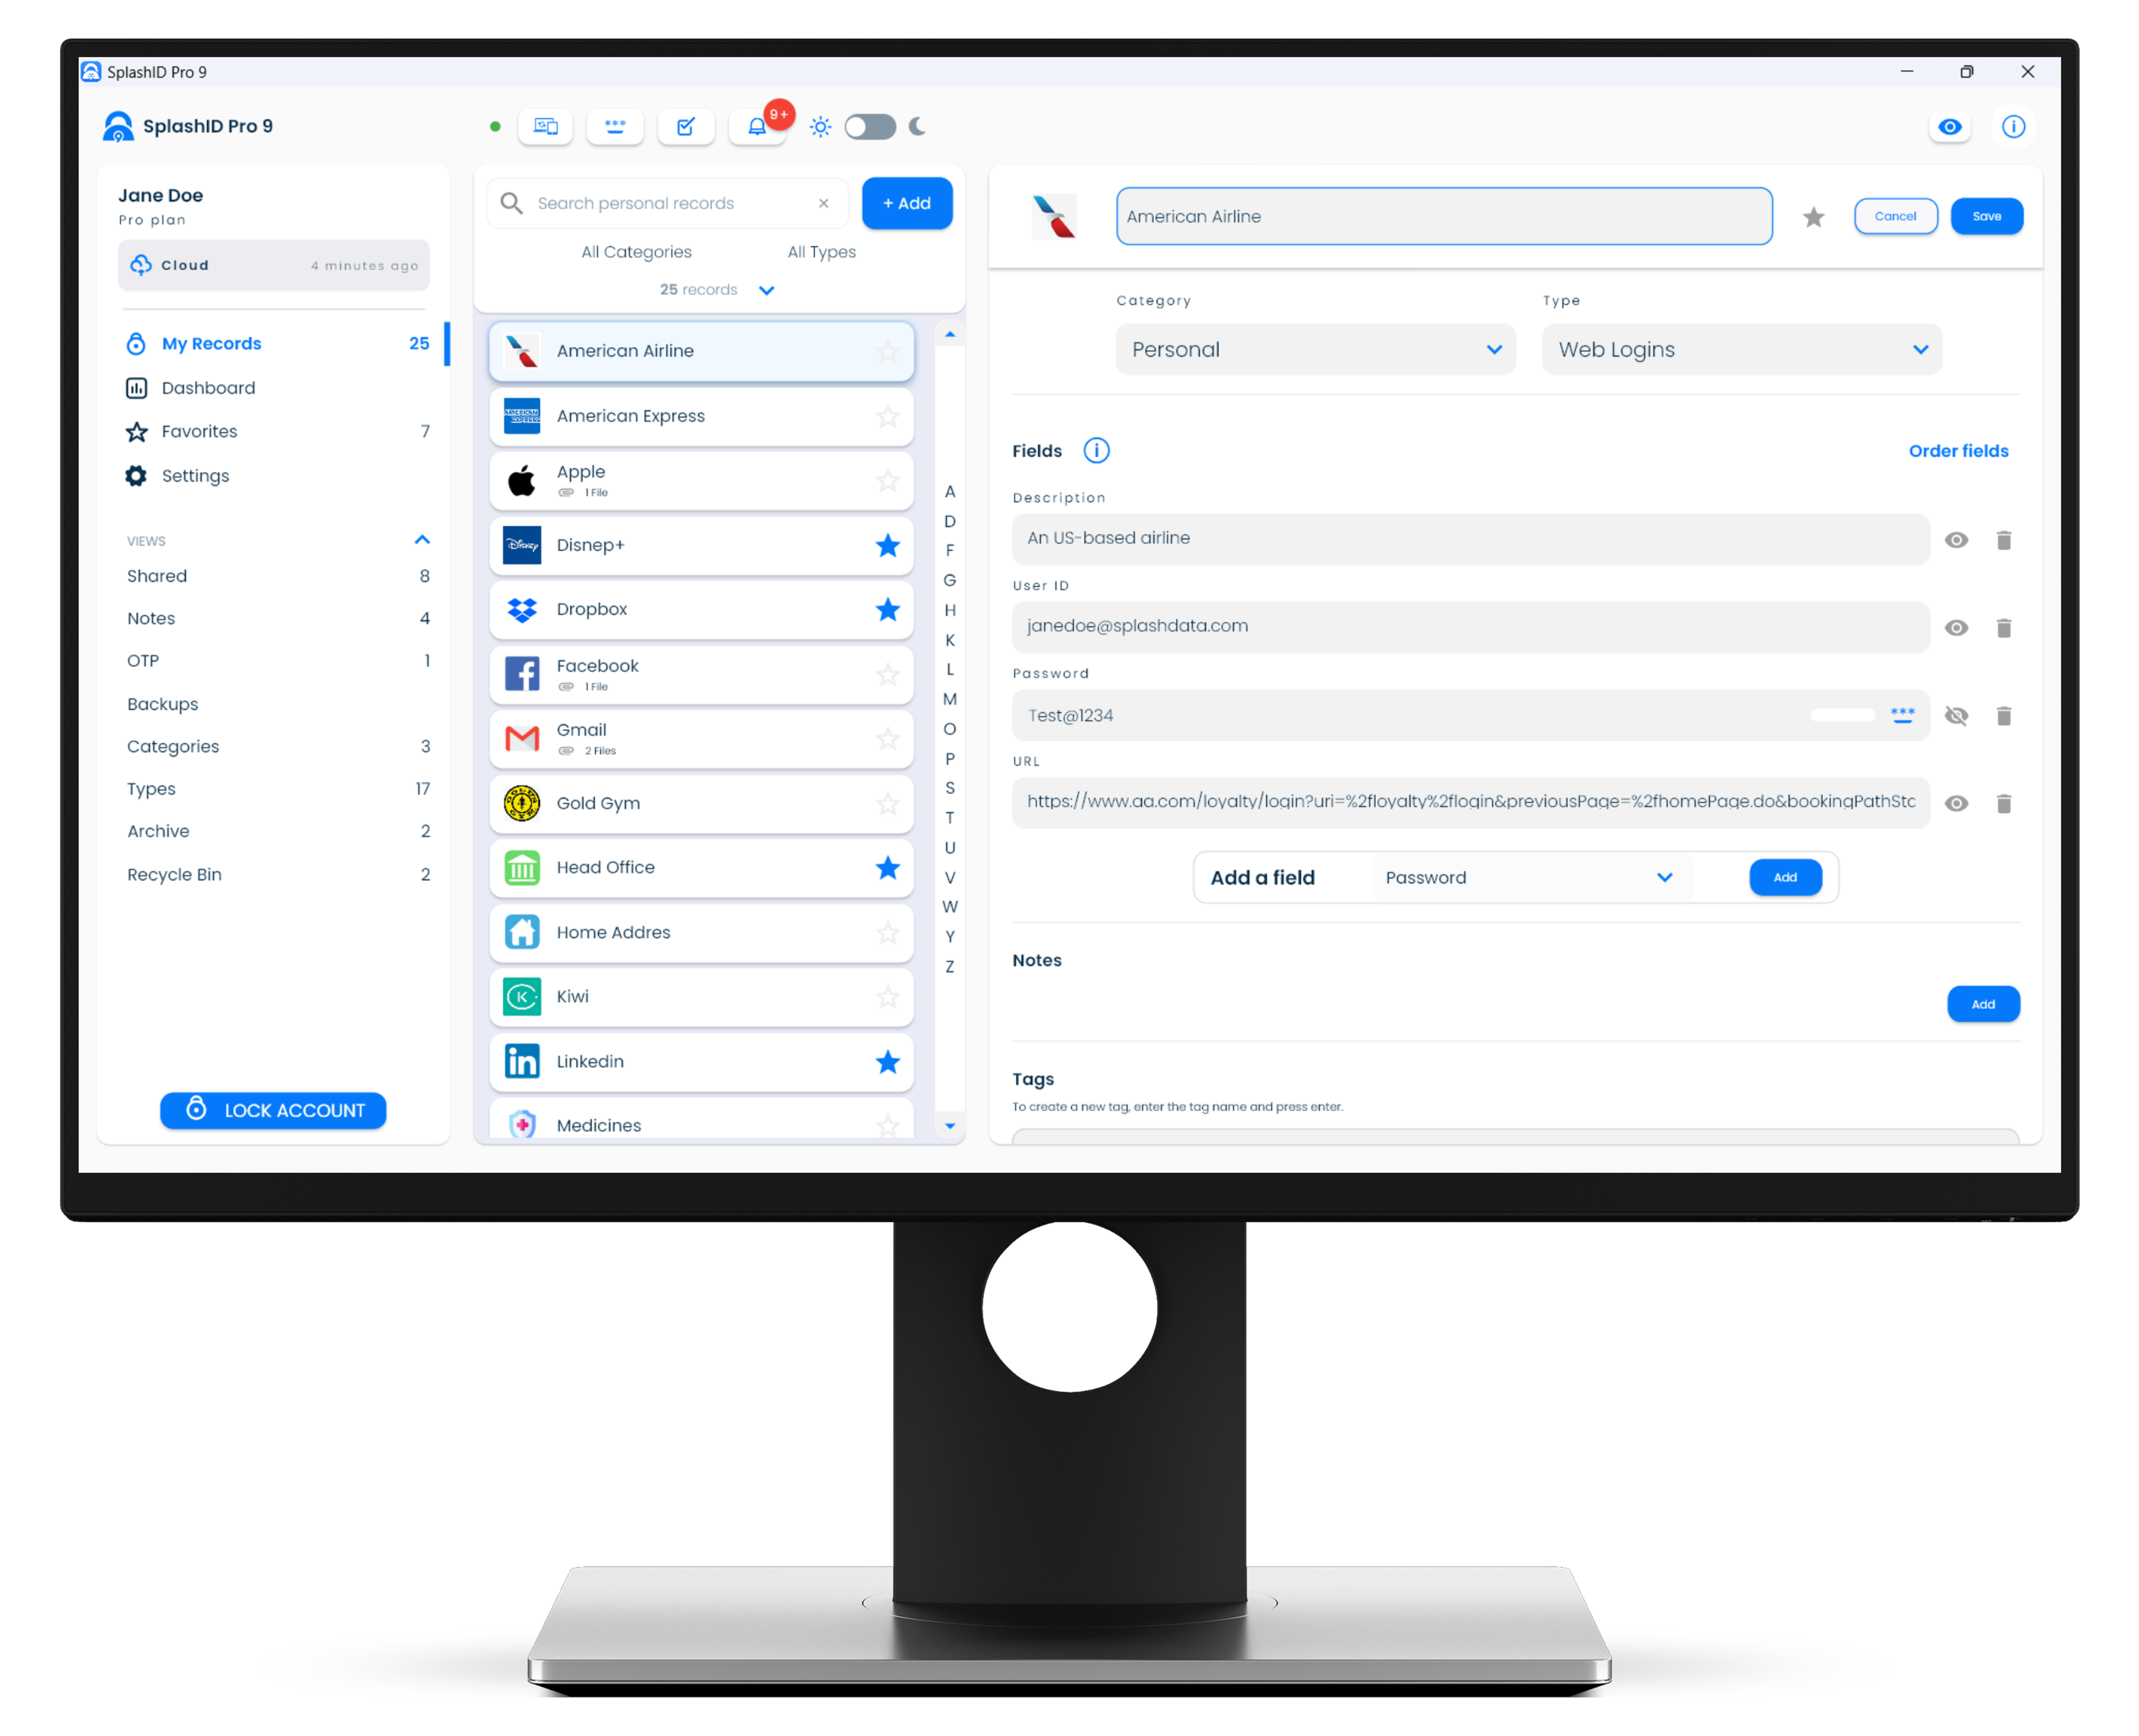
Select a record in the record list, and then click on the Edit icon in the record details header in the right side panel to open the record for editing.
| Mac | Windows |
|---|---|
 |
 |
Archiving a record
Archiving a record can be used to organize infrequently accessed records. It moves the archived records to a different view that can be accessed from the application menu.
Archived records can also be unarchived back to the personal record list.
Deleting a record
Deleting a record sends it to a Recycle Bin. You can permanently delete them from the Recycle Bin if you are sure that you no longer need them.
Alternatively, you can restore a deleted record in the Recycle Bin to the personal record list.
Mark a record as a Favorite
You can mark frequently accessed or important records as favorites. All the favorite records can be viewed in the Favorites view from the side menu.
Filtering and sorting
The records displayed in the list can be filtered using multiple criteria, and then sorted to suit your needs.
The filtering criteria available include
- Searching in record names and fields.
- By selecting specific categories and/or types assigned to records.
- Showing Local only records i.e. records that exist only on one device.
- Showing records that contain attachments.
Sorting of the records can be done by
- Record name
- Recently modified time
- Creation time
Filter panel
The filter panel is available in the top portion of the record list section in different views.
Custom view
You can create your own views by selecting all or one categories and types, setting the filters and sort criteria, and then saving them with a name that you give.
A list of such views can then be accessed to quickly show your records in the way you have filtered and sorted them.
Create a custom view
To create a custom view do the following.
- Select all or one of the categories from the dropdown list in the filter panel.
- Select all or one of the types from the dropdown list in the filter panel.
- Set the filter and sort options as per your need.
- Then click or tap on the list icon to the right of the Types dropdown.
- Click or tap on the Save icon in the options that pop up.
- In the displayed dialog, give the view a name of your choice.
- Click or tap on the Save button to store your custom view locally on the device.
Custom views are local
Custom views are not synced across your devices and desktops. They are only available on the device you set them up in.
Select a custom view
To select a custom view do the following.
- Click or tap on the List icon to the right of the Types dropdown in the filter panel.
- A list of your custom views and the default My Records view is shown in a list below the Save and Edit icons.
- Click or tap on one of the custom views in the list to apply the saved options in the custom view.
Rename a custom view
To rename a custom view do the following.
- Click or tap on the List icon to the right of the Types dropdown in the filter panel.
- Click or tap on the Edit icon that allows you to manage your custom views.
- In the popup shown, select one of your custom views. Then click or tap on the edit icon shown to the right on top of the list.
- Change the name in the text field, and click or tap on the Save button to rename the custom view.
Delete a custom view
To delete a custom view do the following.
- Click or tap on the List icon to the right of the Types dropdown in the filter panel.
- Click or tap on the Edit icon that allows you to manage your custom views.
- In the popup shown, select one of your custom views. Then click or tap on the delete icon shown to the right on top of the list.
- Confirm by clicking or tapping on the Delete button to remove the custom view from your list.
Deleting a custom view
Deleting a custom view does not delete the records that are displayed in the view.
Multiple selection of records and actions
You can select multiple records by checking the Select check box, and then perform actions on them. These actions include
- Change Type
- Change Category
- Duplicate
- Export
- Archive
- Delete
Categories
Categories are used to organise your records into high level groups.
SplashID Pro 9 comes with three categories out of the box. These are
- Personal
- Business
- Family
You can create unlimited number of categories to your account to help you organise your records in a folder like way.
Categories can be renamed, and also deleted if they are not assigned to any records.
WiFi sync and category deletion
For WiFi sync users, it is recommended that all the devices are synced properly before the deletion of a category is attempted on a device. This will prevent the category from being deleted if it was assigned to records on other devices, but was not synced on the current device where it was being deleted from.
Types
Types can be used to indicate the purpose of a record. Types can also be thought of as record templates used at the time of the record creation.
Each type has a predefined set of fields that are used to populate a record when a record is being created for the first time.
For existing records, subsequently changing the type of the record will redefine its purpose, but will not change the fields that were already populated in the record with the fields from the previous type.
Changing type of a record does not change its fields
The fields in the types template does not get applied to the record when you change the type of an existing record.
There are 17 predefined types available in SplashID.
- Addresses
- Bank Accounts
- Clothes Size
- Combination
- Credit Cards
- Email Accounts
- Files
- Frequent Flyer
- Identification
- Insurance
- Memberships
- Phone Numbers
- Prescriptions
- Serial Numbers
- Servers
- Vehicles
- Web Logins
You can also create as many types as you desire.
Types can be renamed, their fields changed, and also deleted if they are not assigned to any records.
WiFi sync and type deletion
For WiFi sync users, it is recommended that all the devices are synced properly before the deletion of a type is attempted on a device. This will prevent the type from being deleted if it was assigned to records on other devices, but was not synced on the current device where it was being deleted from.
Attachments
You can add upto 5 files to a record as attachments.
Each attachment can be upto 2 MB in size.
More attachments should be avoided
Having too many attachments will result in bigger backups and slower sync across devices.
Use attachments judiciously.
Icons
Icons help you visually identify and distinguish between records.
A record gets an icon from the type it is created from initially. Later, if required, you can change the icon on a record or a type.
Changing an icon in a record or type
To change the icon on a record or type you need to open the icon editor as explained below.
- Open a record or type for editing.
- Click or tap on the icon displayed on the left of the record or type name in the details header to show the icon editor.
- Filter out the available icons by using some search words, or scroll and select the desired icon from the list of icons displayed.
- The chosen icon will be displayed in the bottom left part of the icon editor screen.
- Click or tap on Save to set the icon in the record or type.
Using your own icons
You can upload your own images to be used as icons in your records or types using the icon editor.
- Open a record or type for editing.
- Click or tap on the icon displayed on the left of the record or type name in the details header to show the icon editor.
- Click or tap on the + Add button below the search icons bar on the right side.
- Click or tap on the Pick image button to load an image from your device.
- You can zoom the image, and drag the small window to choose a desired area of the image.
- Click or tap on the Crop image button to select the portion of the image to used as an icon.
- Enter a name of your choice in the provided text box, review the selected image and click or tap on the Save button to use the icon.
Record views
Records created by you can be accessed in different ways. These views can be accessed from the application menu.
Personal records
All the record views described here show personal records i.e. records that are not shared with others.
Shared records can be seen in the Shared screen only. Records shared by you with others, and also those that others have shared with you are shown in this view.
My Records
All your personal records that are not shared can be viewed in the My Records view.
These records can be searched, filtered and sorted as per your needs.
You can also create your own custom views as described above.
Favorites
The Favorites view shows all your personal records that you have marked as a favorite in one place.
Shared
Records shared by you with others, and also those that others have shared with you are shown in the Shared screen.
Notes
The Notes screen displays all the notes that you have in your personal records in a single view.
Use this screen to manage your notes across records and to access them quickly.
OTP
The OTP screen shows all the OTP fields that you have in all your personal records collected.
It can be used to quickly locate authenticator OTP codes for sites and applications you use without having to go through a record.
Next steps
Archiving and Deleting
Overview
Over time it is possible that some of the records you had used previously are no longer needed. You can then decide to move them out of the record views to keep your record lists concise and clean. Archiving and deletion of records help you to do this.
Archiving
Archiving of records in SplashID Pro 9 allows you to move records that are not needed to a separate area that can be accessed from the application menu. This helps in keeping your most relevant records in your main views.
Archive screen
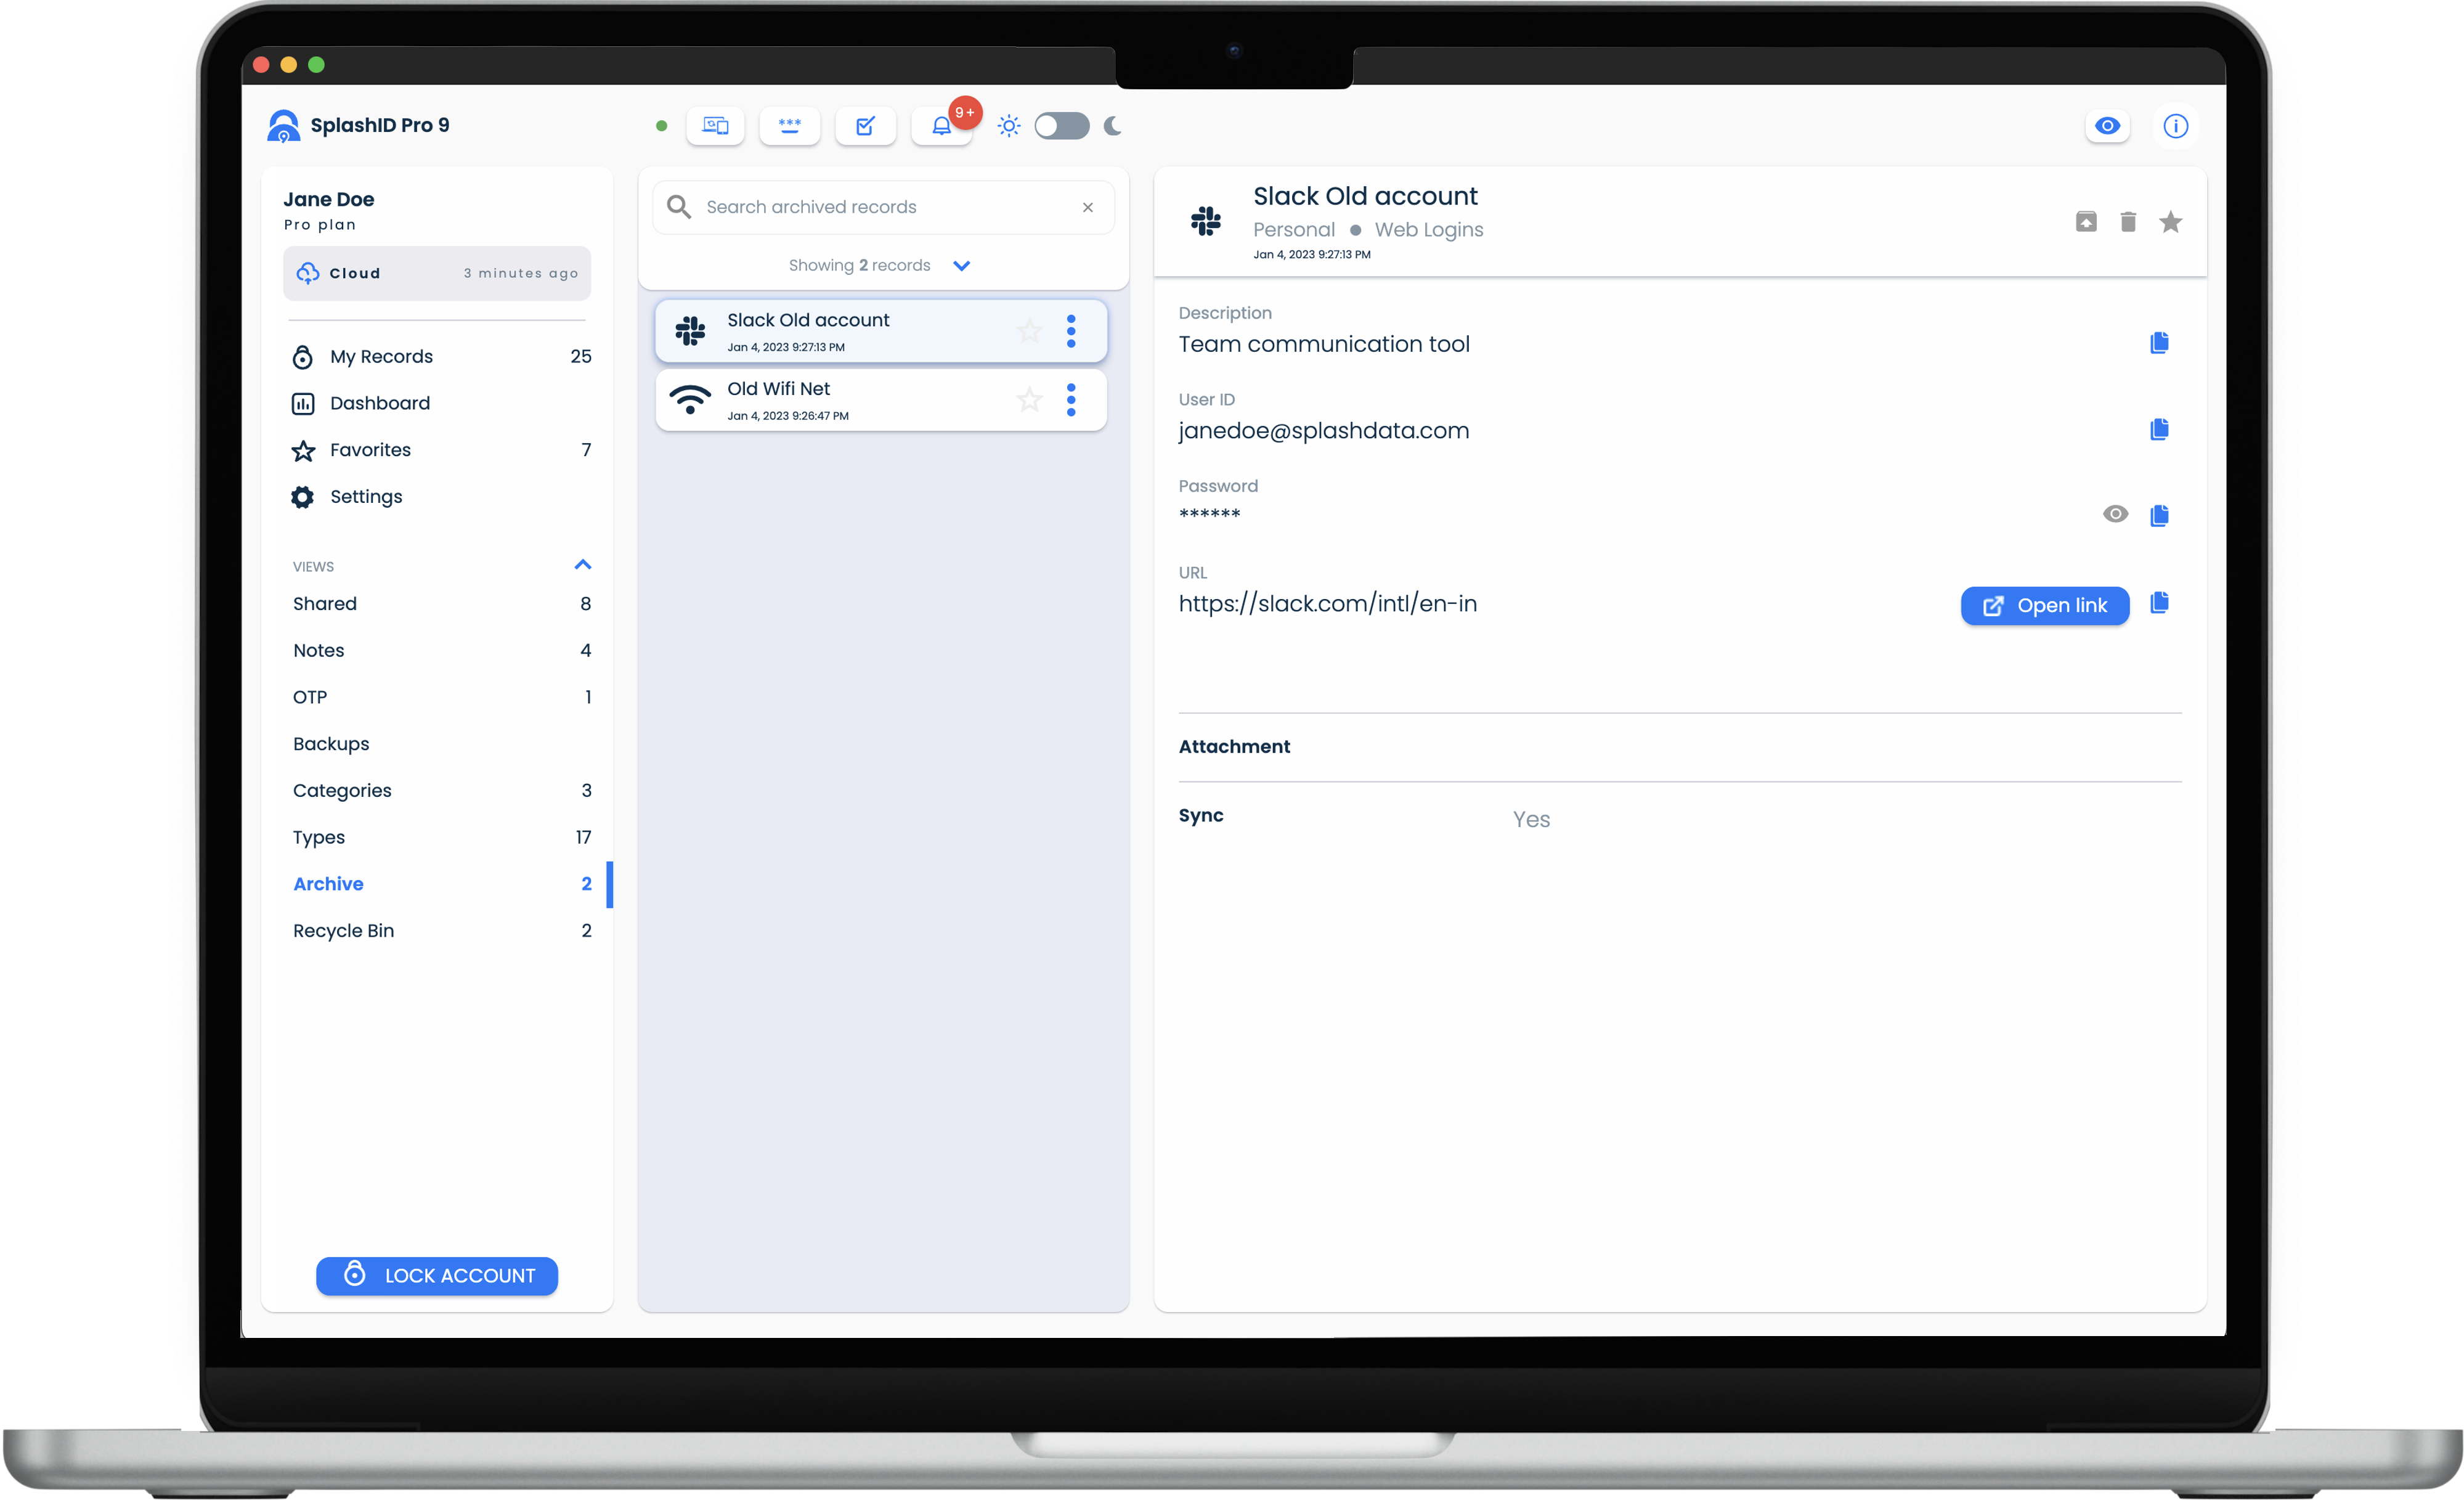
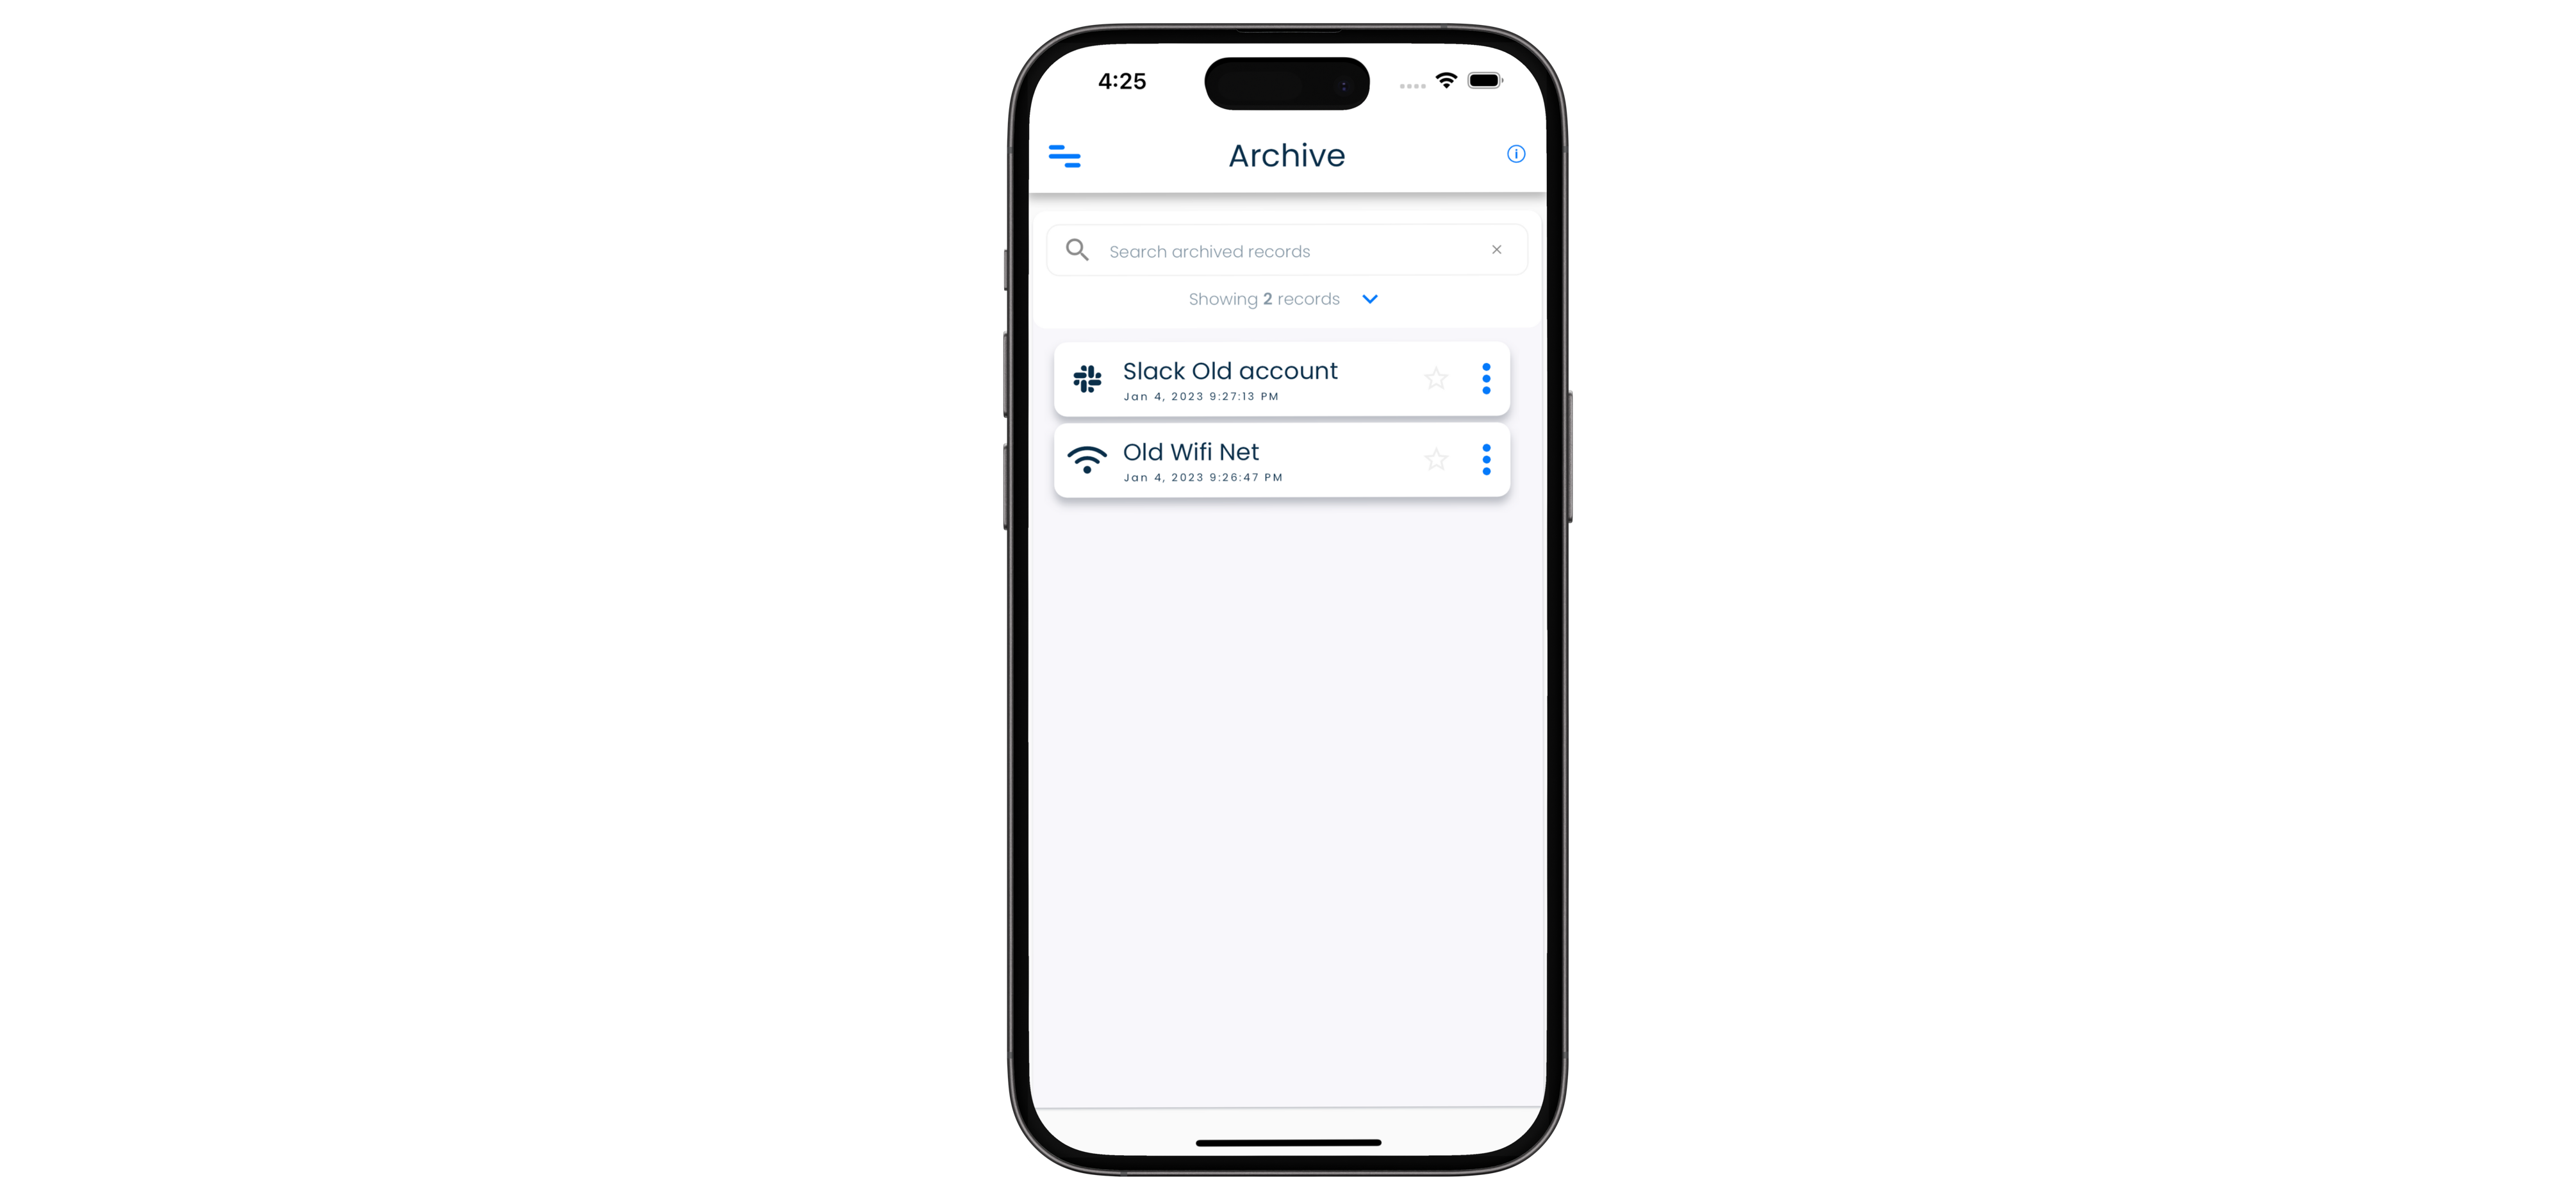
All your archived records can be viewed in the Archive screen. The Archive screen can be reached by clicking or tapping on the Archive link in the application menu.
Archived records sync across devices, and can be unarchived back to the personal record list if they are needed to be accessed regularly again.
Archived records cannot be edited. They will need to be unarchived first and then edited as regular records.
Archive a record
- Visit the My Records screen from the application menu.
- Select a record in the record list.
- Click or tap on the Archive icon in the record details header to archive the record.
- Confirm by clicking or tapping on the Archive button to proceed with archiving the record.
Unarchive a record
- Visit the Archive screen from the application menu.
- Select a record in the archived record list.
- Click or tap on the Unarchive icon in the record details header to unarchive the record.
- Confirm by clicking or tapping on the Unarchive button to proceed with archiving the record.
Another way to unarchive a record
- Visit the Archive screen from the application menu.
- Locate the record in the archived record list.
- Click or tap on the three dots icon to bring up the list of actions.
- Click or tap on Unarchive option.
Archive multiple records
- Visit the My Records screen from the application menu.
- To select multiple records in the record list for archiving the records
- Expand the filter panel if it is collapsed by clicking or tapping on the Down arrow icon.
- Click or tap on the Select checkbox.
- Select the records that you want to archive.
- Click or tap on the three dots icon in the filter panel next to Select to bring up the list of actions.
- Click or tap on Archive option.
- Confirm by clicking or tapping on the Archive button to proceed with archiving the selected records.
Unarchive multiple records
- Visit the Archive screen from the application menu.
- To select multiple records in the record list for unarchiving
- Expand the filter panel if it is collapsed by clicking or tapping on the Down arrow icon.
- Click or tap on the Select checkbox.
- Select the records that you want to unarchive.
- Click or tap on the three dots icon in the filter panel next to Select to bring up the list of actions.
- Click or tap on Unarchive option.
- Confirm by clicking or tapping on the Unarchive button to proceed with archiving the selected records.
Deleting
Deleting a record sends it to a Recycle Bin. The Recycle Bin is a temporary holding area for your deleted records till you decide what to do with them.
Recycle Bin screen
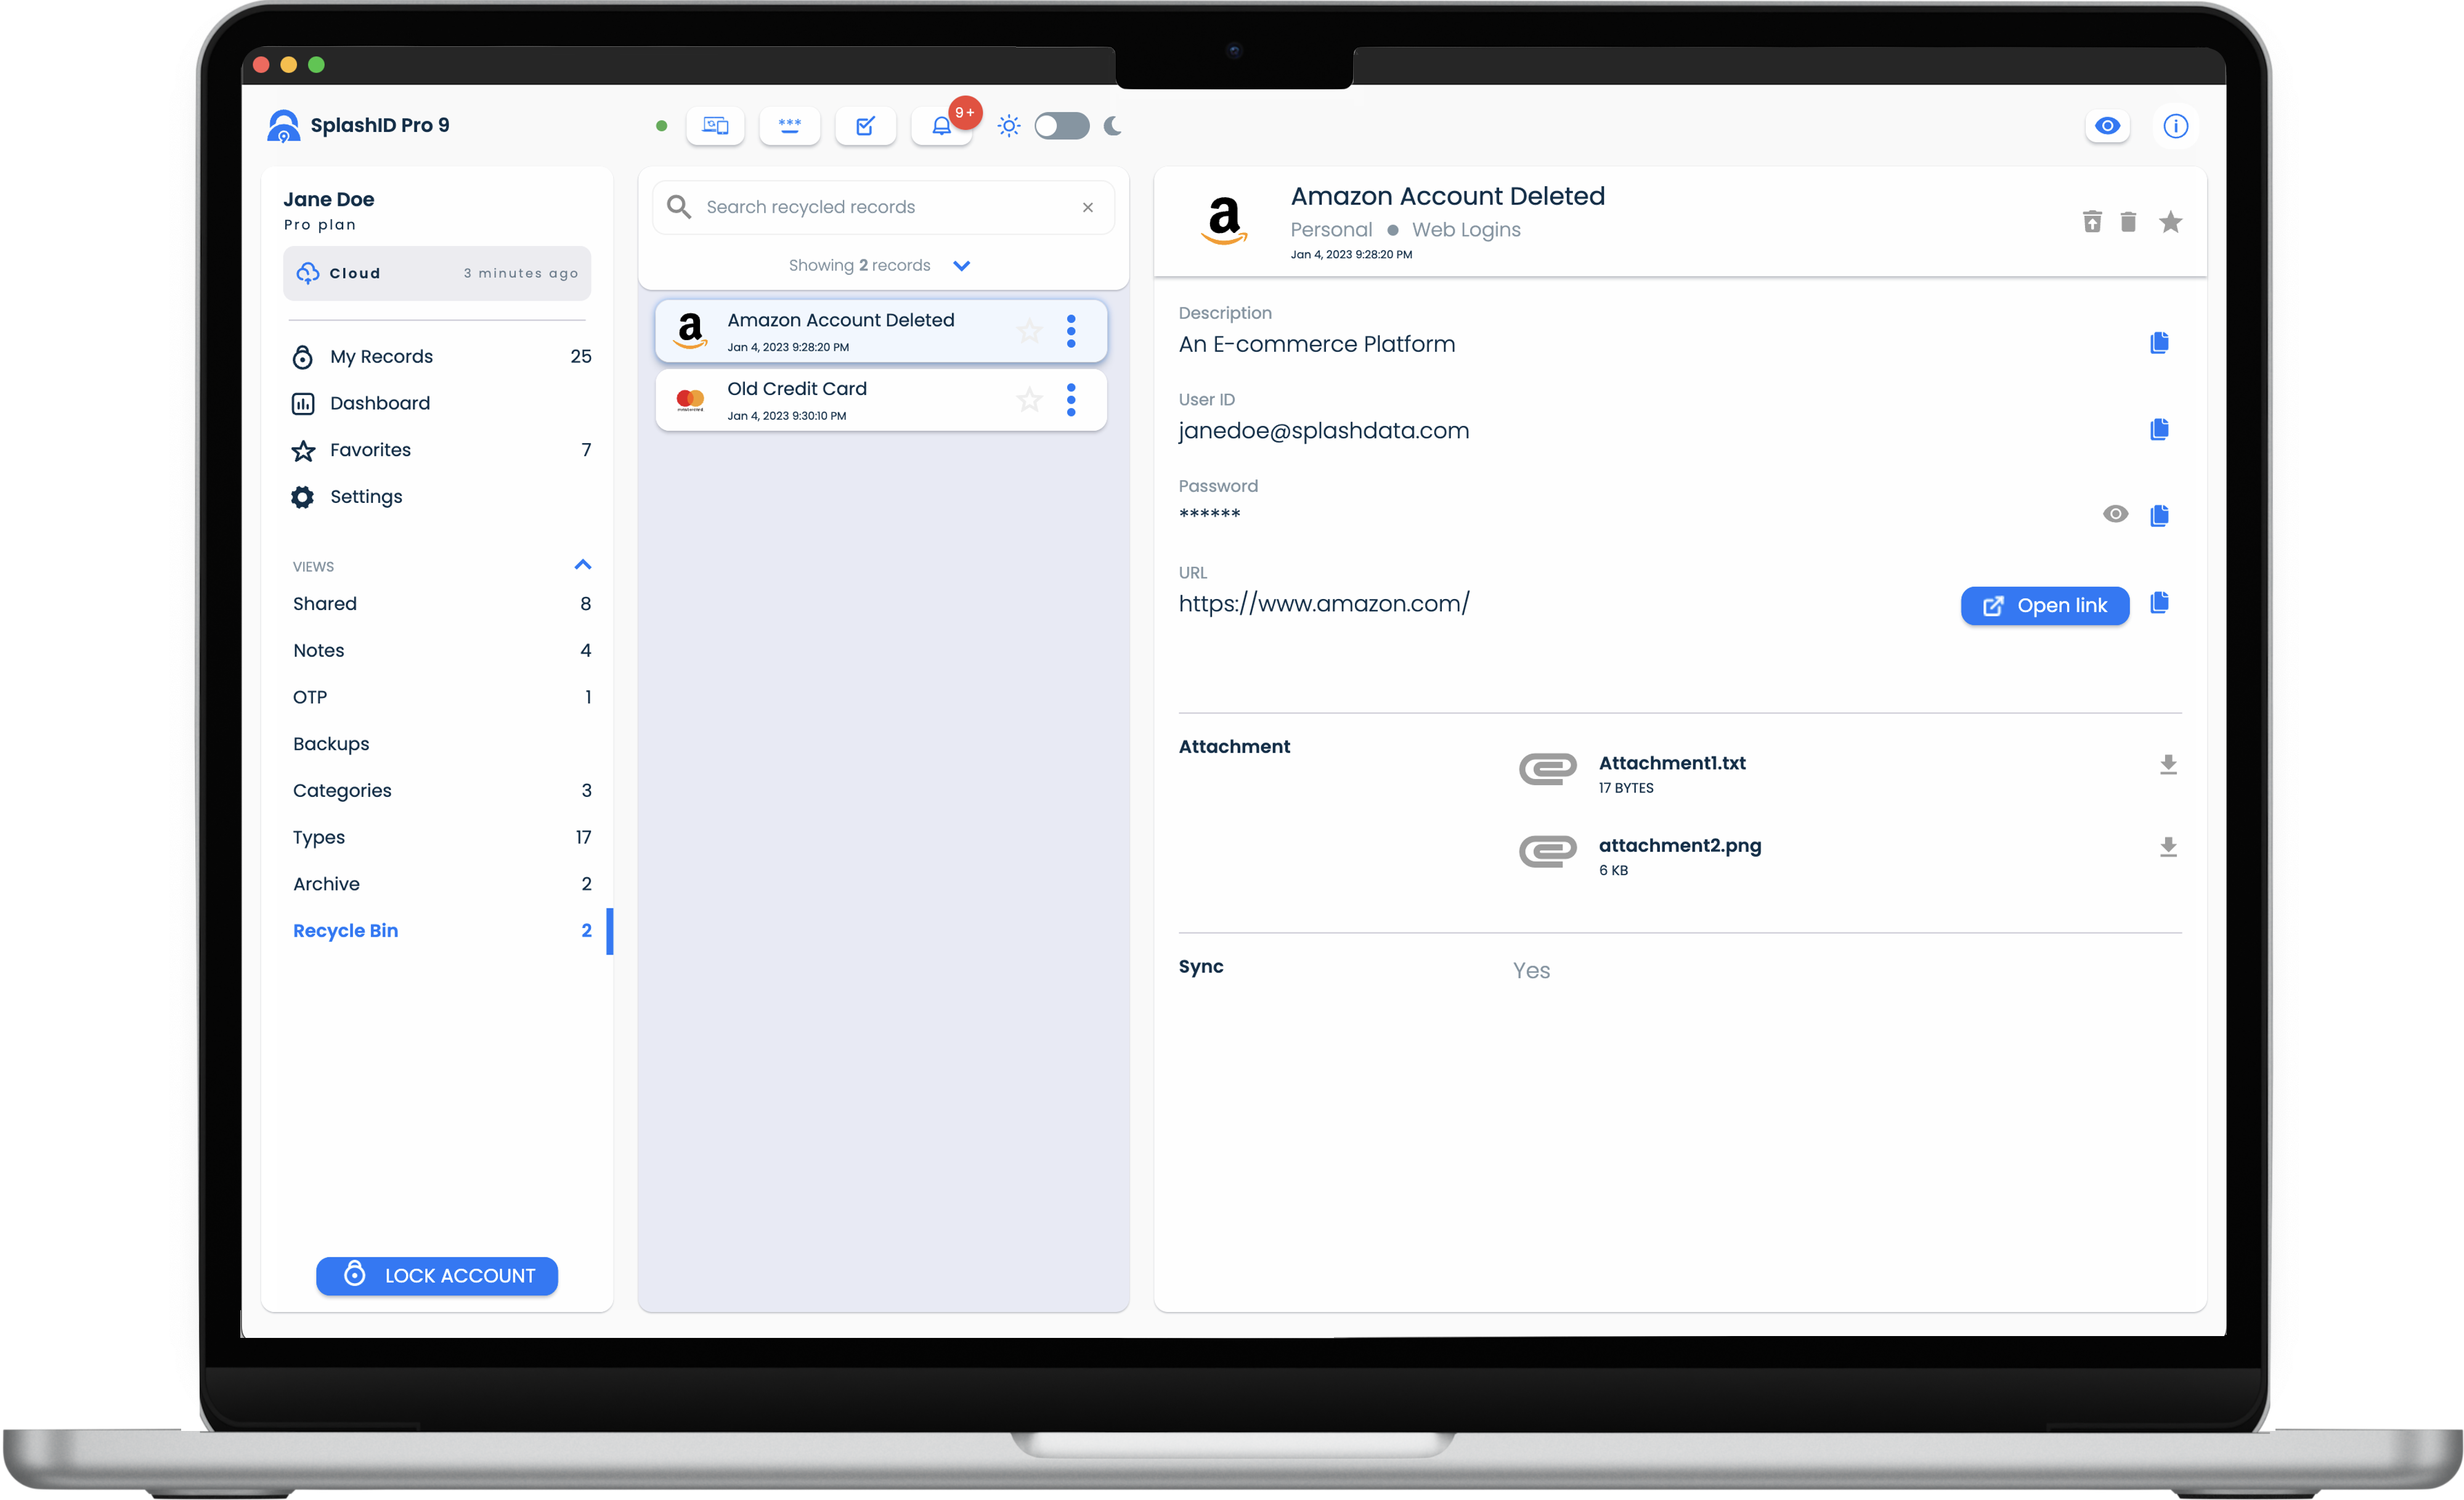
All your deleted records can be viewed in the Recycle Bin screen. The Recycle Bin screen can be reached by clicking on the Recycle Bin link in the application menu.
You can permanently delete them from the Recycle Bin if you are sure that you no longer need them.
Alternatively, you can restore a deleted record in the Recycle Bin to the personal record list.
Records in the Recycle Bin cannot be edited. They will need to be restored first and then edited as regular records.
Delete a record
- Visit the My Records screen from the application menu.
- Select a record in the record list.
- Click or tap on the Trash icon in the record details header to send a record to the Recycle Bin.
- Confirm by clicking or tapping on the Delete button to proceed with deleting the record.
Restore a deleted record
- Visit the Recycle Bin screen from the application menu.
- Select a record in the record list in the Recycle Bin view.
- Click or tap on the Restore icon in the record details header to restore the record.
Another way to restore a deleted record
- Visit the Recycle Bin screen from the application menu.
- Locate the record in the Recycle Bin record list.
- Click or tap on the three dots icon to bring up the list of actions.
- Click or tap on Restore option.
Delete multiple records
- Visit the My Records screen from the application menu.
- To select multiple records in the record list for deleting the records
- Expand the filter panel if it is collapsed by clicking or tapping on the Down arrow icon.
- Click or tap on the Select checkbox.
- Select the records that you want to delete.
- Click or tap on the three dots icon in the filter panel next to Select to bring up the list of actions.
- Click or tap on Delete option.
- Confirm by clicking or tapping on the Delete button to proceed with deleting the selected records.
Restore multiple records
- Visit the Recycle Bin screen from the application menu.
- To select multiple records in the record list for restoring
- Expand the filter panel if it is collapsed by clicking or tapping on the Down arrow icon.
- Click or tap on the Select checkbox.
- Select the records that you want to restore.
- Click or tap on the three dots icon in the filter panel next to Select to bring up the list of actions.
- Click or tap on Restore option.
- Confirm by clicking or tapping on the Restore button to proceed with restoring the selected records.
Deleting records permanently
- Visit the Recycle Bin screen from the application menu.
- Select a record in the record list in the Recycle Bin view.
- Click or tap on the Delete icon in the record details header to restore the record.
Another way to permanently delete a record
- Visit the Recycle Bin screen from the application menu.
- Locate the record in the Recycle Bin record list.
- Click or tap on the three dots icon to bring up the list of actions.
- Click or tap on Delete option.
Notes
Notes screen
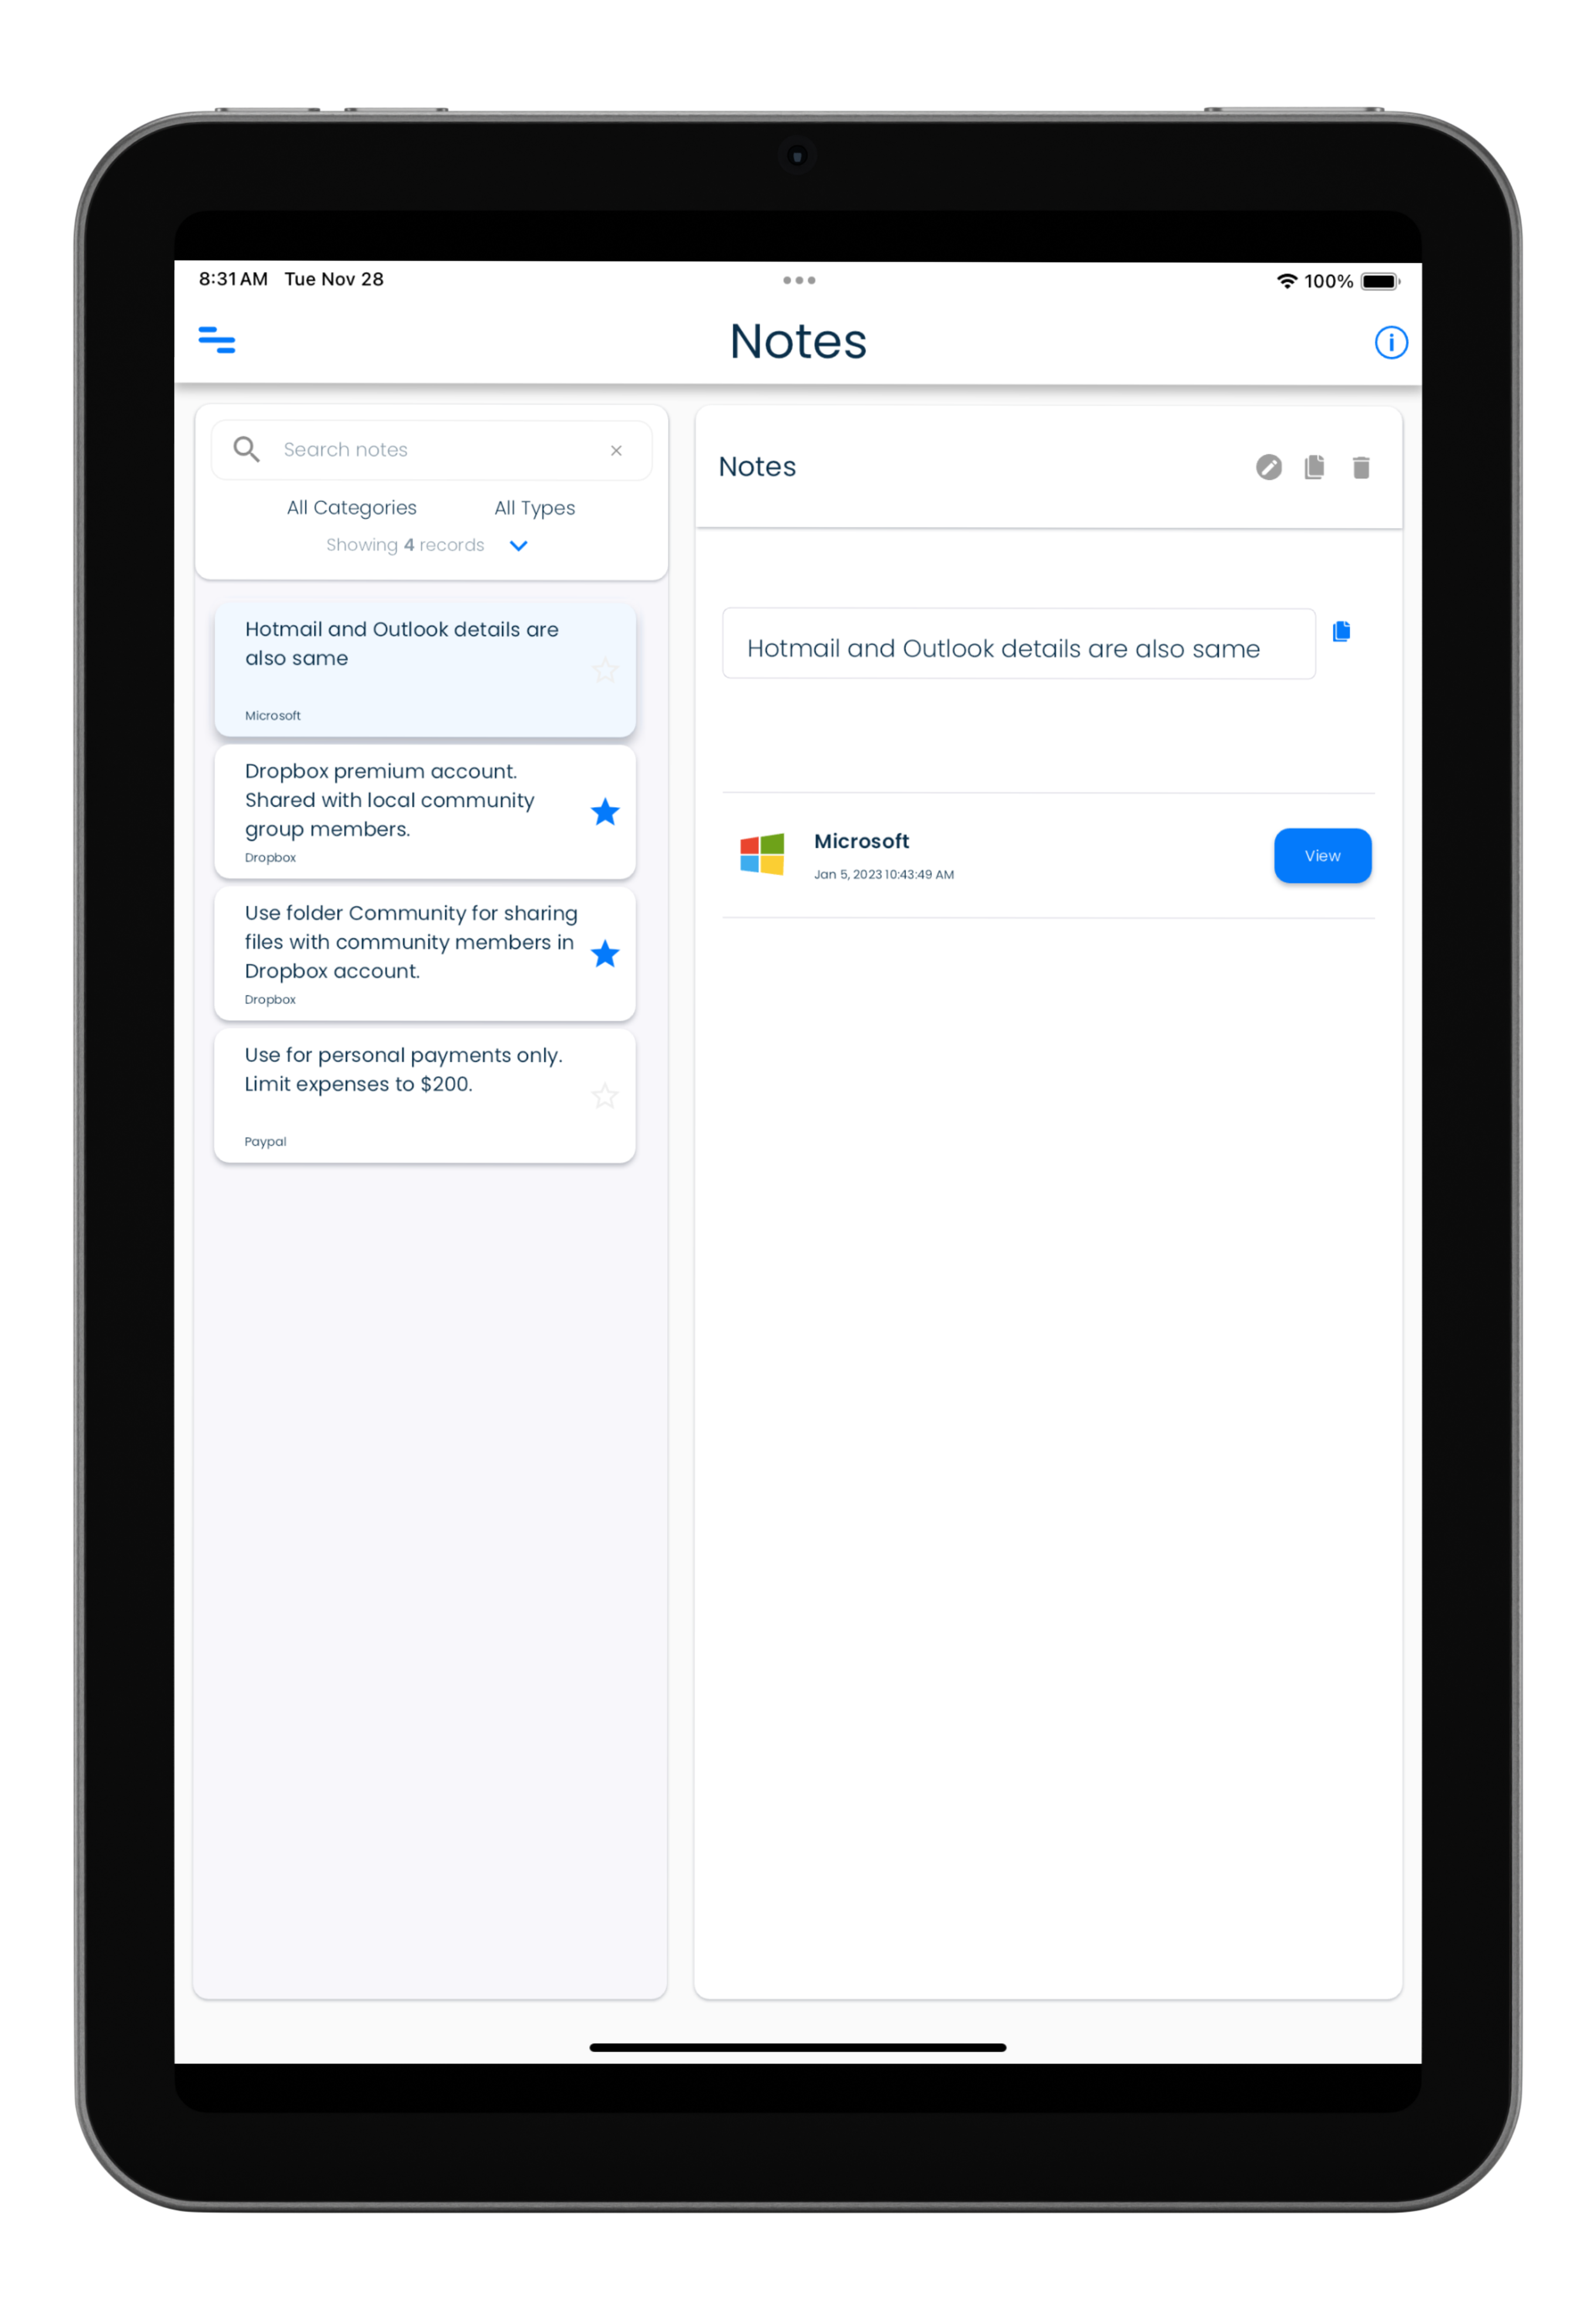
All your personal notes can be viewed in the Notes screen. The Notes screen can be reached by clicking on the Notes link in the application menu.
The notes view shows all the notes added to all your personal records in one place. The primary use of this view will be to see all notes in a convenient and quick way in a single list.
You can navigate to the main record containing the note you are viewing by clicking or tapping the Go to Details Record button in the notes details panel.
Notes in a record can also be edited, duplicated or deleted in this view.
Adding notes
To add a note you need to add it in a record. The steps below explains how to add notes in an existing record.
Existing record
- Select a personal record from any of the record lists displayed to see the record details.
- Click or tap on the Edit icon in the record details header to edit a record.
- Scroll down to the Notes section in the record details.
- Click or tap on the Add button in the Notes section to add a new note.
- In the new notes field add your content and format it using the options provided in the notes field header.
- When you are done save the record by clicking or tapping on the Save button in the record details header.
Another way to add a note to an existing record
You can also easily add a note to a record that has the note as displayed in the Notes view. Here, first select the note in the Notes view, and then click or tap on the View button shown next to the record name displayed in the notes details panel.
You can also easily duplicate the notes entry in a record. Here, first select the note in the Notes view, and then click or tap on the Duplicate button shown in the header panel in the details section. Then click on the duplicated note and edit it while being in the Notes view.
New record
Create a new record first by clicking or tapping on the +Add button in the My Records view.
Then add the record details as you need. Finally, add some notes using the same steps as listed in the Existing record section above.
Viewing notes
Click or tap on the Notes item in the navigation panel to visit the notes view.
On navigating to the Notes view you will be presented with a list of all notes that have been collected from your personal records, and displayed in a single list.
OTP
OTP screen
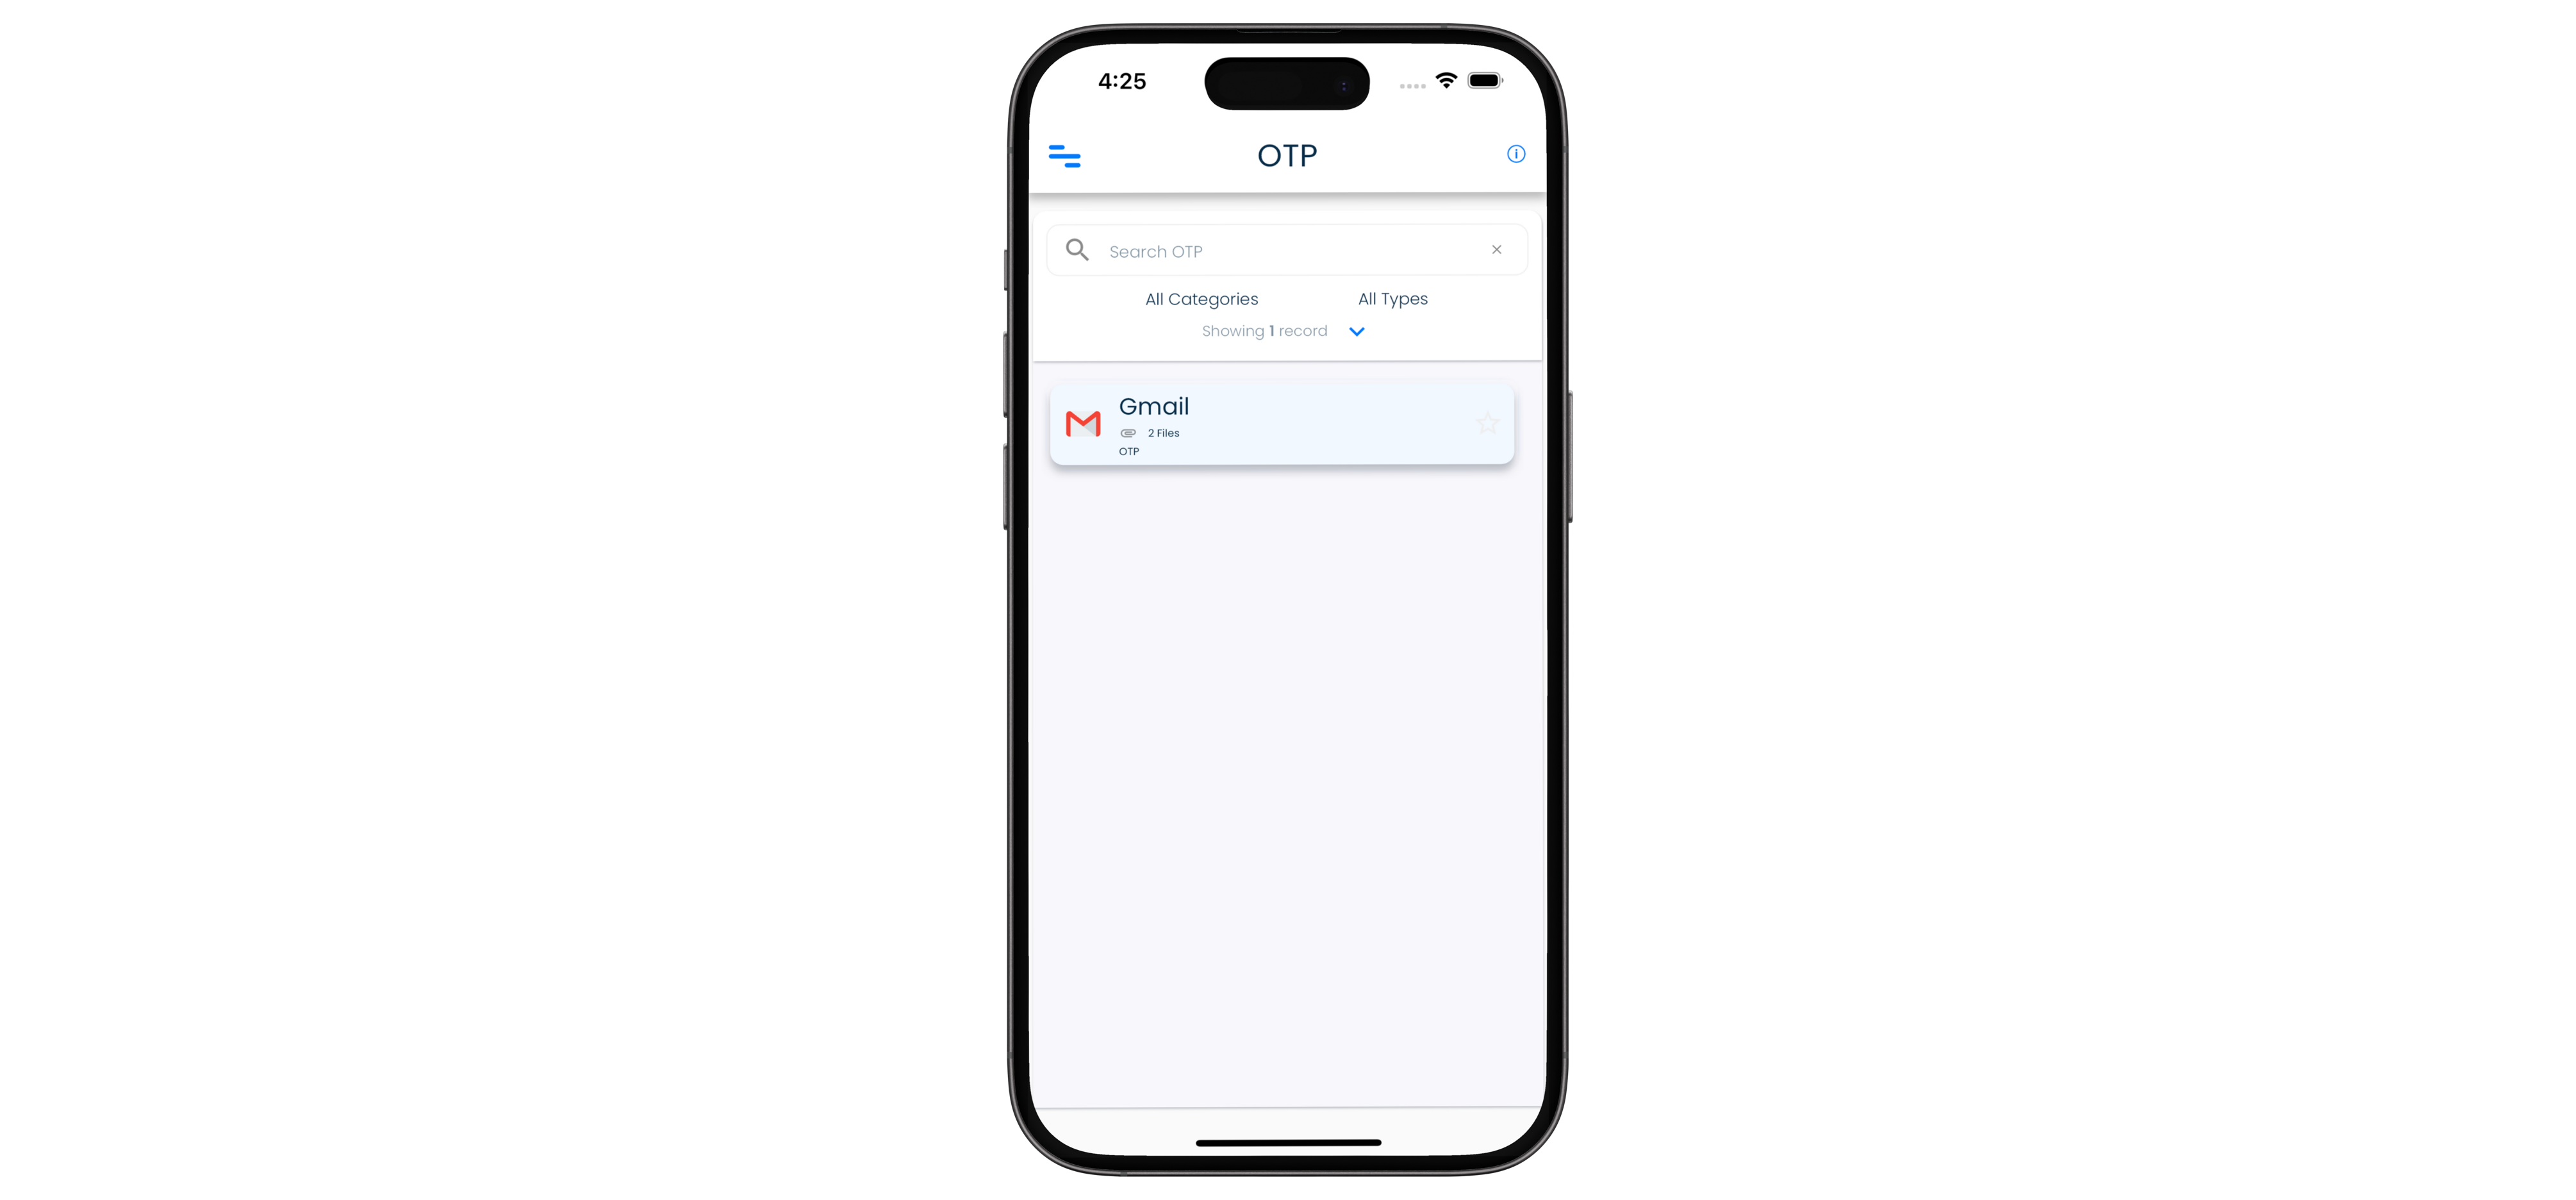
All your OTP codes can be viewed in the OTP screen. The OTP screen can be reached by clicking on the OTP link in the application menu.
OTP codes here refer to TOTP or authenticator application codes that are used for second factor authentication in numerous websites and applications.
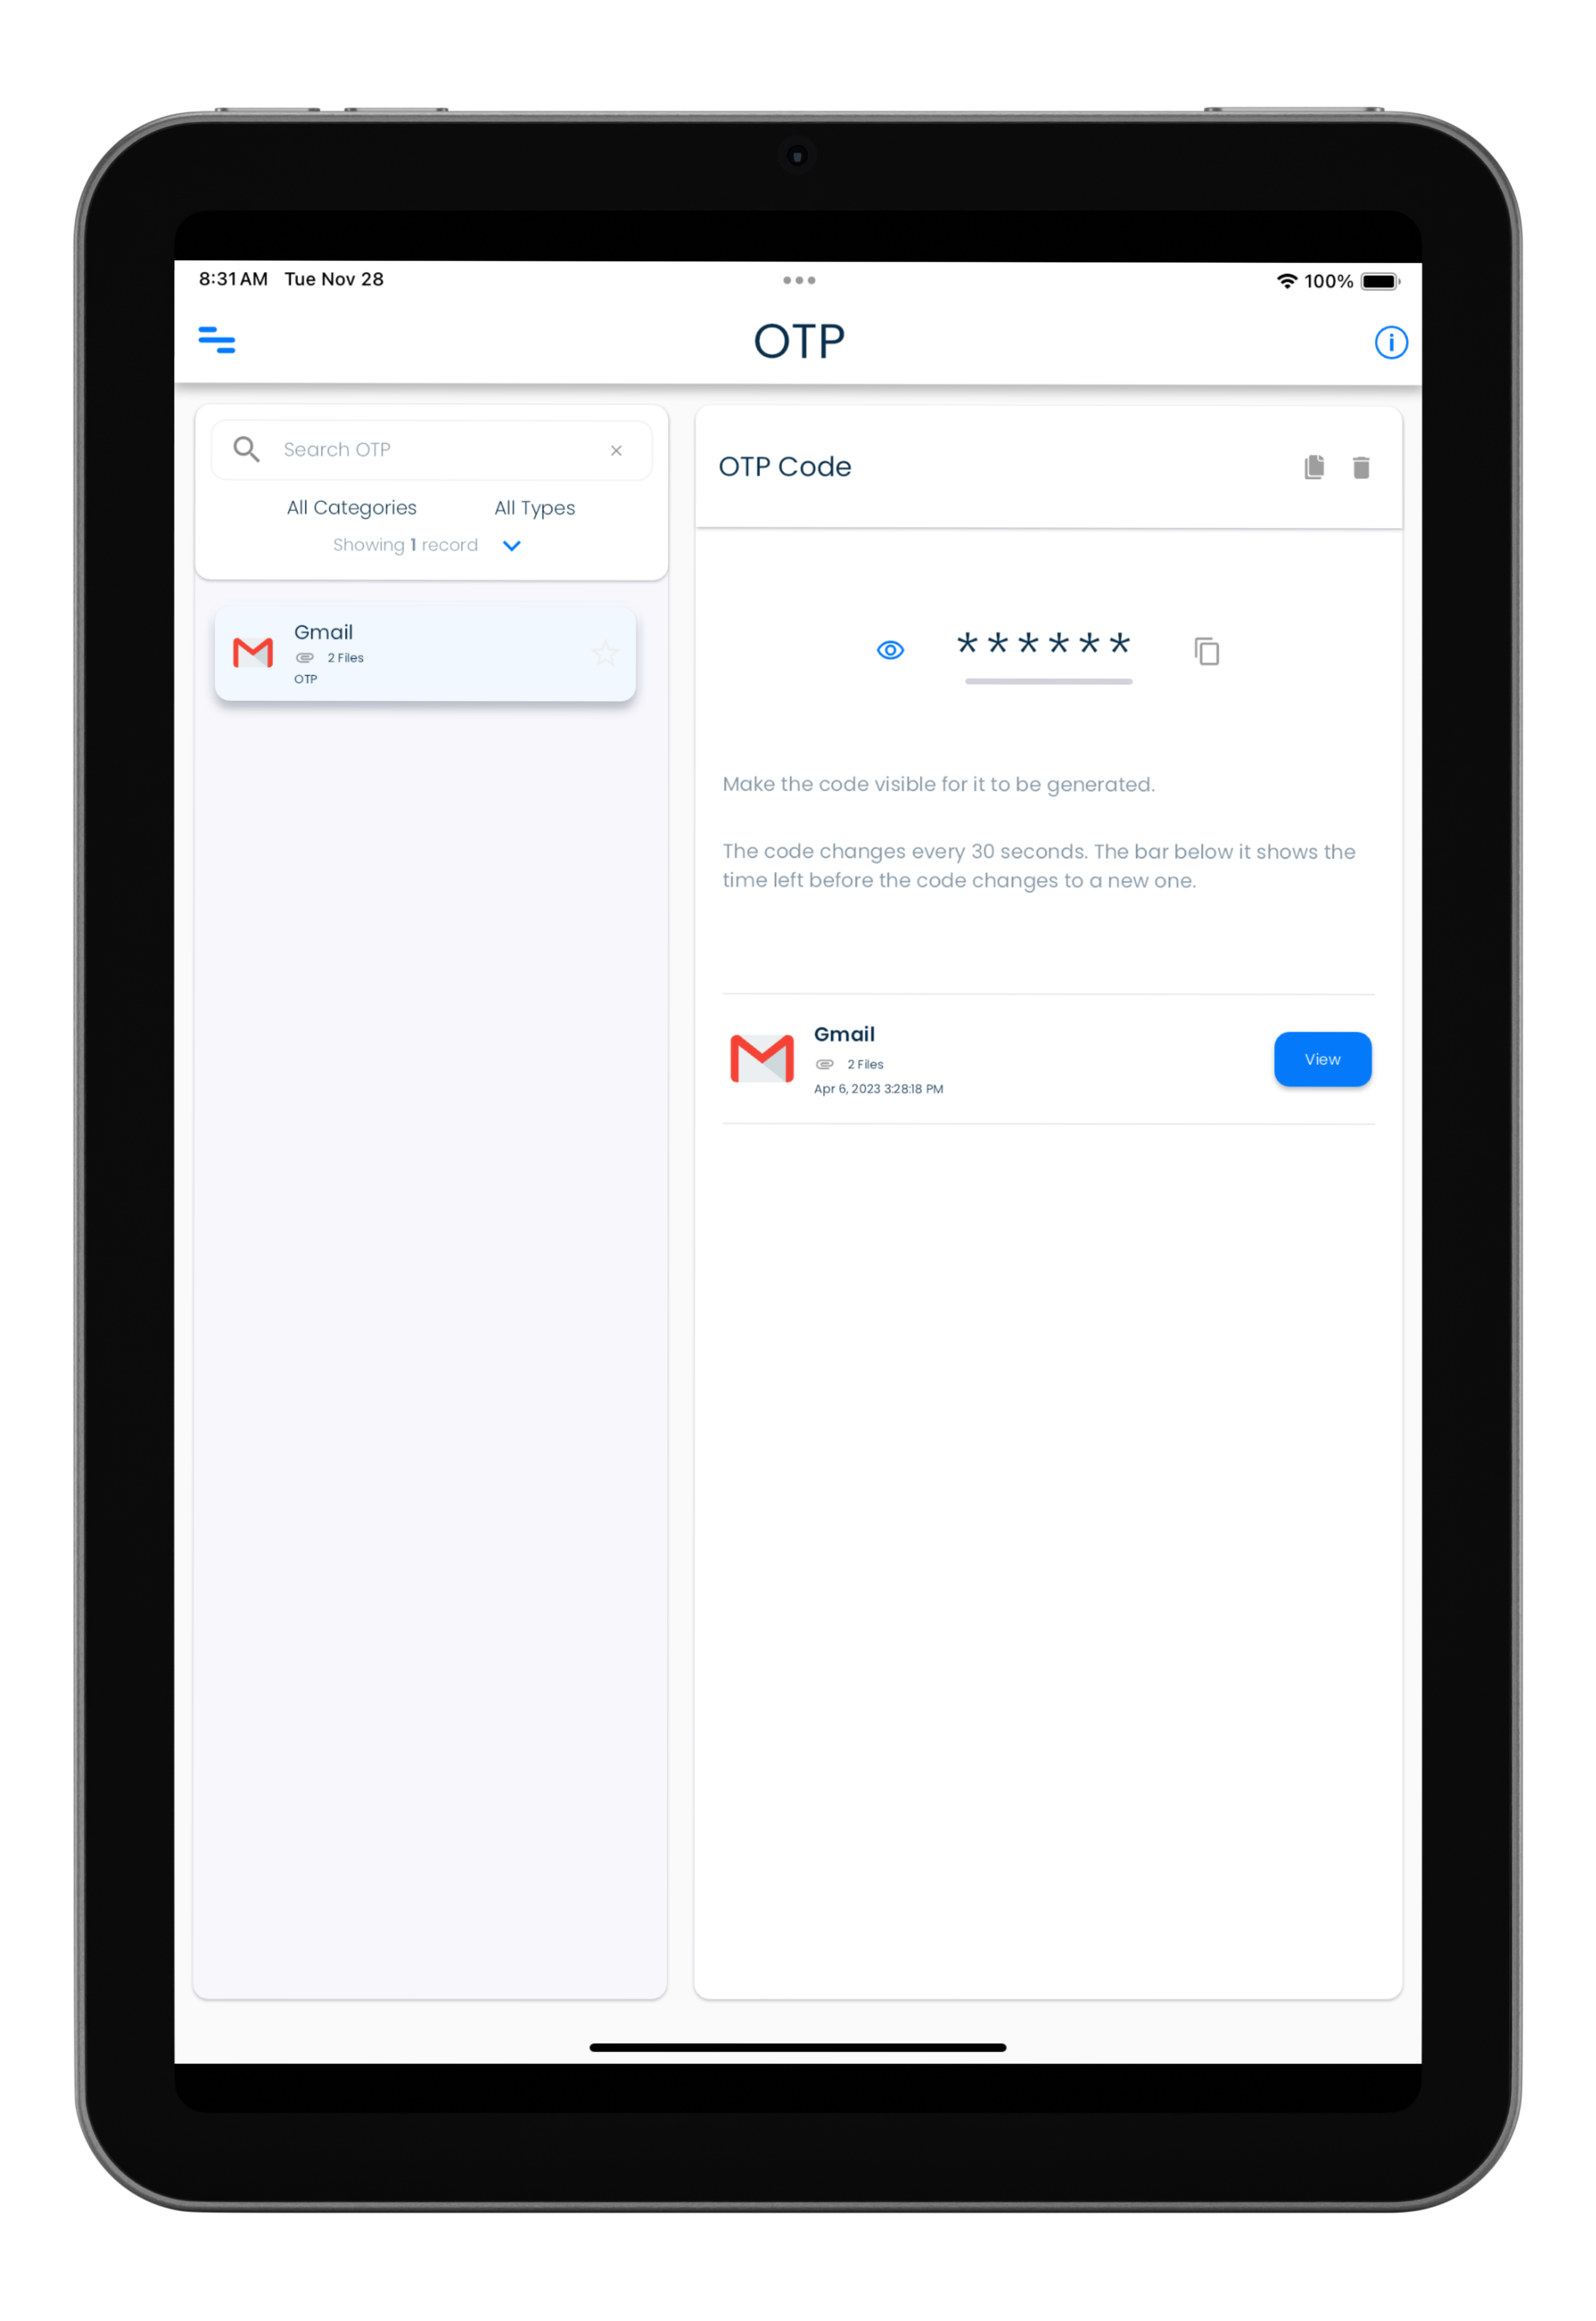
The OTP view shows all the second factor authenticator fields you have setup in all your personal records in one place. The main use of this view will be to view all the OTP authenticator codes in your personal records in a convenient and quick way in one place.
You can navigate to the main record containing the OTP you are viewing by clicking or tapping the Go to Details Record button in the OTP details panel.
OTP field in a record can also be duplicated or deleted in this view.
Setup of OTP fields
To add a OTP you need to add it in a record. The steps below explains how to add notes in an existing record.
QR code image and the OTP key code
You will need a authenticator setup code to complete the OTP field setup in SplashID.
While you are setting up 2 factor in another site or application, perform the steps listed below in SplashID after you reach the QR code screen. This screen will also display a text key that you will need while adding the OTP field in SplashID.
On mobiles and tablets you can use the camera icon next to the OTP field to scan the displayed QR code into the OTP field in SplashID. On desktops, you will need to manually enter the displayed text key into the OTP field in the record.
Existing record
- Select a personal record from any of the record lists displayed to see the record details.
- Click or tap on the Edit icon in the record details header to edit a record.
- Scroll down to the end of the list of fields in the record.
- In the Add a field box, click or tap on the field type list and select the OTP item from the list. Click or tap on the Add button to add the OTP field to the record.
- In the new OTP field scan the displayed QR code, or type in the key displayed in the website or application for which you are setting up the authenticator code generation in SplashID.
- When you are done save the record by clicking or tapping on the Save button in the record details header.
Duplicate OTP
You can also easily duplicate a OTP entry in a record. Here, first select the OTP code in the OTP view, and then click or tap on the Duplicate button shown in the header panel in the details section.
After duplicating the OTP field, edit it and replace the OTP key by using a QR code displayed in the other website or application, or manually enter the key shown there.
New record
Create a new record first by clicking or tapping on the +Add button in the My Records view.
Then add the record details as you need. Finally, add the OTP field in the record using the same steps as listed in the Existing record section above.
Viewing OTP codes
You will need to see the generated OTP codes in SplashID Pro 9, when you are trying to sign in to a website or application for which you have setup the code in SplashID Pro 9.
To see the code you can do it in one of the following two ways.
View the record containing the OTP field
You need to navigate to the record in which you have setup the OTP field.
- Click or tap on the My Records item in the application menu to show your list of records.
- Select a record from any of the record lists displayed to see the record details. You can use search or the other filter options to locate your record.
- In the record details view scroll down to the field that has the OTP code.
- Click or tap on the eye icon to see the generated OTP code. The code changes every 30 seconds.
- You will need to manually enter the displayed code in the application or website you are trying to log into. Alternatively, if you are on the same device, then you can copy the OTP code to the clipboard, and paste it in the website or application if they allow it.
View it in the OTP screen
You need to go to the OTP screen in this method.
- Click or tap on the OTP item in the application menu to show your list of OTP fields.
- Select an OTP field from the list displayed to see the OTP details. You can use search or the other filter options to locate your OTP field.
- In the OTP details view, click or tap on the eye icon to see the generated OTP code. The code changes every 30 seconds.
- You will need to manually enter the displayed code in the application or website you are trying to log into. Alternatively, if you are on the same device, then you can copy the OTP code to the clipboard, and paste it in the website or application if they allow it.
Hiding the OTP code
Once you have used the generated OTP code to login to the website or application that it was setup for, you no longer need the code to be displayed.
Click on the crossed eye icon to stop the code generation and hide it.
Backups
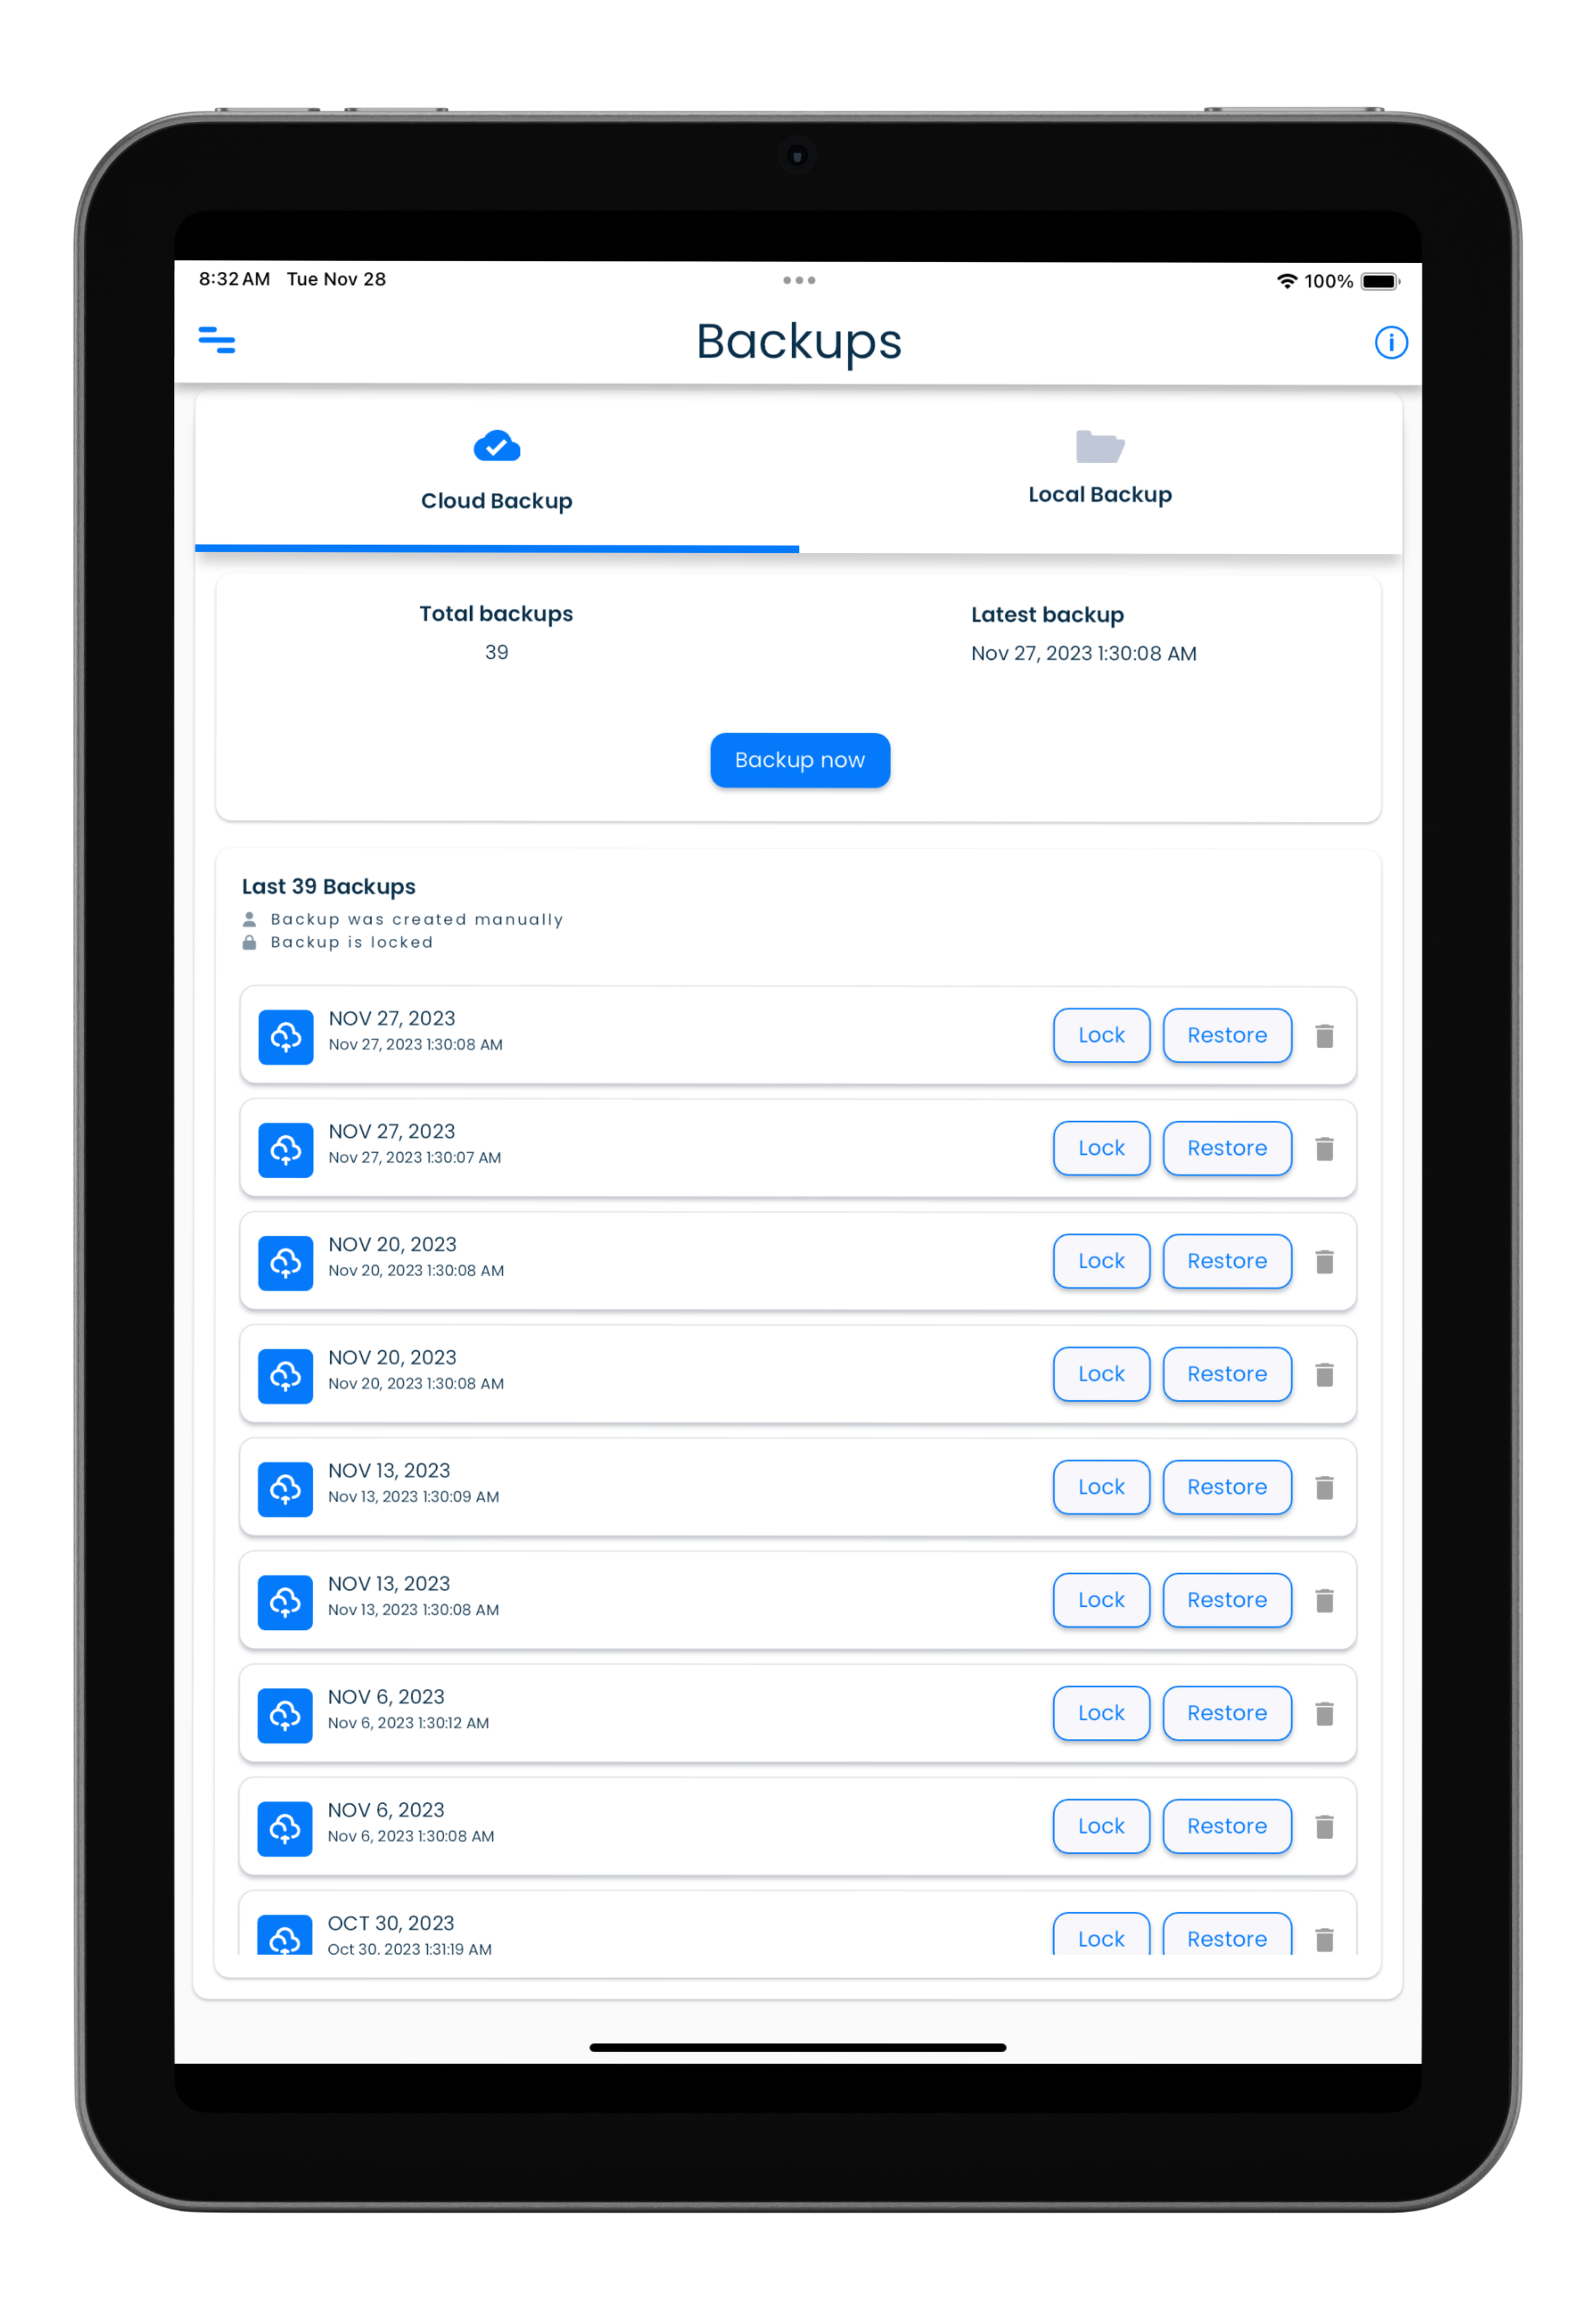
Backups allow for easy and safe storage of own non-shared records in the account for safe keeping. In the eventuality of having lost some information, backups can be used for restoring the personal records using the content that was stored in the backed up file.
Backups screen
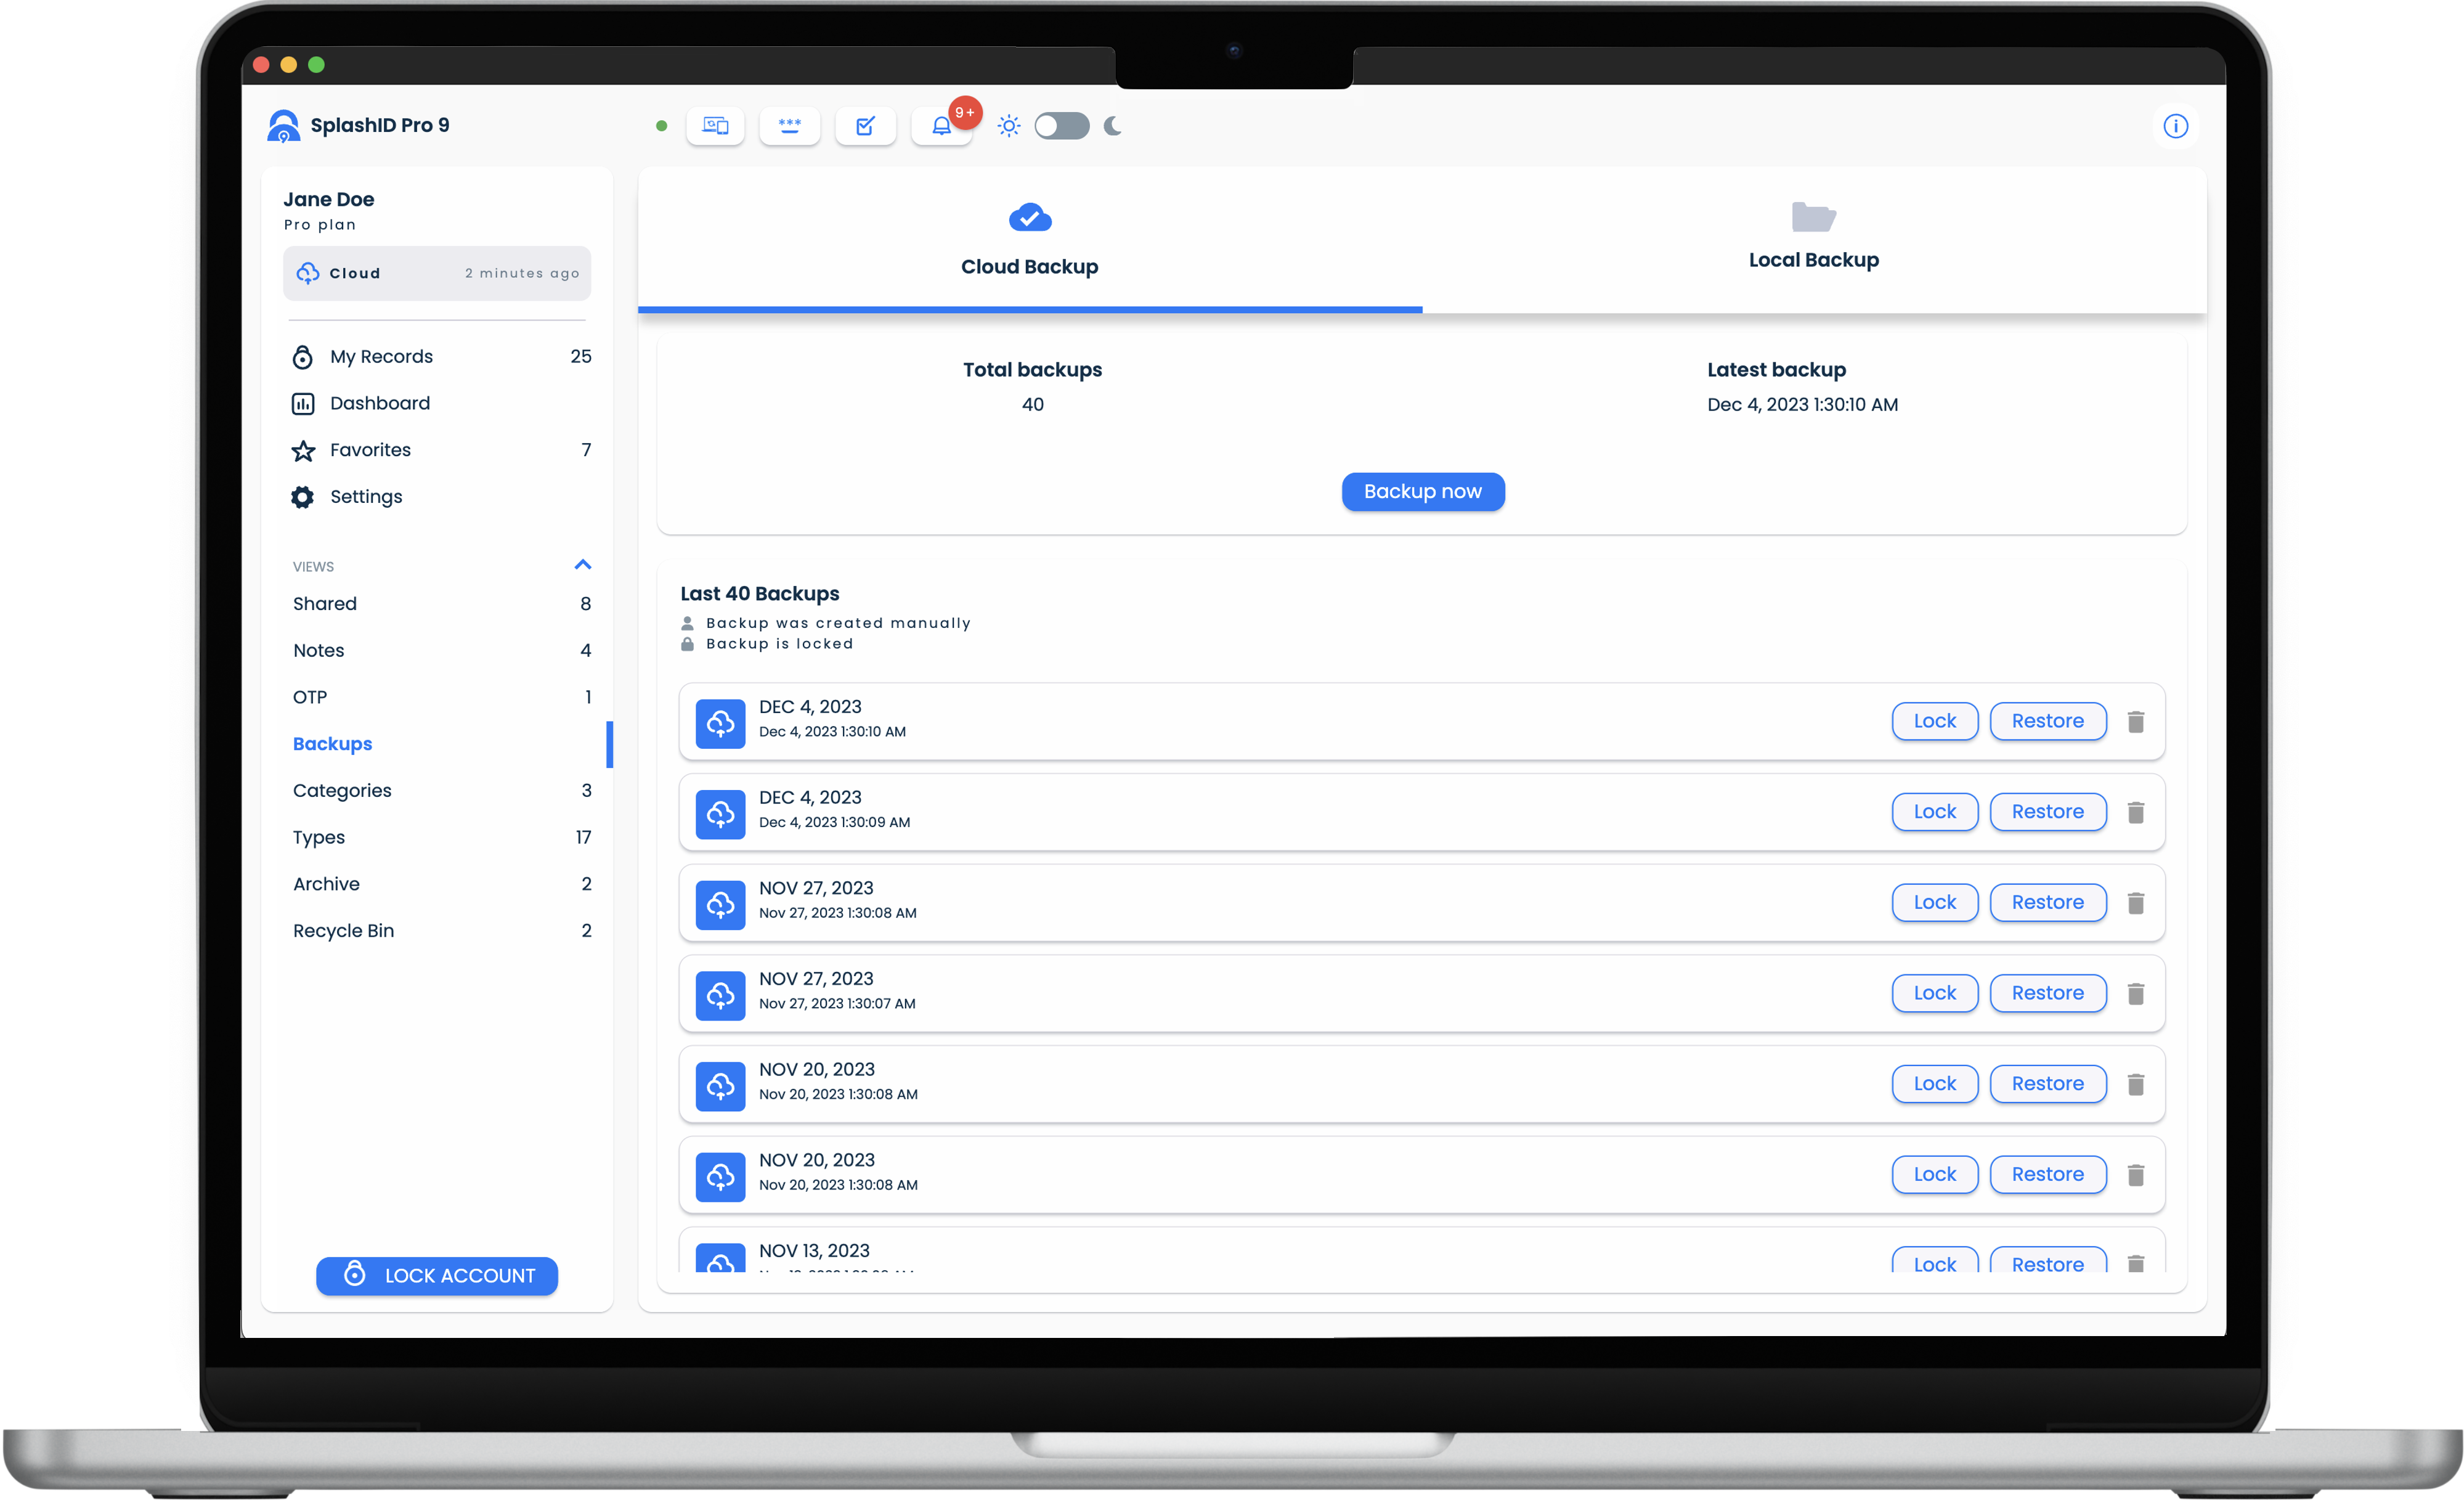
All your available backups can be viewed in the Backups screen. The Backups screen can be reached by clicking on the Backups link in the application menu.
Types of backup
SplashID Pro 9 users have access to two types of backups.
- Cloud backups
- Local backups
Shared records are not backed up
Only your personal records are backed up for your account.
Shared records are distributed across users with sharing information. Hence they are not backed up as part of your account backup.
A backup contains the following user information that is not shared with others.
- Records
- Categories
- Types
- Attachment in records
- User uploaded icons
Cloud backups
Cloud backups is a (1) Pro feature
- Requires a paid SplashID Pro 9 license.
Cloud backups are taken every week automatically for Pro users who have their accounts set up for Cloud Sync. A maximum of 5 backups are available for the user at any given point in time.
Cloud sync users can also manually trigger a cloud backup. This can be done as follows.
- Go to the Backups screen by clicking or tapping on the Backups entry in the application menu.
- Click or tap on the Cloud Backup tab to see your cloud backups.
- Click or tap on the Backup now button to start a cloud backup manually.
There is a limit to the number of cloud backups
Older backups will get removed when the 5 backup limit is reached, and new backups are taken.
Lock a backup
You can lock a cloud backup to prevent it from being overwritten when a new backup is taken.
To lock a cloud backup do the following in the Cloud Backup section in the Backups screen.
- Locate the cloud backup in the displayed list.
- Click or tap on the Lock button in the backup entry.
- Wait till the lock is set on the backup.
Unlock a backup
You can unlock a previously locked cloud backup. This will remove the lock that was set on the backup, and allow it to be overwritten when a new backup is taken as per the backup schedule.
To unlock a cloud backup do the following in the Cloud Backup section in the Backups screen.
- Locate the locked cloud backup in the displayed list.
- Click or tap on the Unlock button in the backup entry.
- Wait till the lock is removed on the backup.
Restore a backup
If you need to remove all your existing information in your account, and restore them from a backup, then you need to use the Restore function.
Sign out from all other devices before a restore
Before you initiate a restore of a backup, it is mandatory that you sign out of your accounts on all other devices.
Alternately, you can uninstall SplashID Pro 9 from all your other devices before you proceed with the restore on your main device.
After the restore you can install SplashID Pro 9 on your other devices and sync them up to get the restored data.
Do the following to restore a cloud backup.
- Select the device that you want to perform the restore on.
- Log out of your account from all other devices.
- Locate the cloud backup in the displayed list on your device.
- Click or tap on the Restore button in the backup entry.
- Provide the required confirmation by entering your master password.
- Wait till the restore completes.
Delete a backup
An existing backup can be deleted, if you are sure that you no longer need it.
Do the following to delete a cloud backup.
- Locate the cloud backup in the displayed list on your device.
- Click or tap on the Trash icon in the backup entry.
- Provide the required confirmation by clicking or tapping on the Delete button.
- Wait till the backup is deleted.
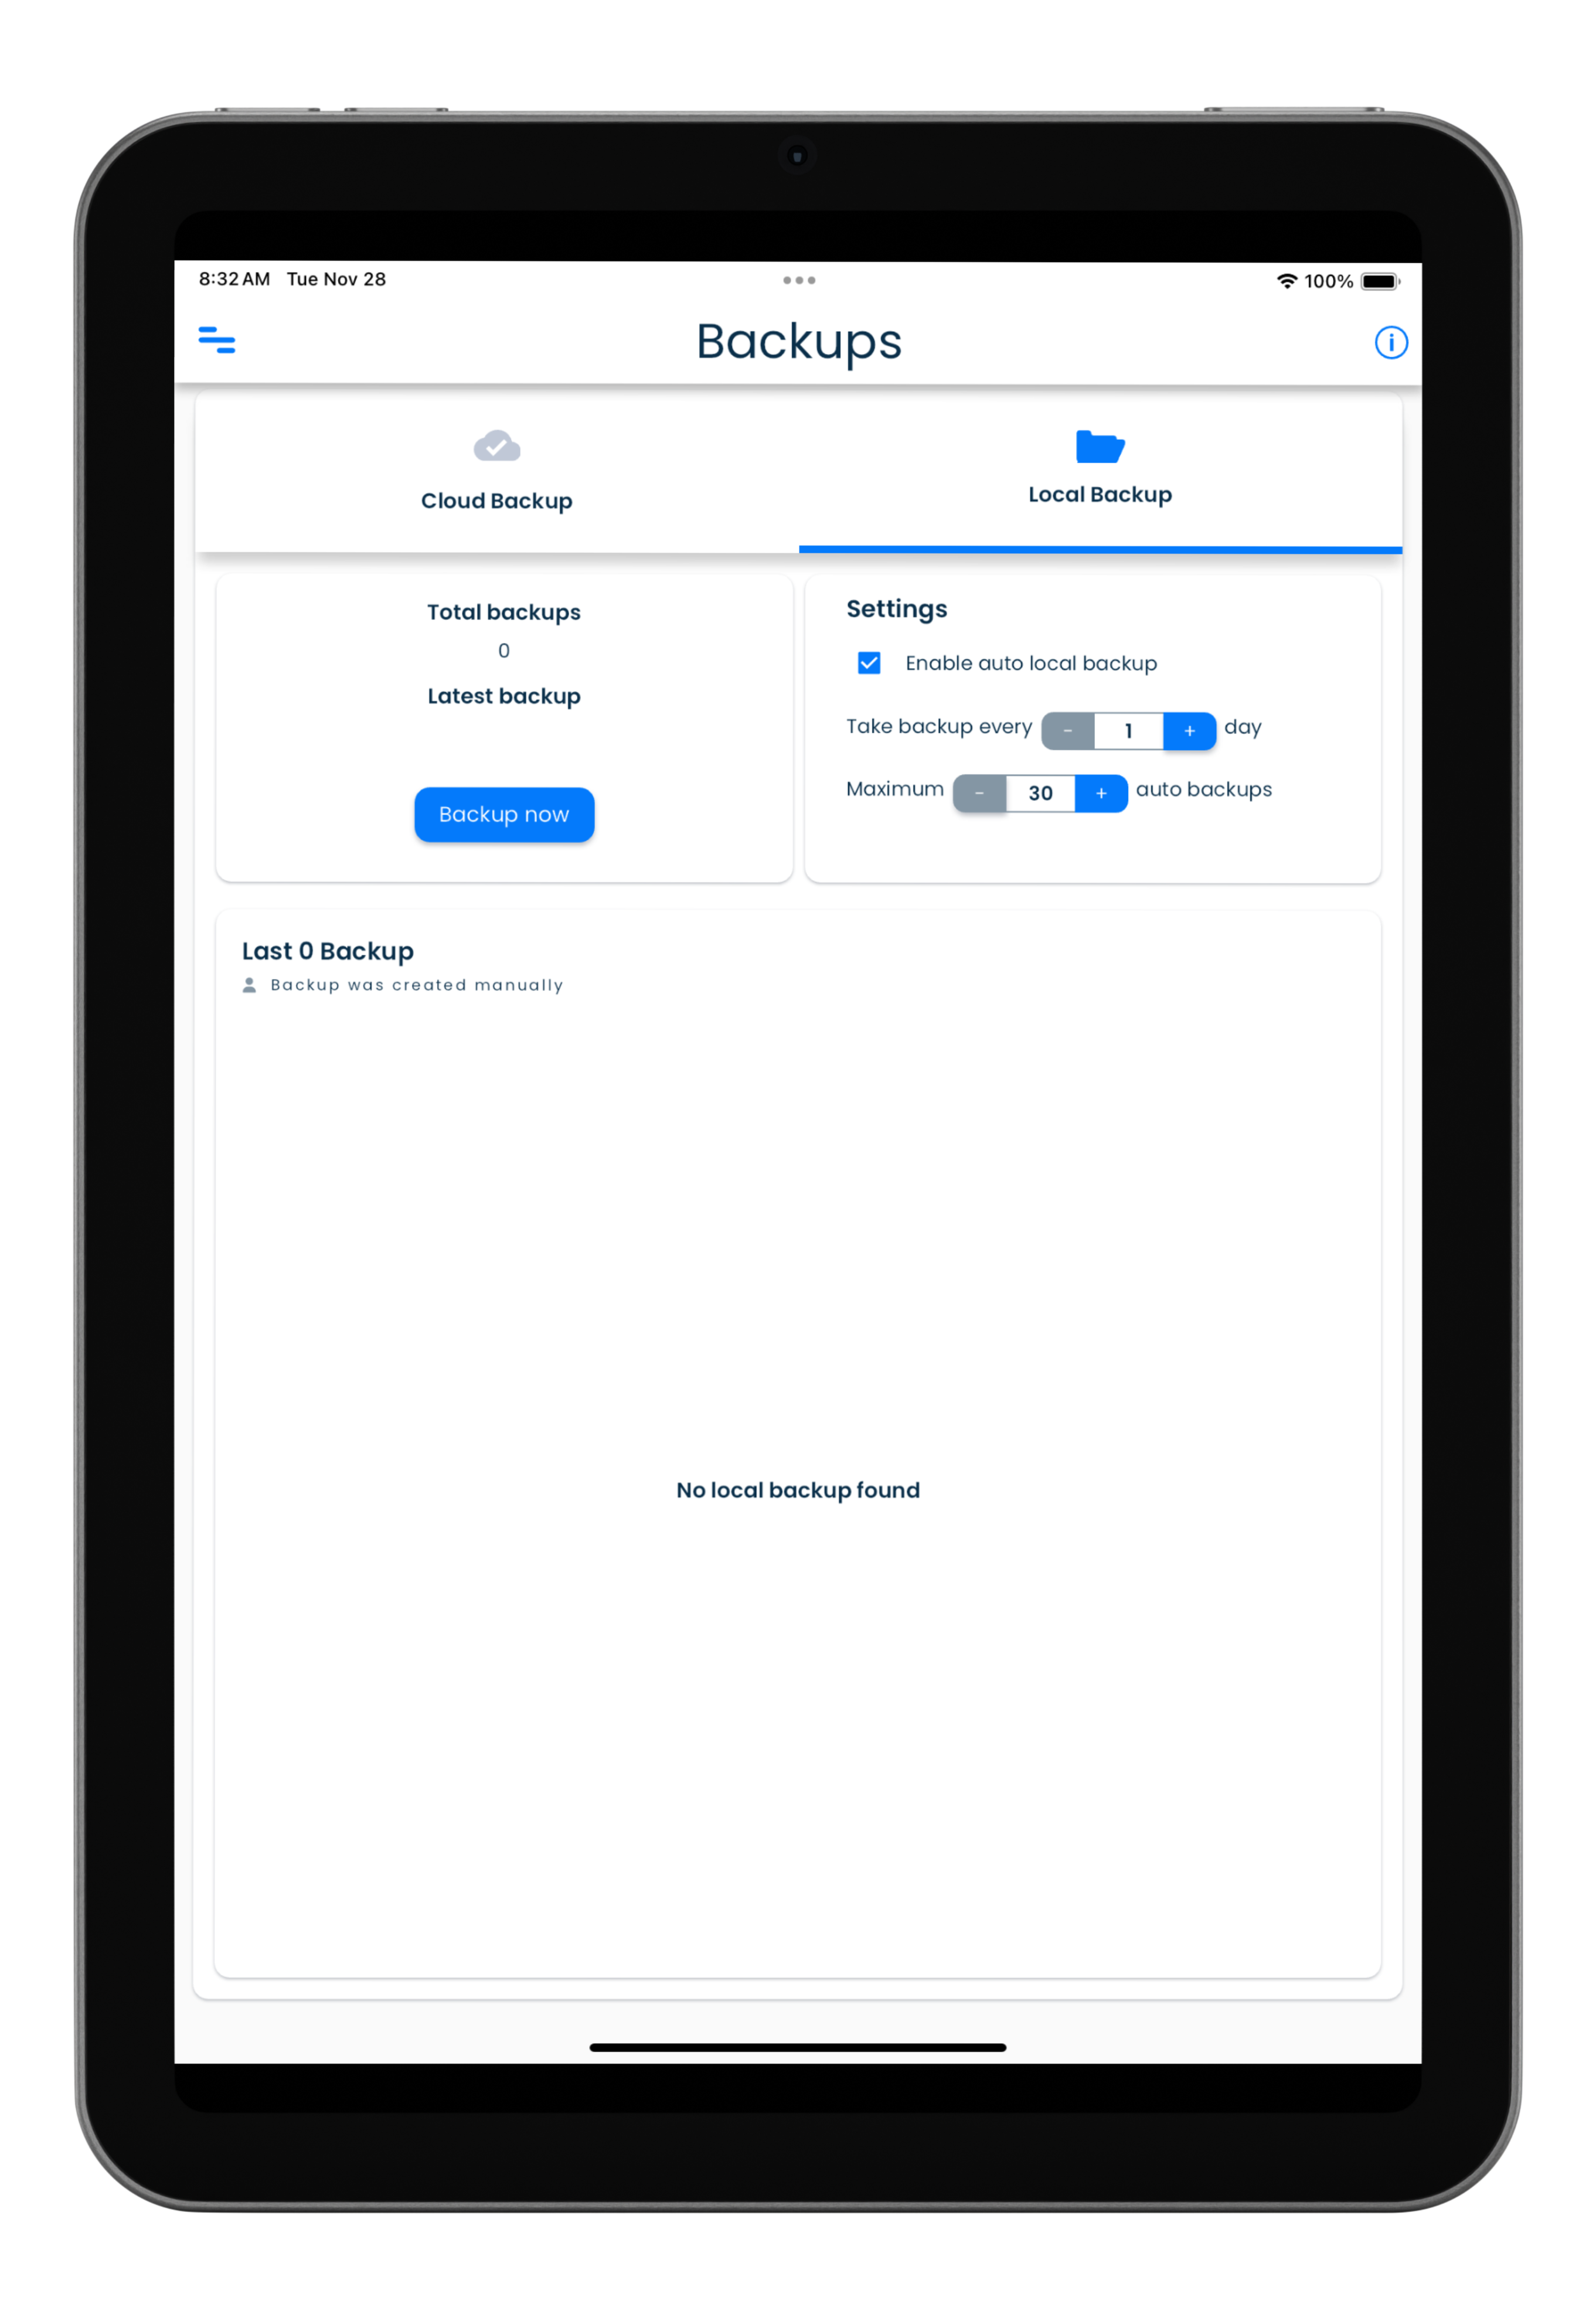
Local backups
Local backups are stored on the physical media storage available in devices. These type of backups are available for all the users irrespective of the sync type of the account.
Local backups are taken automatically on certain actions as listed below.
- Locking the app
- Logging out from the app
- Change of the Sync method
You can also manually trigger a local backup. This can be done as follows.
- Go to the Backups screen by clicking or tapping on the Backups entry in the application menu.
- Click or tap on the Local Backup tab to see your backups taken locally.
- Click or tap on the Backup now button to start a local backup manually.
Local backups on app usage
A local backup is taken only on the days the app is used. Usage means launching and signing in to your account in the app.
If you do not use the app on a given day, then there wont be any local backups taken for that day.
Settings
The local backups settings allow you to configure the following.
- Switching on or off the automatic local backups.
- The desired local backup frequency.
- Number of backups you want to retain on your local storage media.
By default, there will be a maximum of 30 local backups stored, with one being kept for each day you sign in to the application.
Local backups do not sync
Local backups remain on the device where they were taken, and do not sync across the users devices.
Lock a backup
You can lock a local backup to prevent it from being overwritten when a new backup is taken.
To lock a local backup do the following in the Local Backup section in the Backups screen.
- Locate the local backup in the displayed list.
- Click or tap on the Lock button in the backup entry.
- Wait till the lock is set on the backup.
Unlock a backup
You can unlock a previously locked local backup. This will remove the lock that was set on the backup, and allow it to be overwritten when a new backup is taken as per the backup schedule.
To unlock a local backup do the following in the Local Backup section in the Backups screen.
- Locate the locked local backup in the displayed list.
- Click or tap on the Unlock button in the backup entry.
- Wait till the lock is removed on the backup.
Restore a backup
If you need to remove all your existing information in your account, and restore them from a backup, then you need to use the Restore function.
Sign out from all other devices before a restore
Before you initiate a restore of a backup, it is mandatory that you sign out of your accounts on all other devices.
Alternately, you can uninstall SplashID Pro 9 from all your other devices before you proceed with the restore on your main device.
After the restore you can install SplashID Pro 9 on your other devices and sync them up to get the restored data.
Do the following to restore a local backup.
- Select the device that you want to perform the restore on.
- Log out of your account from all other devices.
- Locate the local backup in the displayed list on your device.
- Click or tap on the Restore button in the backup entry.
- Provide the required confirmation by entering your master password.
- Wait till the restore completes.
Delete a backup
An existing backup can be deleted, if you are sure that you no longer need it.
Do the following to delete a local backup.
- Locate the local backup in the displayed list on your device.
- Click or tap on the Trash icon in the backup entry.
- Provide the required confirmation by clicking or tapping on the Delete button.
- Wait till the backup is deleted.
Avoid manually deleting files on your desktop
Please do not access the restricted folders on your device or desktop.
Export and Import
Overview
Exporting and importing of records allow you to extract, store and add records to your or other accounts. Refer to the sections below for more details.
Export
Exporting of records in SplashID Pro 9 allows you to store your records in a file.
You can use the exported file to
- Keep your own backups.
- Add content to other accounts.
Export screen
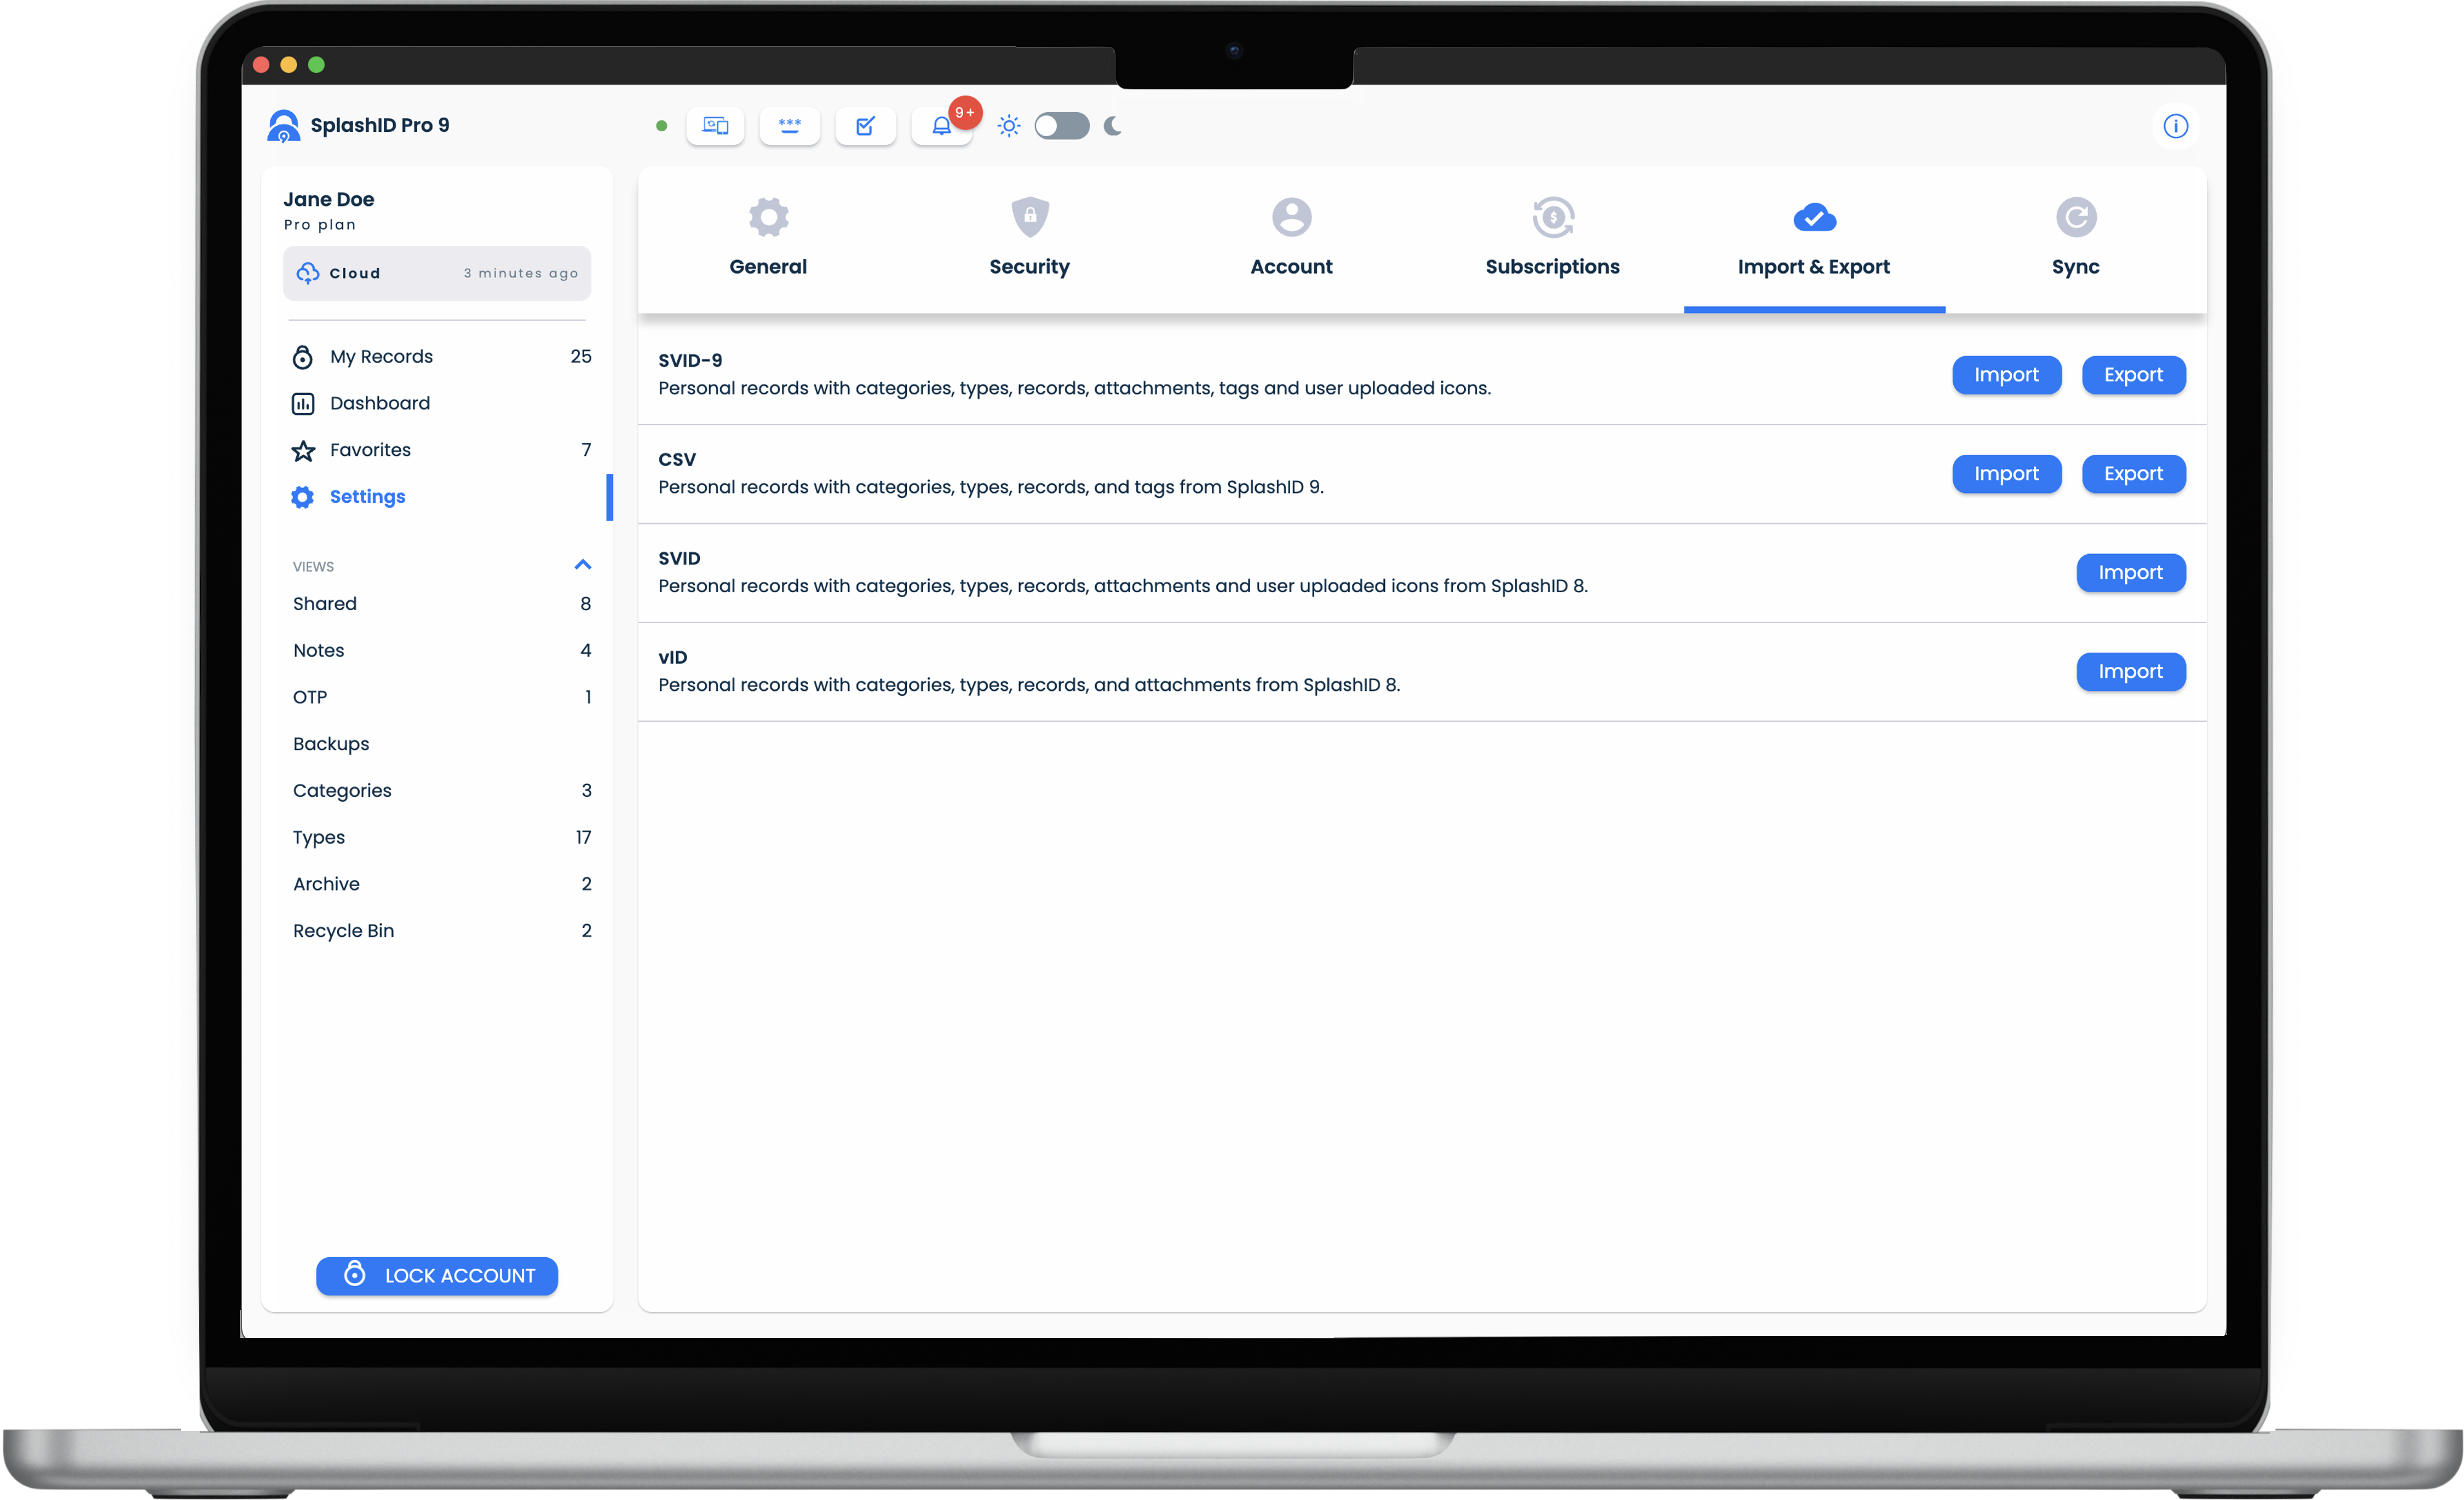
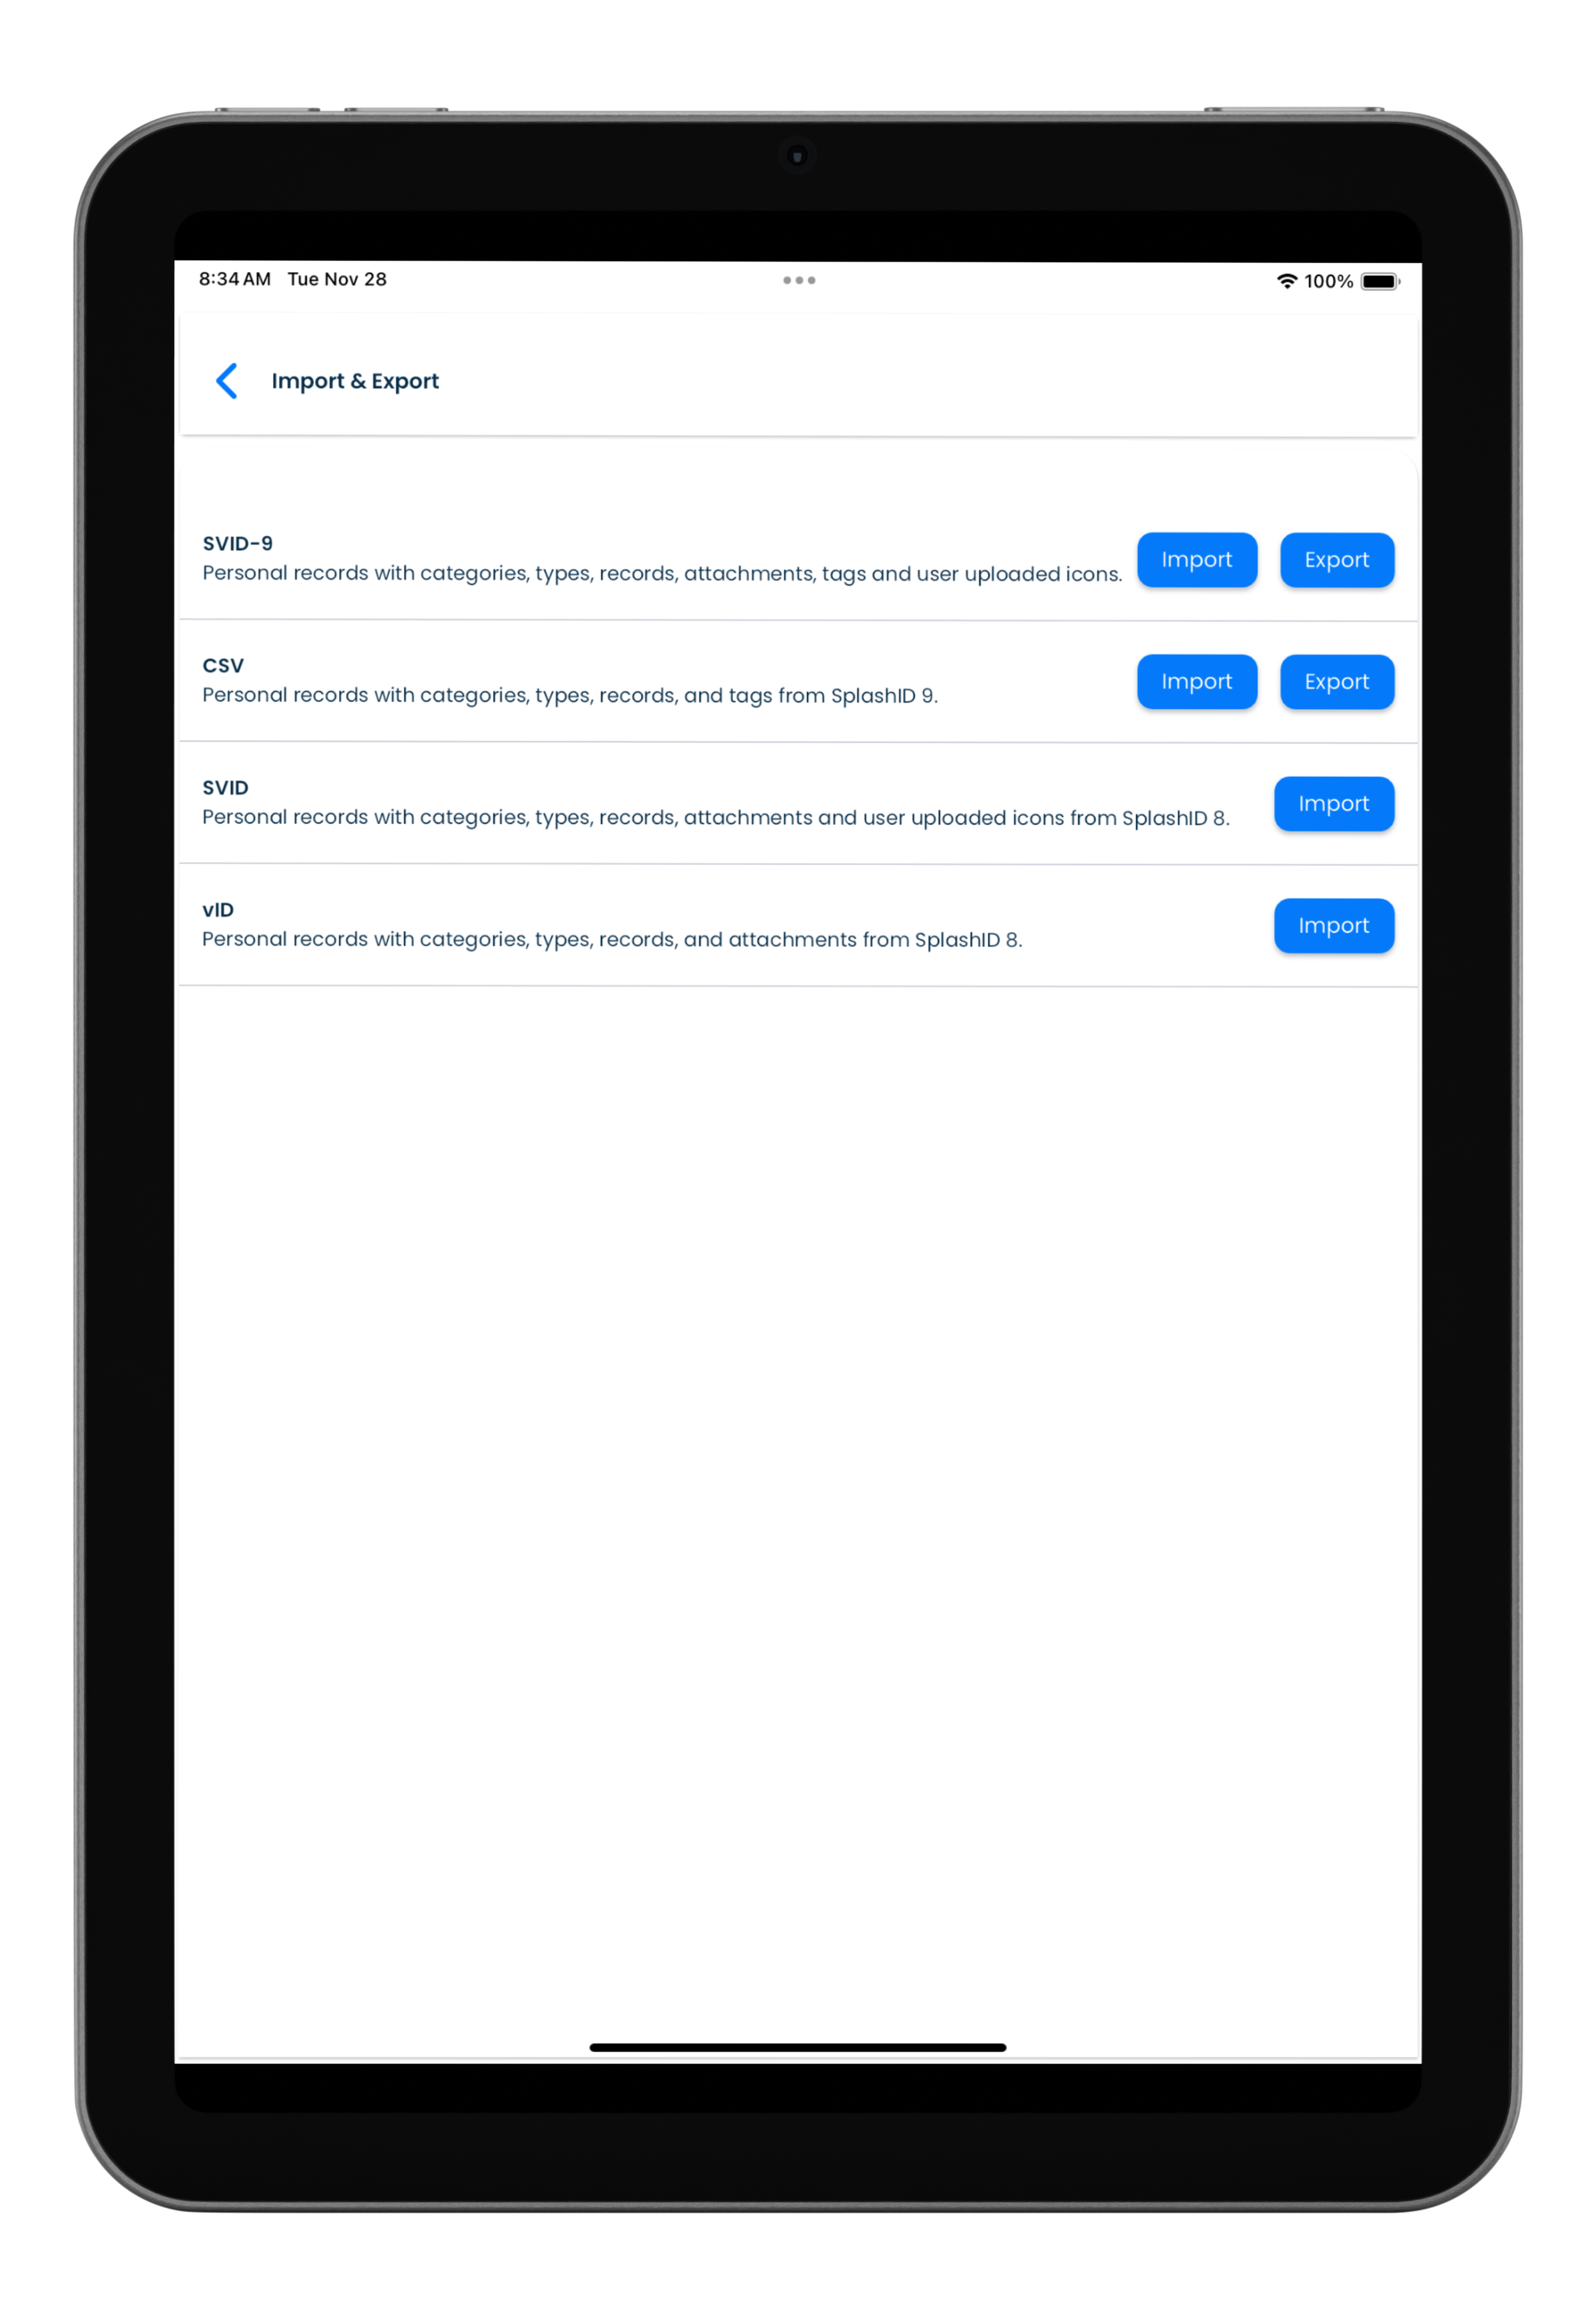
The export screen can be reached by clicking or tapping on the Settings link in the application menu, and then clicking or tapping on the Import & Export section header.
Types of export
SplashID Pro 9 supports exporting to two file formats.
- SVID-9
SVID-9 is a custom file format that SplashID Pro 9 uses. The contents of the file are encrypted with a password you provide at the time of taking the export.
An exported SVID-9 file name will have the exported date and time with an extension called svid9.zip . An example of an SVID-9 file name is 2022-05-28_09-30-19_S9.svid9.zip.
- CSV
The CSV export is a regular CSV file that SplashID Pro 9 enhances with its own content structure in the cells in the file. The contents of the file are NOT encrypted and contain only the textual information present in your records. CSV exported files do not have attachments or your uploaded icons.
An exported CSV file will have the exported date and time with an extension called csv . An example of an SVID-9 file name is 2022-12-28_08-05-22_S9.csv.
Download folder
The exported file is normally stored in the Downloads folder on your desktop, tablet or mobile device.
Export to SVID-9
- Click or tap on the Settings item in the application menu.
- Click or tap on Import & Export.
- Click or tap on the Export button in the SVID-9 row.
- In the dialog shown, provide a strong password and confirm it. Click or tap on the Export button to complete the export.
- In your file explorer, navigate to the Downloads folder to access the exported file.
Export to CSV
- Click or tap on the Settings item in the application menu.
- Click or tap on Import & Export.
- Click or tap on the Export button in the CSV row.
- In the dialog shown click or tap on the Export button to complete the export.
- In your file explorer, navigate to the Downloads folder to access the exported file.
CSV file format
CSV files from SplashID Safe and SplashID Pro 9 are not compatible.
Import
You can import records into your account using an SVID-9 or CSV file that was previously exported from a SplashID Pro 9 account.
Import screen
The import screen can be reached by clicking or tapping on the Settings link in the application menu, and then clicking or tapping on the Import & Export section header.
Types of import
SplashID Pro 9 supports importing of four file formats.
- SVID-9
SVID-9 is a custom file format that SplashID Pro 9 uses. The contents of the file are encrypted with a password you provide at the time of taking the export.
- CSV
The CSV export is a regular CSV file that SplashID Pro 9 enhances with its own content structure in the cells in the file. The contents of the file are NOT encrypted and contain only the textual information present in your records. CSV exported files do not have attachments or your uploaded icons.
- SVID
SVID is a custom file format that SplashID Safe uses. The contents of the file are encrypted with a password you provide at the time of taking the export in the older SplashID Safe app.
- vID
vID is a custom file format that SplashID Safe uses. The contents of the file are encrypted with a password you provide at the time of taking the export in the older SplashID Safe app. vID files do not support user uploaded icons.
Do not close application
To prevent partial import of content do not close or quit your app while the import is happening.
Large files could take a long time depending on the device you are importing into.
Import SVID-9
- Click or tap on the Settings item in the application menu.
- Click or tap on Import & Export.
- Click or tap on the Import button in the SVID-9 row.
- Choose the file you want to import.
- In the dialog shown, enter the password used at the time of the export. Optionally, if you want to replace the types from the file being imported then select the Replace current Type fields with incoming Type fields box.
- Click or tap on the Import button to start the import.
- After the import completes you can see a dialog displaying the summary of the imported content.
Import CSV
- Click or tap on the Settings item in the application menu.
- Click or tap on Import & Export.
- Click or tap on the Import button in the CSV row.
- Choose the file you want to import.
- Click or tap on the Import button to start the import. Please wait till it completes.
- After the import completes you can see a dialog displaying the summary of the imported content.
CSV file format
CSV files from SplashID Safe and SplashID Pro 9 are not compatible.
Import SVID
- Click or tap on the Settings item in the application menu.
- Click or tap on Import & Export.
- Click or tap on the Import button in the SVID row.
- Choose the file you want to import.
- In the dialog shown, enter the password used at the time of the export.
- Click or tap on the Import button to start the import.
- After the import completes you can see a dialog displaying the summary of the imported content.
Import vID
- Click or tap on the Settings item in the application menu.
- Click or tap on Import & Export.
- Click or tap on the Import button in the SVID-9 row.
- Choose the file you want to import.
- In the dialog shown, enter the password used at the time of the export.
- Click or tap on the Import button to start the import.
- After the import completes you can see a dialog displaying the summary of the imported content.
Ended: Records
Sync your data across devices
You can keep your information in sync across multiple devices by using Cloud sync or WiFi sync, or just use it on multiple devices without any syncing in the No sync mode.
The sync mode is first chosen at the time of setting up your account when you sign up.
Sync mode changes
The sync mode is chosen by you depending on how you want to store and sync your data. It is not intended to be changed frequently as it requires additional actions on your behalf to ensure that data is in sync before and after changing sync modes.
If you decide to change your sync modes then you can do that in the Settings section from inside the app.
Types of syncing
There are three types of sync modes available for use.
Cloud sync
Stores your data on our servers.
WiFi sync
Does not use our servers to store your data. You sync your information manually between your devices while connected to your network.
No sync
Each device of yours has its own information.
Cloud sync
Cloud sync is a (1) Pro feature
- Requires a paid SplashID Pro 9 license.
Using your account in Cloud sync mode is the easiest way for you to keep your information the same across all your devices. It requires your device to be connected to the internet for sync to happen whenever you make changes to your information on a device.
Your information is stored securely on our servers in an encrypted form. The mechanisms used ensure that even we cannot decrypt and see your information.
Enabling Cloud sync
If you need to switch your account to Cloud sync, please do the following.
- Pick your device with SplashID Pro 9 that has the most current information, and sign in to your account.
- Click or tap on the Settings item in the application menu.
- Click or tap on Sync.
- Click or tap on the Cloud card.
- Provide the required confirmation to proceed further. Wait till the sync completes.
Syncing manually
Occassionally it is possible that some of your information has not synced automatically. In such situations, you can manually start a cloud sync by clicking or tapping on the Cloud Sync button above any of the record list screens.
Troubleshooting
If you need to check differences in your data on the device with what is stored on our servers, then use the Cloud sync troubleshooter as described below.
- Click or tap on the Settings item in the application menu.
- Click or tap on Sync.
- Click or tap on the Troubleshoot button in the Cloud card.
- Review the report displayed that compares each item on your device with the one stored in our server.
WiFi sync
WiFi sync is a (1) Pro feature
- Requires a paid SplashID Pro 9 license.
If you do not want your records to be stored on our servers, then you can use your account in WiFi sync mode.
You can still sync between your devices containing your SplashID Pro 9 accounts by using WiFi sync. Here your data flows between the devices on your local network only. The sections below explain how to sync your data using WiFi sync.
Enabling Wifi sync
If you need to switch your account to Wifi sync, please do the following.
- Pick your device with SplashID Pro 9 that has the most current information, and sign in to your account.
- Click or tap on the Settings item in the application menu.
- Click or tap on Sync.
- Click or tap on the Local Wifi card.
- Provide the required confirmation to proceed further.
Change in WiFi sync mechanism from 9.4
The WiFi sync mechanism has been rewritten. All the apps will need to be of version 9.4 or above for WiFi sync to work.
Syncing manually
WiFi sync between your devices needs to be manually done. The steps below explain in general on how to perform WiFi sync between any two devices that you use SplashID Pro 9 on.
- Ensure that both your devices are connected to the same local network. This will normally be the case if all your devices connect to the same internet router in your home or office.
- Sign in to your account on both your devices.
- Initiate WiFi sync using one of the options below.
- From the My Records screen
- On one of your devices, navigate to the My Records screen by clicking or tapping on the My Records entry in the application menu.
- Click or tap on the Wifi sync button displayed on top of the record list screen.
- You will be taken to the Sync screen in Settings.
- From the Sync screen in Settings
- Click or tap on the device in the list in the My devices screen that should be synced with.
- Wait till the WiFi sync completes.
Sync direction in WiFi sync
By default the sync direction is two way sync.
You can select one of the other to options to override the sync direction that allows for overwriting the data on one device with the data from the other device.
WiFi syncing across devices
My devices
The My devices screen shows all your devices that you have setup for WiFi sync.
Available devices
The Available devices screen show your other devices that you have not yet setup for WiFi sync.
One time setup for WiFi sync
If you do not see your device listed in My devices, then you need to add it to the trusted devices list from the Available devices screen by clicking on the + Add button next to the device.
The Available devices screen will display all your other devices that satisfy the following conditions.
- Have SplashID Pro 9 installed on the device
- Is signed in to the same account
- Is not in the My devices list
- Is connected to the same WiFi or wired network
Once a device is added to the My devices list, they will appear on your other devices that have synced with this device after the addition.
Troubleshooting connections
The following conditions need to be met for WiFi sync to happen between your devices. Check that all of them have been fulfilled.
- You have signed in with the same SplashID Pro 9 account on your two devices.
- Both of your devices are connected to the same WiFi or wired network.
- You have accepted all permissions asked for when the app was installed or when launched.
- You do not have any firewalls on your devices or internet router that block SplashID Pro 9 traffic to flow between them.
Restarting WiFi services
There are two options to further troubleshoot discovery and connection issues. Please ensure that the requirements as listed above are met before you try one or both of the options given below.
- Restart WiFi service
Click on the refresh button to restart the app WiFi broadcast and discovery services. Once clicked wait for a few seconds for the WiFi services to do their work in the background.
- Refresh WiFi broadcast
Sometimes you just need the other devices to see the device you are currently on. In such cases, you can just make the current device broadcast its presence to the other devices by clicking on the refresh button.
Troubleshooting differences
If you need to check differences in your data between two of your devices, then use the Wifi sync troubleshooter as described below.
- Click or tap on the Settings item in the application menu.
- Click or tap on Sync.
- Click or tap on the Troubleshoot button in the Local Wifi card.
- Review the report displayed that compares the items on your two devices.
No sync
If you do not want your records to be stored on our servers and you do not want to sync your information between your devices, then you can use your account in No sync mode.
Enabling No sync
If you need to switch your account to No sync, please do the following.
- Sign in to your account.
- Click or tap on the Settings item in the application menu.
- Click or tap on Sync.
- Click or tap on the No sync card.
- Provide the required confirmation to proceed further.
Sharing records with others
Sharing is a (1) Pro feature
- Requires a paid SplashID Pro 9 license.
Overview
Sharing screen
Sharing of your records and viewing records shared by others is done in the Sharing screen. The Sharing screen can be reached by clicking on the Shared link in the application menu.
You can share your records with other SplashID Pro 9 users once you set up trusted users and groups of trusted users in your account.
Similarly, you can see another users shared information if they invite you to become their trusted user, and you accept their invite.
A user who accepts a sharing invite becomes a trusted user of the other.
Once you have added some trusted users, you can setup groups to allow sharing of records with multiple people without having to share with them individually on every record.
Controlled sharing
In SplashID Pro 9, you control who else can see the records that you share. It is a one-way sharing, and allows you to share with others who are willing to see your shared information.
This also means that sharing in the reverse direction depends on the other user inviting you, and you accepting the invitation.
When groups are created, invited users can accept or reject the invitations. This gives a user the power to decide if they want to join a group or not.
Sharing summary
Sharing of records in SplashID Pro 9 can be achieved by:
-
Setting up trusted users.
-
Optionally, creating groups of your trusted users.
-
Editing your records and assigning them to these trusted users and/or groups to start sharing of these records.
You remain the owner of your records, and through sharing can optionally give others the right to edit your records.
This means that sharing of records can be used as a powerful tool to disseminate your information in a controlled and secure manner.
Sharing requires a paid license
All users involved in sharing will need a valid SplashID Pro 9 license to be able to setup trusted users and groups, and then to share records.
Trusted users
Add a trusted user
You can invite another SplashID Pro 9 user to view and/or edit records shared by you with them.
To add a trusted user do the following.
- Visit the Shared screen from the application menu.
- Click or tap on the Users button at the top of the middle panel in desktops, or at the top of the left panel in tablets, or at the top of the screen in mobiles.
- Click or tap on the Invite User link at the top right side of your screen.
- Enter the user's email address, select/deselect the optional Edit check box.
- Click or tap on the Invite button to send out an email to the user.
The invited user will need to accept your invite. Till the invitation is not accepted it will be displayed in the same screen in the Pending tab.
Once trusted, you can add this user to your personal records in the record editor, and save the record to start sharing the record with the trusted user.
Removing a trusted user
To remove a trusted user do the following.
- Visit the Shared screen from the application menu.
- Click or tap on the Users button at the top of the middle panel in desktops, or at the top of the left panel in tablets, or at the top of the screen in mobiles.
- Click or tap on the Trusted tab header.
- Locate the trusted user in the list, and click or tap on the 3 dot icon.
- Click or tap on the Remove option in the list.
- Click or tap on the Remove button to confirm the removal of the user.
Changing edit permission
Shared records can be edited by a trusted user if they were assigned an edit permission to the trusted role by the owner of the record. The edit permission can be revoked or granted at any time by the user owning the records, by modifying the edit permissions in the trusted user setup.
Accepting an invitation
You can accept the invite sent by another SplashID Pro 9 user to view and/or edit records shared by them with you.
To accept an invite do the following.
- Visit the Shared screen from the application menu.
- Click or tap on the Users button at the top of the middle panel in desktops, or at the top of the left panel in tablets, or at the top of the screen in mobiles.
- Click or tap on the Pending tab header.
- Locate the inviting user in the list, and click or tap on the 3 dot icon.
- Click or tap on the Accept item in the list to accept the invitation.
Declining an invitation
You can decline the invite sent by another SplashID Pro 9 user.
To decline an invite do the following.
- Visit the Shared screen from the application menu.
- Click or tap on the Users button at the top of the middle panel in desktops, or at the top of the left panel in tablets, or at the top of the screen in mobiles.
- Click or tap on the Pending tab header.
- Locate the inviting user in the list, and click or tap on the 3 dot icon.
- Click or tap on the Decline item in the list to accept the invitation.
Resend invitation
Sometimes, you might need to send the invite to another user again.
To resend an invite do the following.
- Visit the Shared screen from the application menu.
- Click or tap on the Users button at the top of the middle panel in desktops, or at the top of the left panel in tablets, or at the top of the screen in mobiles.
- Click or tap on the Invited tab header.
- Locate the user in the list to whom you want to send the invitation again, and click or tap on the 3 dot icon.
- Click or tap on the Re-invite option in the displayed list.
Inform the user personally
Do let the invited user know personally of a pending invitation, if required. Some of them prefer to be notified personally of such actions.
Enable edit permission
To enable edit permission of a trusted user do the following.
- Visit the Shared screen from the application menu.
- Click or tap on the Users button at the top of the middle panel in desktops, or at the top of the left panel in tablets, or at the top of the screen in mobiles.
- Click or tap on the Trusted tab header.
- Locate the trusted user in the list, and click or tap on the 3 dot icon.
- Click or tap on the Enable edit option in the list.
Disable edit permission
To disable the edit permission given previously to a trusted user do the following.
- Visit the Shared screen from the application menu.
- Click or tap on the Users button at the top of the middle panel in desktops, or at the top of the left panel in tablets, or at the top of the screen in mobiles.
- Click or tap on the Trusted tab header.
- Locate the trusted user in the list, and click or tap on the 3 dot icon.
- Click or tap on the Disable edit option in the list.
Groups of users
You can create groups of your trusted users for sharing records between them. Once a group has been created, you can add your trusted users to the group and assign them one of the following roles.
- Admin
- Editor
- Viewer
The roles and the permissions they have are listed and described in the following sections.
Roles and permissions
The group owner can assign roles to every user in the group. The default role of a user in a group is that of a viewer.
| Role | Manage group users | Share own records in group | Edit others records | View shared reccords |
|---|---|---|---|---|
| Admin | Yes | Yes | Yes | Yes |
| Editor | No | Yes | Yes | Yes |
| Viewer | No | No | No | Yes |
Admin of a group
An admin user can add, remove or edit other users role permissions. They cannot change the group owners permissions.
Using this mechanism, administration of a groups members can be delegated to other users.
An admin user can share their own records, and will also have edit permissions on the records that have been shared in the group.
Editor of a group
An editor can make changes to a records description, fields, notes, attachments and icons. They cannot change the existing sharing information in the records shared by others i.e. they cannot add/update users and groups assigned to a record.
An editor can share their own records in the group.
Viewer of a group
A viewer in a group can only see the records shared in the group. They will not be able to edit any shared records, or share their own records.
Create a group
To create a group of trusted users do the following.
- Click or tap on the Groups button at the top of the middle panel in desktops, or at the top of the left panel in tablets, or at the top of the screen in mobiles.
- Click or tap on the Create Group link at the top right side of your screen.
- Enter a name for your sharing group.
- Click or tap on the Create button to create the group. The created group is then displayed in the My Groups tab in the same screen.
- Click on the group name to start adding trusted users from your user list. You can assign Admin, Editor or Viewer roles to the invited user.
Adding group members
To add a trusted user to a group do the following. You need to be a group admin to be able to do this.
- Click or tap on the Groups button at the top of the middle panel in desktops, or at the top of the left panel in tablets, or at the top of the screen in mobiles.
- Click or tap on a group shown in the list of groups you have setup in the My Groups section.
- Click or tap on the Invite user link at the top right side of your screen.
-
In the displayed dialog
-
Select some or all of the trusted users you want to add to the group.
-
Select the role you want to give to the users you are adding in the group.
-
Click or tap on the Invite button to send invites to the added users.
Invited users need to accept the invitation to be able to join the group.
Removing group members
To remove a trusted user to a group do the following. You need to be a group admin to be able to do this.
- Click or tap on the Groups button at the top of the middle panel in desktops, or at the top of the left panel in tablets, or at the top of the screen in mobiles.
- Click or tap on a group shown in the list of groups you have setup in the My Groups section.
- Click or tap on the Members tab to see the existing members in the group.
- Locate the user you want to remove, and click or tap on the three dots actions button shown to the right.
- Click or tap on the Remove button to remove the user from the group.
Changing members role
To change the role assigned to an existing group member do the following. You need to be a group admin to be able to do this.
- Click or tap on the Groups button at the top of the middle panel in desktops, or at the top of the left panel in tablets, or at the top of the screen in mobiles.
- Click or tap on a group shown in the list of groups you have setup in the My Groups section.
- Click or tap on the Members tab to see the existing members in the group.
- Locate the user you want to remove, and click or tap on the three dots actions button shown to the right.
- Click or tap on the Make admin, Make editor or Make viewer option in the list to change the role of the user in the group.
Re-invite a user
To re-invite a user to join a group do the following. You need to be a group admin to be able to do this.
- Click or tap on the Groups button at the top of the middle panel in desktops, or at the top of the left panel in tablets, or at the top of the screen in mobiles.
- Click or tap on a group shown in the list of groups you have setup in the My Groups section.
- Click or tap on the Invited tab to see the members in the group who were invited previously, but have not yet accepted the invite.
- Locate the user you want to re-invite, and click or tap on the three dots actions button shown to the right.
- Click or tap on the Re-invite button to remove the user from the group.
Cancel invite of a user
To cancel a user previously invited to join a group do the following. You need to be a group admin to be able to do this.
- Click or tap on the Groups button at the top of the middle panel in desktops, or at the top of the left panel in tablets, or at the top of the screen in mobiles.
- Click or tap on a group shown in the list of groups you have setup in the My Groups section.
- Click or tap on the Invited tab to see the members in the group who were invited previously, but have not yet accepted the invite.
- Locate the user you want to cancel the invite for, and click or tap on the three dots actions button shown to the right.
- Click or tap on the Cancel button to cancel the invite sent to the user previously.
Rename a group
To rename a group do the following. You need to be a group admin to be able to do this.
- Click or tap on the Groups button at the top of the middle panel in desktops, or at the top of the left panel in tablets, or at the top of the screen in mobiles.
- Click or tap on a group shown in the list of groups you have setup in the My Groups section.
- Click or tap on the Edit icon in the group header at the top.
- Change the name of the group.
- Click or tap on the Update button to change the group name.
Delete a group
To delete a group do the following. You need to be a group admin to be able to do this.
- Click or tap on the Groups button at the top of the middle panel in desktops, or at the top of the left panel in tablets, or at the top of the screen in mobiles.
- Click or tap on a group shown in the list of groups you have setup in the My Groups section.
- Click or tap on the Trash icon in the group header at the top.
- In the displayed dialog, optionally select if you want to also delete the records shared in the group while deleting the group. If not selected, the records you own will be converted to personal records and will appear in your My Records screen.
- Click or tap on the Delete button to delete the group.
Share a personal record
To share a record for the first time, go to a personal record in one of the record lists and start editing it.
Trusted users and groups
You need to have atleast one trusted user or group setup for being able to share a record.
You can then add your trusted users and groups to this record in the sharing section in the record details panel.
Finally, save the record to start sharing of the record.
Sharing of a personal record will convert it to a shared record. The shared record will be removed from your personal lists, and will be available in the Shared records screen that can be accessed from the application menu.
Shared records remain with the owner
A record that has been shared with others continues to be owned by the user who created the record.
Only a record owner can change the sharing information in a record.
Managing sharing of a record
You can modify the list of users and groups in a record, and save the record to make changes to record sharing effective.
If a record is shared with one or more groups, and you have assigned Admin roles to other group members, then they can also manage sharing of the record indirectly by managing the group membership.
Removing sharing of a record
You can convert a shared record to a personal record if you are the owner of the record.
To remove access to a shared record, edit the record and remove all the users and groups in the Sharing section.
Once all users and groups have been removed from the list in the record, and the record saved, the record will become a personal record that is accessible only by you.
The record will be removed from your shared list, and will be available in the My Records screen that can be accessed from the application menu.
Warning
A personal record that is shared will become visible to trusted users after they sync their content or do a fresh sign in.
A shared record that is made a personal record will be removed from the shared view of the trusted users after they sync their content or do a fresh sign in.
Settings for your account
The settings screen allow you to customise certain aspects of your account.
Settings screen
Your account and device specific settings can be viewed and managed in the Settings screen. The Settings screen can be reached by clicking on the Settings link in the application menu.
The settings options will vary across users, depending on the Pro license type of the account, and the sync method chosen.
The available settings for your account and your devices are organised into groups. On desktops, the setting groups are displayed as tabs, while on mobiles the groups are organized as a list.
Refer to the following sections to get an idea of the available settings in SplashID Pro 9.
General
All settings that are common at the application level are included here.
Setting |
Description | Cloud sync | WiFi sync | No sync |
|---|---|---|---|---|
| Application | ||||
| Hide unused record fields | Determines if the record details should display fields that are empty. | Yes | Yes | Yes |
| Theme | ||||
| System theme | Select if the application theme should follow system theme set on your device. | Yes | Yes | Yes |
| Light or Dark | Manually set the theme mode, if you do not want the application theme to be the same as the system theme. | Yes | Yes | Yes |
| Font | ||||
| Font | Select a font from the list to be used in the application. | Yes | Yes | Yes |
| Font scale | Increase or decrease the font size across the application. | Yes | Yes | Yes |
| Keep Logs | ||||
| Keep logs | Set the duration for which the activity logging is recorded. | Yes | Yes | Yes |
| Web Logins | ||||
| Auto fill web logins | Select the option if you want the details in a record to be populated in the login form of a website. Auto fill requires you to use the browser extension, and the URL in the record should match the website login page URL. |
Yes | Yes | Yes |
| Side Menu | ||||
| Hide Shared | Select it to hide the shared records view if you do not need it. | Yes | Yes | Yes |
| Hide Notes | Select it to hide the Notes view if you do not need it. | Yes | Yes | Yes |
| Hide OTP | Select it to hide the OTP view if you do not need it. | Yes | Yes | Yes |
| Hide Categories | Select it to hide the Categories view if you do not need it. | Yes | Yes | Yes |
| Hide Types | Select it to hide the Types view if you do not need it. | Yes | Yes | Yes |
| Password Generator | ||||
| Length | Set the length of the password generated by the utility. | Yes | Yes | Yes |
| Characters to include | Select the character sets to be included in the generated password. | Yes | Yes | Yes |
| Characters to exclude | Exclude the confusing characters set (i1l0oO), and any other characters you specify in the generated password. | Yes | Yes | Yes |
Security
Setting of 2 factor methods, and securing application behaviour can be done in this area.
Setting |
Description | Cloud sync | WiFi sync | No sync |
|---|---|---|---|---|
| Application | ||||
| Clear clipboard on Lock and Sign out | Select to wipe out any copied to clipboard content when the application locks or you sign out. | Yes | Yes | Yes |
| Clear filter on Sign out | Select to wipe out any selected record filters when you sign out. | Yes | Yes | Yes |
| Auto lock after ___ minutes | Select to setup the application to lock automatically after a preset time interval if there is no activity. Set the inactivity time interval in minutes. The default interval is 10 minutes. |
Yes | Yes | Yes |
| Local pin | Set a 6 digit pin to access your account on the device. The set local pin is only for the device you set it on. Click or tap on the Setup button to set a local pin. Once set, click or tap on the Modify button to change or remove the local pin. |
Yes | Yes | Yes |
| Account | ||||
| 2-Factor Authentication | Set a second factor method to authenticate while you sign in to you account. The second factor will provide additional security to your account. Click or tap on the Setup button to set a 2-Factor method. Once set, click or tap on the Modify button to change the 2-Factor method, or click or tap on the Disable button to remove the 2-Factor method while you sign in. |
Yes | Yes | Yes |
| Account lock duration ___ minutes | Setup the application to unlock automatically after a preset time interval if the account was locked due to 10 or more successive failed logins. Set the auto account unlock time interval in minutes. The default interval is 60 minutes. |
Yes | Yes | Yes |
Account
Settings specific to a users account are handled here. Editing the user name, setting up the account sign in types and downloading of the account recovery kit can be done here.
Setting |
Description | Cloud sync | WiFi sync | No sync |
|---|---|---|---|---|
| Delete Account | Click or tap on the Delete Account link if you want to start the process of deleting your account. | Yes | Yes | Yes |
| Change username | Click or tap on the Change link to edit and change the username for your account. | Yes | Yes | Yes |
| Linked Accounts | ||||
| Email account - Log out | Click or tap on the Log out button to sign out of your account and return to the sign in screen. | Yes | Yes | Yes |
| Email account - Email | Click or tap on the Change link to change the email address associated with this account. Changing an email address will require you to verify the new email address as part of the change process. |
Yes | Yes | Yes |
| Email account - Password | Click or tap on the Change link to change the master password of this account. It is recommended that you log out of all other devices before you do this on one of your devices. |
Yes | Yes | Yes |
| Email account - Password hint | Click or tap on the Change link to change the password hint for this account. We recommend that you do not store your master password here as the password hint is sent to you by email when you request for it. Instead use some other words or phrases that will help you remember your master password. |
Yes | Yes | Yes |
| Google account | Click or tap on the Link button to set up signing in with your Google account. This will be an additional sign in method for this account of yours. You can get more details on using a Google account here. |
Yes | Yes | Yes |
| Apple account | Click or tap on the Link button to set up signing in with your Apple account. This will be an additional sign in method for this account of yours. You can get more details on using a Apple account here. |
Yes | Yes | Yes |
| Recovery Kit | ||||
| Download recovery kit | Click or tap on the Download Kit button to generate and download a recovery kit for your account. | Yes | Yes | Yes |
Subscriptions
Previously purchased subscriptions, and other available subscriptions for purchase are listed in this screen. There are two types of subscriptions that can be purchased.
- Personal subscriptions
Personal subscriptions give you pro individual licenses that you can use and also assign to others. Click or tap on the Personal Plan button to see the personal subscriptions in your account.
- Volume licensing plans (VLP)
Teams, groups and organizations with their own domain can purchase licenses in bulk by subscribing to VLP plans. Click or tap on the Volume Licensing Plan button to see the personal subscriptions in your account.
SplashID Pro 9 allows you to purchase multiple licenses that you can assign to others. This is especially useful if you have to purchase licenses for other family or team members.
Subscriptions offered by us can be bought from multiple places for your convenience. These include
- SplashID web site
The first subscription purchase needs to be made on our website. After that you can manage and buy additional subscriptions from inside the applications.
- App Store
Purchasing from the App Store is supported from inside our iOS, iPadOS and macOS applications.
- Play Store
Purchasing from the Play Store is supported from inside our Android applications.
Refresh to see your purchased licenses
If you do not see your purchased licenses, then first click or tap on the Refresh button in the top right side of this screen.
You can always contact out technical support team if you are having any issues related to the subscriptions.
Import & Export
You can perform operations related to import and export of different flavours of SplashID files.
The following files can be imported.
- SVID9
- SVID
- VID
- CSV (SplashID Pro 9 format)
Own records and account information can be exported to the following file types.
- SVID9
- CSV (SplashID Pro 9 format)
Sync
Licenses ↵
Free and Pro licenses
SplashID Pro 9 can be used without a paid license on multiple devices. This is the initial state of a new account after you create it.
An account in free mode comes with the restrictions listed below.
- No syncing across installations.
- Maximum of 25 records in one installation.
- No automatic cloud backups for Cloud sync users.
- No sharing of records with other users.
All the above restrictions are unlocked when you purchase a SplashID Pro 9 license for your account.
In SplashID Pro 9 you can also purchase multiple licenses that you can assign to others. This is especially useful if you have to purchase licenses for your family or team members.
How to get a Pro license?
You can get a Pro license in one of the following ways.
- Purchase a subscription from us, the App Store, or the Play Store.
- Migrate your existing SplashID Safe account with a Pro license to SplashID Pro 9.
- Purchase a one time paid license called a lifetime license.
Subscriptions
Subscriptions can be purchased with yearly or monthly renewals. They renew automatically at the end of the validity period. You can cancel them from renewing anytime.
Subscriptions screen
The Subscriptions screen can be reached by clicking or tapping on the Settings link in the application menu, and then clicking or tapping on the Subscriptions section header.
There are two types of subscriptions that can be purchased to get Pro licenses.
Personal subscriptions
Personal subscriptions give you individual Pro licenses that you can use for yourself, or to assign to others.
These are available with yearly or monthly validity.
In the Subscription screen, click or tap on the Personal Plan button to see the personal subscriptions in your account.
Volume licensing plans (VLP)
Teams, groups and organizations with their own domain can purchase licenses in bulk by subscribing to VLP plans.
These are available with yearly validity.
In the Subscription screen, click or tap on the Volume Licensing Plan button to see the personal subscriptions in your account.
For more details please visit the VLP page.
Lifetime licenses
One time purchase licenses, also called as lifetime licenses, for SplashID Pro 9 are not offered currently. We plan to introduce this in 2025.
Lifetime licenses for SplashID Pro 9 will be valid till the product is available for download and use. These licenses will not be valid for other editions of SplashID. However, we will offer upgrade paths to lifetime licenses at a nominal cost when new editions of SplashID are released.
We do not anticipate the regular release of new editions of SplashID. To put this in perspective, SplashID Safe was in use for more than a decade, before we introduced SplashID Pro 9. We have provided the existing SplashID Safe users who have lifetime licenses, a free migration path to SplashID Pro 9 atleast till 31st January 2026, or till a later date that we will announce in the future.
Where to buy a license?
Subscriptions offered by us can be bought from multiple places for your convenience.
The availability of the subscription plans for purchase depend on the device you are using SplashID Pro 9 on. Once purchased they give you a Pro license that is valid for use on any number of devices you want to use your account on.
You can choose to purchase a subscription on the device you are most comfortable with.
On Android mobiles and tablets you get to purchase and manage the following subscriptions.
- SplashID Pro 9 (Annual)
- SplashID Pro 9 (Monthly)
- SplashID Pro 9 (Annual) Play Store version
- SplashID Pro 9 (Monthly) Play Store version
In Apple devices you get to purchase and manage the following subscriptions.
- SplashID Pro 9 (Annual) App Store version
- SplashID Pro 9 (Monthly) App Store version
In Windows devices and in the web app you get to purchase and manage the following subscriptions.
- SplashID Pro 9 (Annual)
- SplashID Pro 9 (Monthly)
SplashID website
To purchase a subscription managed by us directly do the following.
- Go to the SplashID Pro 9 purchase form.
- Enter your personal details, card details and address in the provided fields.
- Optionally, enter the coupon code if you have one that will give you a discount.
- Click on the Buy button and proceed to complete the purchase.
After the purchase is completed, sign in to SplashID Pro 9 and verify that the license is displayed in the Subscription section in Settings. If this is not displayed, please click or tap on the Refresh button for the license to be displayed.
After the initial purchase from our website, you can manage and buy additional quantities of the same subscription or our other subscription from inside the application itself.
App Store
Purchasing from the App Store is supported from inside SplashID Pro 9 on iOS, iPadOS and macOS devices.
To purchase a subscription in the App Store do the following.
- Sign in to your account on an Apple device.
- Go to the Subscriptions screen in Settings.
- Click or tap on the Personal Plan button to show the personal licenses available.
- Click or tap on the Subscribe button in the list of available licenses and proceed to complete the purchase.
Play Store
Purchasing from the Play Store is supported from inside SplashID Pro 9 on Android devices.
To purchase a subscription in the Play Store do the following.
- Sign in to your account on an Android device.
- Go to the Subscriptions screen in Settings.
- Click or tap on the Personal Plan button to show the personal licenses available.
- Click or tap on the Subscribe button in the list of available licenses and proceed to complete the purchase.
Licenses for others
Once you have purchased multiple quantities of licenses, you can assign them to other SplashID Pro 9 users of your choice. You can do this from the Subscriptions screen in Settings.
Next to the purchased license you will see details of the number of licenses you have and the users assigned to them.
Before assigning a license to others do ensure that they know about it. We will not be responsible for multiple license assignments or any refund requests made due to this. You can reduce the quantities of a license purchased, or cancel the renewal of a license to prevent this problem recurring in the future.
Volume License Program (VLP)
VLP is for teams with their own email domain
A VLP license caters to all users with email addresses from a domain who sign up for a SplashID Pro 9 account.
You need to be an authorised person in your company to register for a VLP. Please contact your IT admin before you sign up for a VLP license.
If you want to use your official email address for a personal license then please refer to the personal license page for details on how to purchase one.
A VLP plan is designed to cater to a group of users who share a common email domain. Once purchased it automatically assigns Pro licenses to the users who sign up for a SplashID Pro 9 account with email addresses from the registered domain. It is therefore easy for users in small groups to get licenses automatically without the need for any additional administration.
The number of users who automatically get a Pro license will depend on the pack you subscribe to. They get assigned on a first come first serve basis.
The VLP administrator also has the flexibility to view the assigned users and add or remove them from the list. All of this is done from within the SplashID Pro 9 app.
How does it work?
In a nutshell VLP works as follows.
- An administrator creates a SplashID Pro 9 account with their official email, signs in and purchases a VLP license for the email domain.
- After that, users from the same email domain automatically get a license when they sign up for a SplashID Pro 9 account.
- The administrator can add or remove users who are assigned licenses in the VLP for the domain.
Volume License Program screen
The VLP subscription administration is done in the Subscriptions screen in Settings. To go the VLP screen do the following.
- Sign in to a SplashID Pro 9 application on Windows or Android with your administrator email address.
- Click or tap on the Settings entry in the application menu.
- Click or tap on Subscriptions.
- Click or tap on the Volume License Plan button.
The sections below explain the VLP work flow in detail.
Enroll
Enrolling in a VLP program creates a VLP account for the domain used by the team.
A domain can be enrolled only once for a VLP program. The email address used to enroll for the VLP program becomes the administrator of the VLP for that domain.
You can enroll in the SplashID Pro 9 Volume License Program by following the steps listed below.
- Go to the VLP screen as explained above.
- Choose a pack from the available list. A pack gives you a set of licenses that your users can use. If you need more licenses, you can add more quantities of the chosen pack, or buy a larger pack.
- Click or tap on the Subscribe button of the chosen plan. You will be taken to a purchase form.
- Enter all the details in the VLP purchase form correctly. Ensure that your email address is correct. Complete the purchase and go back to the subscriptions screen.
- You should be able to see more options in the VLP plan that you just purchased. These options allow you to increase or decrease the number of licenses, add or remove users who are assigned Pro licenses in the pack, or even cancel the subscription renewal.
Onboard users
Users get aassigned to your VLP in two ways. The maximum number of users who get a Pro license from the VLP will depend on the packs you purchase.
-
A user who signs up for a SplashID Pro 9 account gets a Pro license automatically, if the following conditions are met.
-
The users email address is from the domain authorised for the VLP.
-
The maximum licenses available has not been used up.
-
An administrator adds the users email address to the VLP. This is done in the Volume License Program subscriptions screen. This is possible as long as there are licenses available to be assigned.
Administer VLP
A VLP administrator can perform the following actions from within the SplashID Pro 9 app on a Windows or Android device.
- Purchase more quantities of the same VLP pack to add to the available licenses.
- Purchase other VLP packs to add to the total licenses available for the domain.
- Cancel a VLP subscription.
- View the list of users assigned to the VLP packs.
- Add or remove users from the list of licenses.
To perform the above actions follow the steps listed below.
- Go to the VLP screen as explained above.
- Scroll down to the VLP pack you have subscribed to.
- Click or tap on the + button to increase or decrease the number of licenses.
- Click or tap on the user icon button to add or remove users who are assigned Pro licenses in the pack.
- Click or tap on the X button to cancel the subscription renewal.
- Click or tap on the Refresh icon button to re-subscribe to the previously cancelled subscriotion.
Ended: Licenses
Migrate your SplashID 8 account
SplashID Safe
SplashID Safe is also referred to as SplashID 8 here for clarity.
The page explains how you can migrate your SplashID 8 account to SplashID Pro 9.
The applications for SplashID Pro 9 are different from SplashID 8. They can both be installed and used together on the same device.
The migration does not change the data in your SplashID 8 account, and you can continue using it as long as your SplashID 8 license is valid. However the data will not sync between SplashID 8 and SplashID Pro 9.
Requirements
For migrating your SplashID 8 account to SplashID Pro 9 the following conditions need to be fulfilled.
- You should be an existing SplashID 8 user.
- Your account email address in SplashID 8 is the same as your SplashID Pro 9 account.
- You have signed up for a SplashID Pro 9 account and have completed its setup.
- You are a Pro license holder in SplashID 8.
- The sync method of your accounts in SplashID Safe and SplashID Pro 9 should be the same.
What gets migrated?
The migration can migrate your account, data and license depending on how you are set up in SplashID 8.
| Cloud sync | WiFi or No sync | |
|---|---|---|
| Account | Yes | Yes |
| License | Yes, for lifetime and our own subscriptions. No, for App Store and Play Store licenses. |
Yes, for lifetime and our own subscriptions. No, for App Store and Play Store licenses. |
| Data | Yes | No |
How to migrate?
To proceed with migration ensure that you have signed up for a SplashID Pro 9 account and have completed its setup. Also keep the master password of your SplashID 8 account ready as it will be needed during the migration.
The image below shows the macOS desktop app of SplashID Pro 9 of a signed in user who can migrate. The steps for migration are similar in the Windows, Android, iOS, or iPadOS apps. You can do the migration once on any app of your choice. We recommend using the macOS or Windows SplashID Pro 9 app as it will be easier to go through the steps on these machines.
Steps to migrate
- Download and install a SplashID Pro 9 application. We recommend using a desktop for the migration.
- Launch the installed SplashID Pro 9 app.
- Sign up for a SplashID Pro 9 account with the exact same email address as your current SplashID Safe account.
- Verify the email address used and complete the onboarding steps as suggested by the application.
- Sign in to your account, if needed.
- Tap or click on the Migrate from SplashID 8 link displayed below your account name in the top portion of the application menu.
- Enter the master password for the account you have in SplashID 8 and click or tap on confirm. Check the email address displayed above the password box to ensure that it is the email address of your SplashID 8 account.
- Review the migration summary.
- If you are on cloud sync and have setup Types in SplashID 8 with your own fields, then you can select the checkbox for 'Replace current Type fields with incoming Type fields' to replace the types in SplashID Pro 9 with your own fields.
- Click or tap on the Migrate button to proceed with the migration.
Master passwords
The master passwords of your accounts in SplashID Pro 9 need not be the same as in SplashID Safe.
Data migration will happen for cloud sync accounts only
The data in your SplashID 8 account will be migrated only if the account uses cloud sync.
For WiFi and No sync accounts in SplashID 8, you will need to export all your records to a SVID file on your main device, and then import the SVID file into your SplashID Pro 9 account from the Settings screen in the Import & Export tab.
SplashID 8 account after the migration
The SplashID 8 account of yours will remain independent of SplashID Pro 9, and you can continue using it. This will allow you to transition to SplashID Pro 9, and discontinue using SplashID 8 once you start using SplashID Pro 9 regularly.
The migration does not change the data in your SplashID 8 account, and you can continue using it as long as your SplashID 8 license is valid. However the data between SplashID 8 and SplashID Pro 9 will not sync.
In the future we will end support for SplashID 8 and stop offering it as a service. We strongly recommend that all existing users move over to SplashID Pro 9 as soon as they can.
Data migration from SplashID 8
Cloud sync
Cloud sync accounts in SplashID 8 will have their data copied over to SplashID Pro 9 during the migration.
First time migration
If you have a large number of records, then after the migration is complete, the application will start sending the migrated data using cloud sync. This happens in the background and will take some time depending on how much information you have.
After some time, you can log in to your account on another device and wait for the first time sync to complete in the background.
IMPORTANT
If the data appears to be out of sync, then first manually start sync on the device that you had completed the migration initially, by clicking or tapping on the Cloud Sync button. This button is shown at the top of the record list panel. After the sync completes successfully, initiate manual sync similarly on your other devices.
The manual sync procedure might be needed to be performed multiple times to ensure that all your content gets synced across all your devices.
WiFi and No sync
WiFi sync and No sync users will need to export their data to a SVID file in SplashID 8, and then import the SVID file in SplashID Pro 9.
No syncing between SplashID 8 and SplashID Pro 9 after the migration
Data does not sync between SplashID 8 and SplashID Pro 9. So do ensure, that you continue using SplashID Pro 9 after the migration, and stop using SplashID 8 once you are comfortable with the new SplashID.
License migration from SplashID 8
Your license will get migrated to SplashID Pro 9, if you had purchased one from us directly.
If you had purchased a SplashID Pro yearly or monthly subscription from the App Store or the Play Store, then your license will not be migrated. This is due to restrictions on license transfers across products in the App Store or the Play Store.
SplashID subscriptions purchased on our site
The migration will transfer your license to SplashID Pro 9 with the same annual or monthly license type and billing details as you had set it up in SplashID 8. Discounts in SplashID 8 will not get carried over to SplashID Pro 9.
Once transferred, your SplashID 8 account will continue to have a Pro license till the expiry of the current subscription. You can continue using SplashID 8 till the license expiry. After the expiry, the account will revert to a free license account.
Lifetime licenses
The migration will transfer your lifetime license over to SplashID Pro 9 for free till 31st January 2026.
After this offer period lifetime license holders will have to pay a nominal fee to transfer their SplashID Safe lifetime license over to SplashID Pro 9.
Your SplashID 8 account will remain as a Pro license account till the SplashID 8 service is stopped in the future. So do ensure that you start using SplashID Pro 9 once you are comfortable with it, and move away from SplashID 8.
App Store and Play Store licenses
SplashID Safe
The SplashID 8 app is commonly referred to as SplashID Safe in the stores.
Apple and Google limit our ability to transfer existing subscription purchases from one application to another application. Due to this restriction, it is not possible to automate the transfer of the SplashID 8 subscription purchased from the App Store or the Play Store to SplashID Pro 9.
You will have to do the following to migrate over to SplashID Pro 9 and setup a new purchase.
- Initiate the migration and transfer over your data to SplashID Pro 9.
- Proceed to the subscription screen and purchase a license that suits you.
- Once your SplashID Pro 9 account is set up with your data and license, you will need to manually stop the subscription for the SplashID 8 app in the App Store or the Play Store.
If you migrate to SplashID Pro 9, and do not cancel your SplashID 8 subscription you will continue getting billed for SplashID 8 subscriptions that you do not use. Please note that the responsibility for cancelling your SplashID 8 license in the App Store or Play Store rests with you. We will not be in any position to refund any amounts from the App Store or Play Store if you continue subscribing to the SplashID 8 licenses.
FAQ
Overview
What does migrating your SplashID Safe account to SplashID Pro 9 mean?
Migrating your SplashID Safe account will mean moving your license and data over to SplashID Pro 9. After that you can use SplashID Pro 9 applications instead of SplashID Safe on your devices and desktops.
What is the difference between SplashID Safe and SplashID Pro 9?
SplashID Safe is the SplashID password manager that you have been using since 2014.
SplashID Pro 9 is a next generation upgraded version of SplashID Safe. It retains most of the features in SplashID Safe and adds new features like built-in record sharing, unlimited fields in records, multiple notes with a notes only view, OTP code generation for other sites, record archiving and recycle bin features that are built on a set of new technologies.
Are SplashID Safe and SplashID 8 the same?
Yes. SplashID Safe is the SplashID product that you have been using since 2014. It is also known as SplashID 8, as all SplashID Safe applications are released as version 8 products e.g. 8.3.11.
What happens to my SplashID Safe account after the migration?
Your SplashID Safe account will continue to work till we shut down the service in the future.
Since the license too will automatically migrate for some users, for subscribers it will mean that their SplashID Safe account will at some time become a free account when the older license expires.
Can I use both SplashID Safe and SplashID Pro 9?
You can continue to use both SplashID Safe and SplashID Pro 9. Both the products function independent of each other. Their applications are different and can be installed alongside each other on your device and desktops.
There is no sharing or syncing of data between SplashID Safe and SplashID Pro 9. So if you decide to continue using both while they are available, you will need to manually maintain the records in both if you want them to be in sync.
Is SplashID Safe going away?
We anticipate keeping SplashID Safe till a majority of our existing SplashID Safe users migrate to SplashID Pro 9.
Towards this we will be supporting all of our existing SplashID Safe customers and actively help them migrate to SplashID Pro 9.
Why is SplashID Pro 9 being introduced?
The technologies used in SplashID Safe are old and difficult to effectively maintain and enhance the product. We also wanted to add new features and adopt newer cloud technologies that are secure and can serve lots of users at any point in time. In addition, we needed to use stronger encryption mechanisms that were not possible using our older technologies.
Migration
How do I migrate?
-
Download and install a SplashID Pro 9 application. We recommend using a desktop for the migration.
-
Launch the installed application.
-
Sign up for a SplashID Pro 9 account with the exact same email address as your current SplashID Safe account.
-
Verify the email address used and complete the onboarding steps as suggested by the application.
-
Sign in to your account if required. If you have a SplashID Safe account with the same email address then a 'Migrate from SplashID 8' option will be displayed below your account profile in the top portion of the navigation panel on the left side of the screen.
-
Click on the 'Migrate from SplashID 8' link and verify your SplashID Safe account by entering the master password for the account.
-
Review the shown summary and proceed to complete the migration.
-
Wait till the migration process gets over.
What information will migrate to SplashID Pro 9?
For cloud sync users the license and the data in the users account will get migrated. Do ensure that you have synced your SplashID Safe data once, before you attempt the migration in SplashID Pro 9.
For WiFi sync and No sync users in SplashID Safe, their license will get migrated to SplashID Pro 9. Their data will have to be manually migrated as explained in the Data migration section below.
License migration
Which licenses will be transferred over to SplashID Pro 9?
- Lifetime licenses for SplashID Safe
- Annual and monthly subscriptions offered by us directly
Which licenses cannot be transferred during the migration?
SplashID Safe subscriptions bought from the App Store and Play Store, and VLP licenses cannot be automatically transferred over to SplashID Pro 9.
- App Store subscriptions for SplashID Safe
- Play Store subscriptions for SplashID Safe
- Volume licensing program licenses
Will I need to purchase a new license for SplashID Pro 9?
If you are an existing SplashID Safe user with a Pro license, then you may not need to purchase another license. Lifetime licenses, and the annual and monthly licenses offered by us will get transferred over to SplashID Pro 9 as part of the migration.
Subscriptions bought in the App Store or Play Store cannot be automatically transferred to SplashID Pro 9 as the store policies do not allow for transferring a license from pone product to another.
How can I get a SplashID Pro 9 license from the App Store or Play Store?
After completing the migration, you can choose one of the below options for getting a license.
OPTION 1:
Purchase a SplashID Pro 9 license from inside the app. Depending on the device used, you will see a subscription plan from the App Store or the Play Store.
OPTION 2:
Purchase a non store SplashID Pro 9 license as listed in the subscription screen.
What happens to my SplashID Safe subscriptions from the App Store or Play Store after the migration?
Your SplashID Safe subscriptions from the App Store or Play Store will continue till you cancel them in your App Store or Play Store account.
You need to cancel your subscriptions for SplashID Safe to avoid being charged on subscription renewal. Please note that we are not allowed to cancel your subscriptions in the App Store or the Play Store.
We will not be able to refund any such renewals. It is your responsibility to ensure that you do not get charged for a subscription that you do not use.
Does a SplashID Pro 9 license cost more?
SplashID Pro 9 licenses cost the same as SplashID Safe licenses at the time of writing this.
During the initial offer period, all lifetime license transfers will be without any additional costs. Once the offer period ends, an upgrade fee will be charged for lifetime license users.
Subcriptions wil be charged as listed on the SplashID Pro 9 website. If you have had any previous discounts or coupons with your SplashID Safe subscription, then please contact our support team for assistance in getting them applied to the new SplashID Pro 9 subscription.
Is my Lifetime license for SplashID Safe valid for an upgrade to SplashID Pro 9?
Absolutely yes. In fact, during the initial offer period, the upgrade will be free. After the offer period, the upgrade will be at a nominal charge.
Details on the initial offer period will be communicated to users though our newsletters.
When does the initial offer period start and end?
We are currently in the initial offer period.
The initial offer for the free Lifetime license migration will be available till 31st January 2026.
Data migration
Will my SplashID Safe data be automatically moved over to SplashID Pro 9?
Yes, for cloud sync users.
No, for users on WiFi sync and No sync, as we do not have these users data on our servers.
What all data will get migrated for Cloud sync users?
All user generated data on our server in the users account will be migrated. These include
- Records
- Categories
- Types
- Attachments
- User uploaded icons
What can a Cloud sync user do if the data migration fails?
First check that your Pro license has migrated over to SplashID Pro 9 from SplashID Safe. This can be seen below your account name and above the navigation menu items.
Then use the export from SplashID Safe, and import into SplashID Pro 9 procedure.
To do this sign in to the web application of SplashID Safe at https://www.splashid.com/login, select all the records and export them to an SVID file.
The exported SVID file can then be imported to SplashID Pro 9 by going to the Settings screen, and then clicking on the Import button in the SVID row in the Import & Export section. Follow the dialog prompts and wait till the import completes successfully.
How can WiFi sync and No sync users get their data migrated?
WiFi sync and No sync users can manually migrate their data using SVID files. The steps to follow are
-
Install and login to both SplashID Pro 9 and SplashID Safe applications on the same device. Use a desktop preferably, as it will be easier to export the SVID file to a folder of your choice.
-
Initiate and complete the migration from inside the SplashID Pro 9 application.
-
In the SplashID Safe application select all records and export them to a SVID file.
-
Go back to the SplashID Pro 9 application, and go to Settings, then Import & Export. Click on the Import button in the SVID section and select the SVID file exported in step 3 above for import.
-
Wait till the import gets over. It could take a few minutes depending on the amount of data you have, and the processing power of your device.
Note: Some users might see no records being displayed after the import process completes. We recommend you wait for some more time and then logout from the app. On relogin your data should get displayed.
What do I do if my import fails?
You can retry the import after quitting the SplashID Pro 9 application and launching it again.
If it still fails, check the size of the SVID file. It should not be zero bytes.
If the SVID file appears to have content, then please check your SplashID Safe account to see if there is corrupted data or any missing types or categories in the records. If you spot them, try cleaning up the records and then export the SVID file again. Try importing this cleaned up SVID file again in SplashID Pro 9.
